AMPLIFIER OWNER’S MANUAL
4
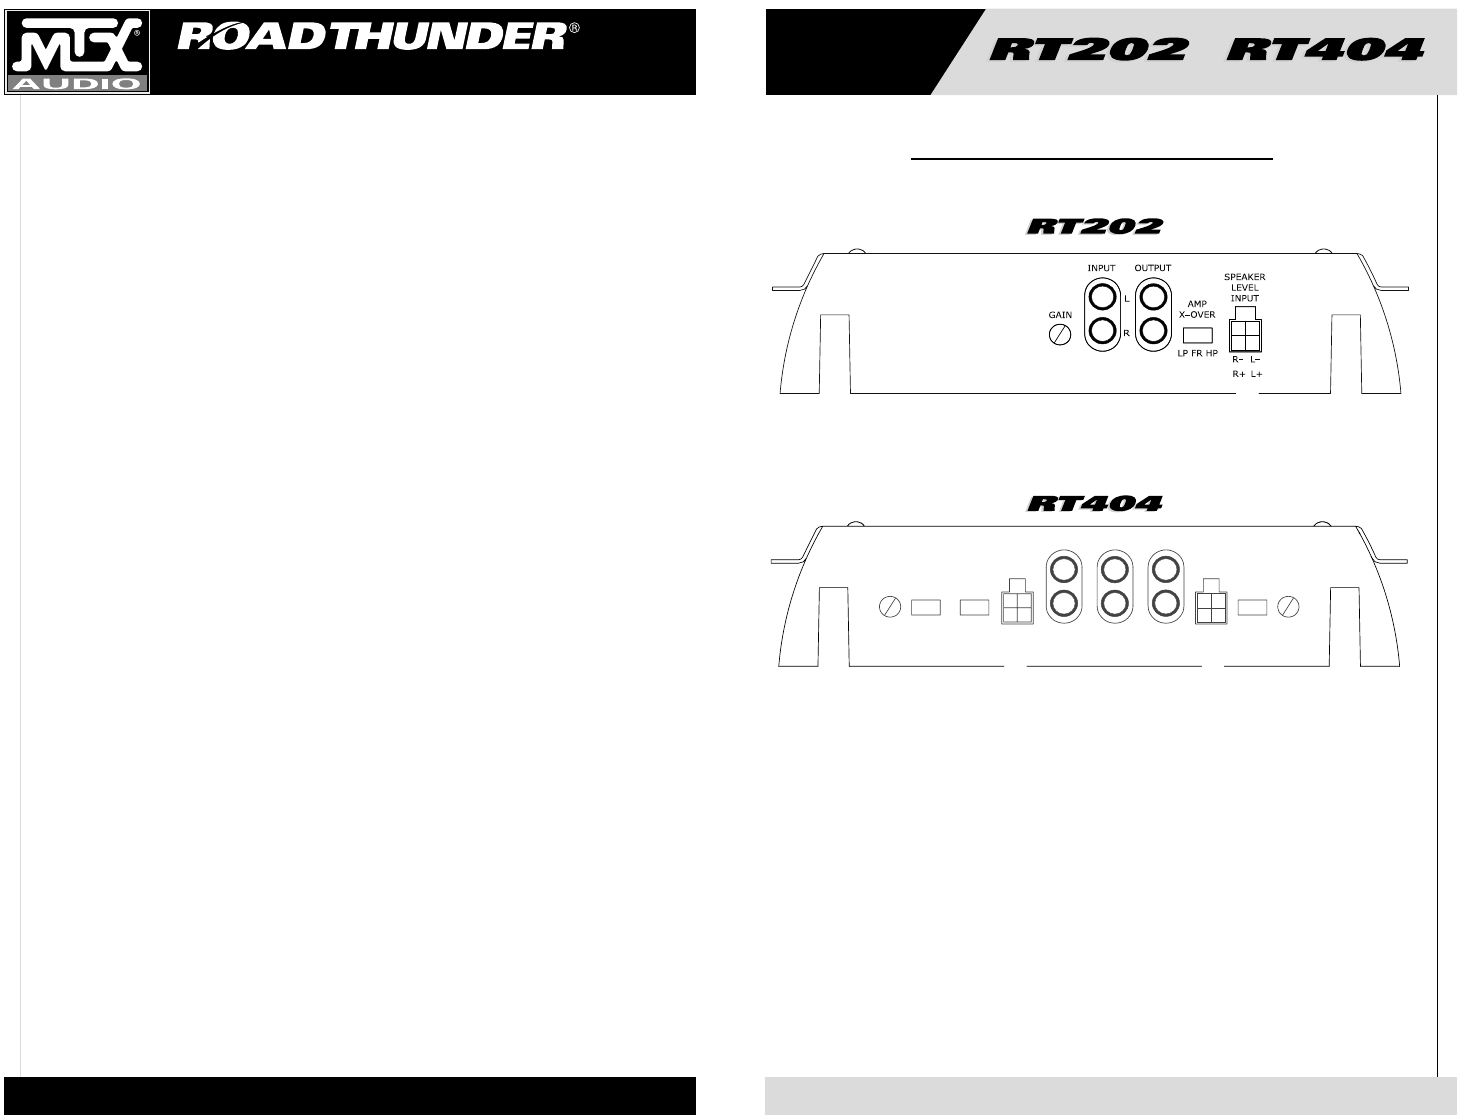
1. RCA Input Jacks – These RCA input jacks are for use with source units that have RCA or Line Level
Outputs. An independent set of jacks are provided on the RT404 for front and rear stereo inputs. A source
unit with a minimum level of 200mV is required for proper operation. The use of high quality twisted pair
cables is recommended to decrease the possibility of radiated noise entering the system.
2. Input Select 2CH/4CH – This switch, found on the RT404, is used to match the amplifier’s input to the
source unit’s output so all four channels of the amplifier are driven. If your source unit has 2 outputs (left
and right) connect them to the amplifier’s front channel inputs, and place the input select switch in the 2CH
position. If your source unit has 4 outputs, (left front, left rear, right front, right rear) connect them to the
amplifier inputs and place the input select switch in the 4CH position. In the 4CH position, the fader on
your source unit will operate.
3. Speaker Level Inputs – This input will allow the amplifier to operate from source units with speaker level
outputs. Output speaker leads from the source unit should be tied directly to the wire harness provided
with the amplifier.
Wire harness color codes:
Grey/Black = Source unit right negative (-) White/Black = Source unit left negative (-)
Solid Grey = Source unit right positive (+) Solid White = Source unit left positive (+)
With the Smart-Engage™ auto-turn-on circuit, a remote turn-on wire is not necessary when connecting
the speaker-level input wire harness to a high powered source unit. The amplifier will automatically turn
on when music is received.
4. RCA Output – These RCA outputs allow for a signal to be sent to other amplifiers in a daisy-chain
configuration. The RCA outputs on all Road Thunder series amplifiers will send a full-range signal to
additional amplifiers.
5. Gain Controls – These controls are used to match the input sensitivity of the amplifier to the particular
source unit that you are using. The controls are factory set to 1Vrms. Note that the RT404 has a separate
gain control for front and rear channels.
6. Crossover Select – This switch controls the type of crossover configuration that you desire. Road
Thunder series 2-channel amplifiers include a defeatable 18dB/octave, 85Hz crossover that is high
pass/low pass or full range selectable. The RT404 four channel amplifier includes a defeatable
18dB/octave, 85Hz crossover that is high pass or full range for the front channels, and a high pass, low
pass or full range for the rear channels.
❷
❶
❸
❹
❺
❻
❶
❸
❻
❺
Input Panel Layout
❶
❸
❹
❺
❻