How To Use Your Breadmaker
For bread making (programs 1, 2, 3, 4,
5, 7, 8, 9 only)
Open the lid and remove the baking pan (E)
by firmly pulling it straight up by the handle. It is
important to remove the baking pan from the
appliance, to avoid accidentally spilling ingredients
into the inner case (D), rather than putting the
ingredients into the pan while it is in place.
Attach the kneading blade (F) onto the shaft
and push firmly down. Be sure the shaft and
kneading blade are clean of any breadcrumbs
or dough.
Place the ingredients in the pan in exactly
the same order stated in the recipe, always
adding the yeast last. Make sure the yeast does
not come in contact with the liquid, salt or
sugar. Always measure the ingredients carefully
using the cup and spoon provided. For liquids
place the cup on a flat surface and view at eye
level. When using the spoon level off the
ingredients with the straight edge of a knife.
Heaped measurements of critical ingredients
can dramatically affect the cooked result.
Place the pan in the unit. Push down firmly
until you hear it click in position. Fold down
the handle (it’s easier to remove after baking if
you position it at the front). Note: If the baking
pan is not fitted correctly the kneading blade will
not operate.
Close the lid. Plug in the appliance. Initially
the display temporarily reads “1P” on the
display to indicate program 1 and then shows
“3:00” hours. Press the menu control (J6) to
select the number of the program required for
the recipe, when you release the button the
total cycle time will be displayed in hours and
minutes. Each time you press the button it will
advance one program. If you go too far when
pressing the menu control, either switch the
appliance off and start again or simply carry on
pressing the button until it goes back to the
beginning (program 1). If you want program
1, you do not need to press the menu control (J6).
For programs 1 to 4 only, press the
browning adjustment (J5) to select the crust
colour - 1 = lightly browned, 2 = browned and
3 = very browned. An arrow will point to the
setting selected. If you have chosen programs
5 to 10 the level of browning and weight are
automatically selected (browning on 2 and
weight on 750 g).
For programs 1 to 4 only, press weight
selection button (J3) and choose either 500 g
or 750 g as detailed in the recipe.
Press the start/stop button (J4) to start the
program, the program is set and the time
starts to count down on the display. If the
wrong program has accidentally been set and
the program has already started, firmly press
down the start/stop button continuously for
about 5 seconds until the display shows “P” for
program, then within 5 seconds reset to the
required number program using the menu
button. Note: For program 2, there is a rest time
for the first 30 minutes to help soften the flour
and settle the temperature of the ingredients.
Mixing does not begin until the display shows
3:40 (750 g setting) and 3:30 (500 g setting).
Note: The control panel has a protective
film over the digital display when new
which should be removed.
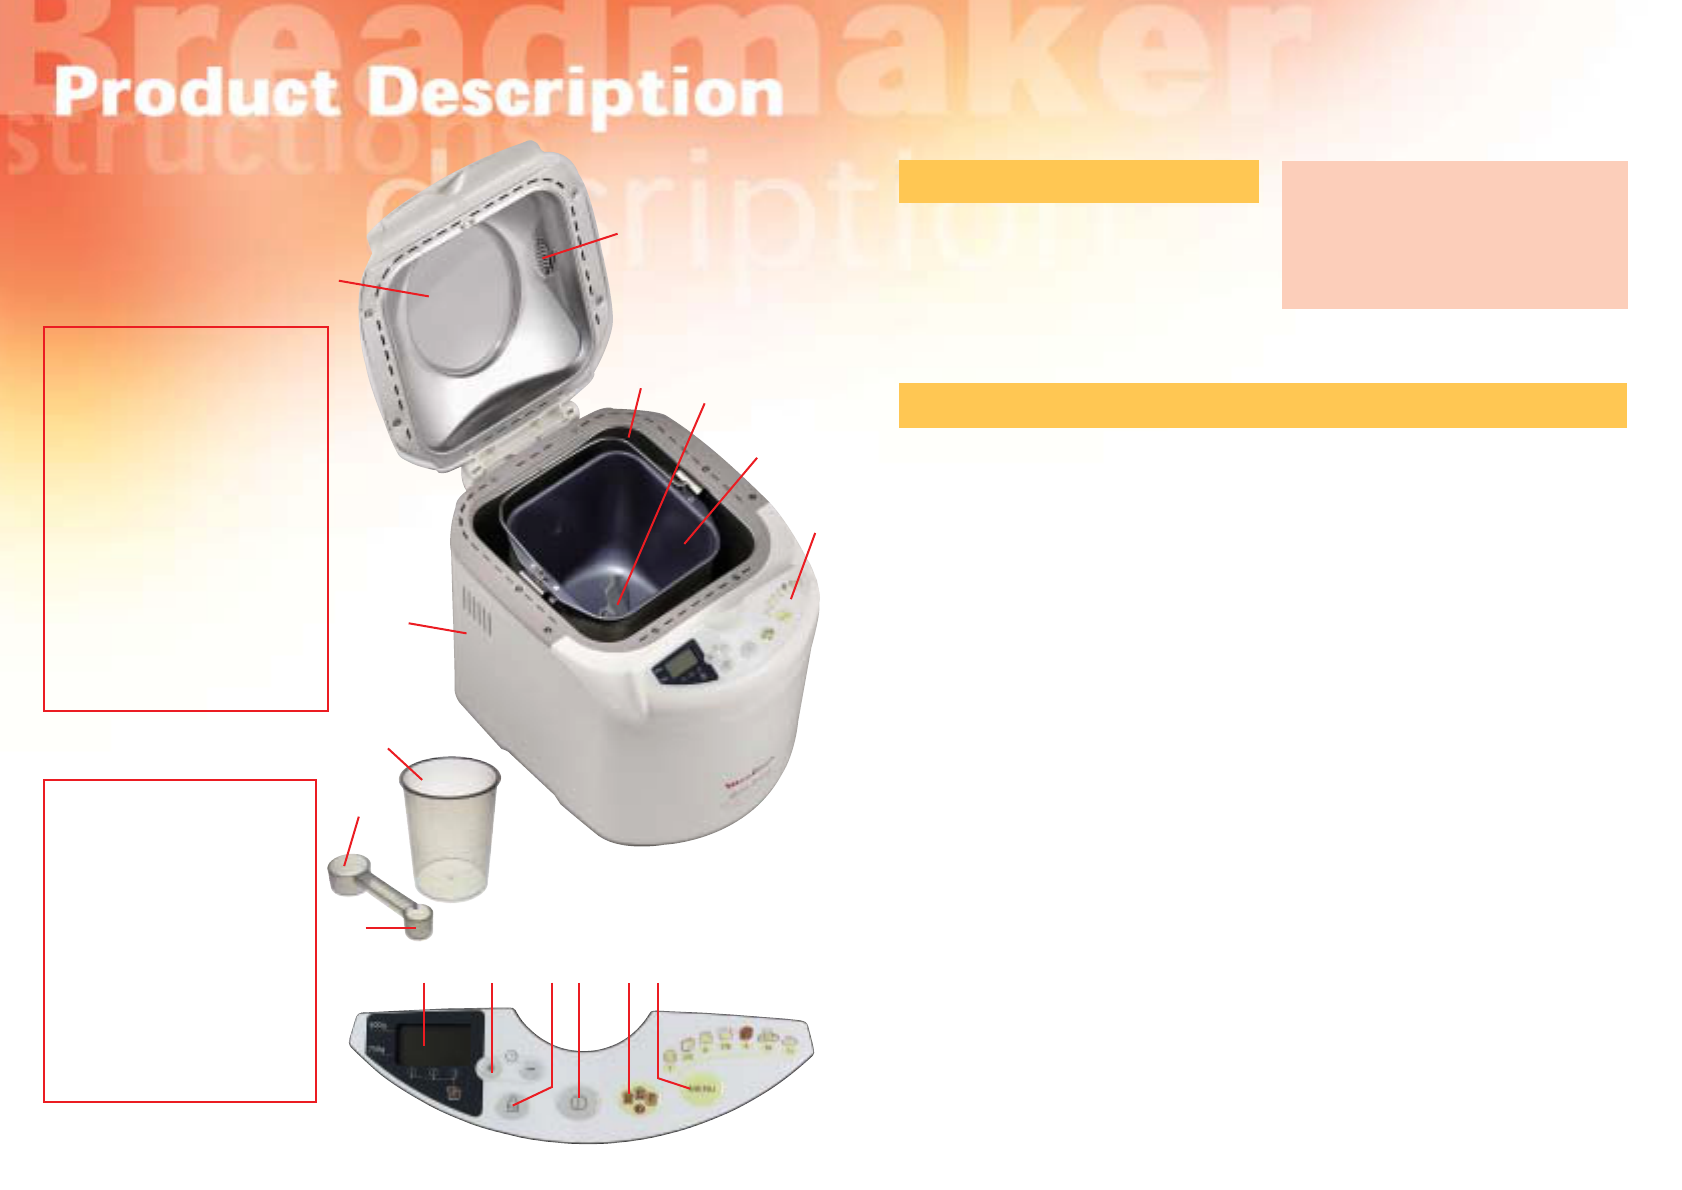
List Of Parts
A - Main body of the appliance
B - Lid with viewing window
C - Air vents
D - Inner case
E - Baking pan
F - Kneading blade
G - Measuring cup
H - Measuring spoon
a = Tablespoon - approx. 15 ml
(
1
/
2
tablespoon also marked)
b =Teaspoon- approx. 5ml
(
1
/
2
teaspoon also marked)
J Control panel
J1 - Display
J2 - Delayed start buttons
(this function cannot be
used on programs 5, 6,
10, and 11)
J3 - Weight selection
J4 - Start/Stop button
J5 - Browning adjustment
(to select the colour of
the crust for programs 1
to 4 only).
J6 - Menu control
Before You Start
• Unpack the appliance and wash the pan and
the accessories in water and washing-up liquid.
• Rinse and dry with care.
• Clean the baking pan using a damp sponge.
• The display has a protective film over it when
new which must be removed otherwise you will
have difficulty reading the display.
1
2
3
4
5
6
7
8
A
B
C
D
E
F
G
Ha
J
J1
J2
J3
J4
J5
J6
IF YOU HAVE ANY PROBLEMS
OR QUERIES, PLEASE CONTACT
OUR HELPLINE:
0845 330 4554 – UK
(01) 6774230 – IRELAND
Thank you for choosing an appliance from the Moulinex range
which is intended exclusively for making bread, teabreads, brioches,
cakes, dough’s, jams and compotes.
Hb
3
4