MODELS:
MBP21
MBP21-2
EU EN
QUICK ST
For a full e
(av
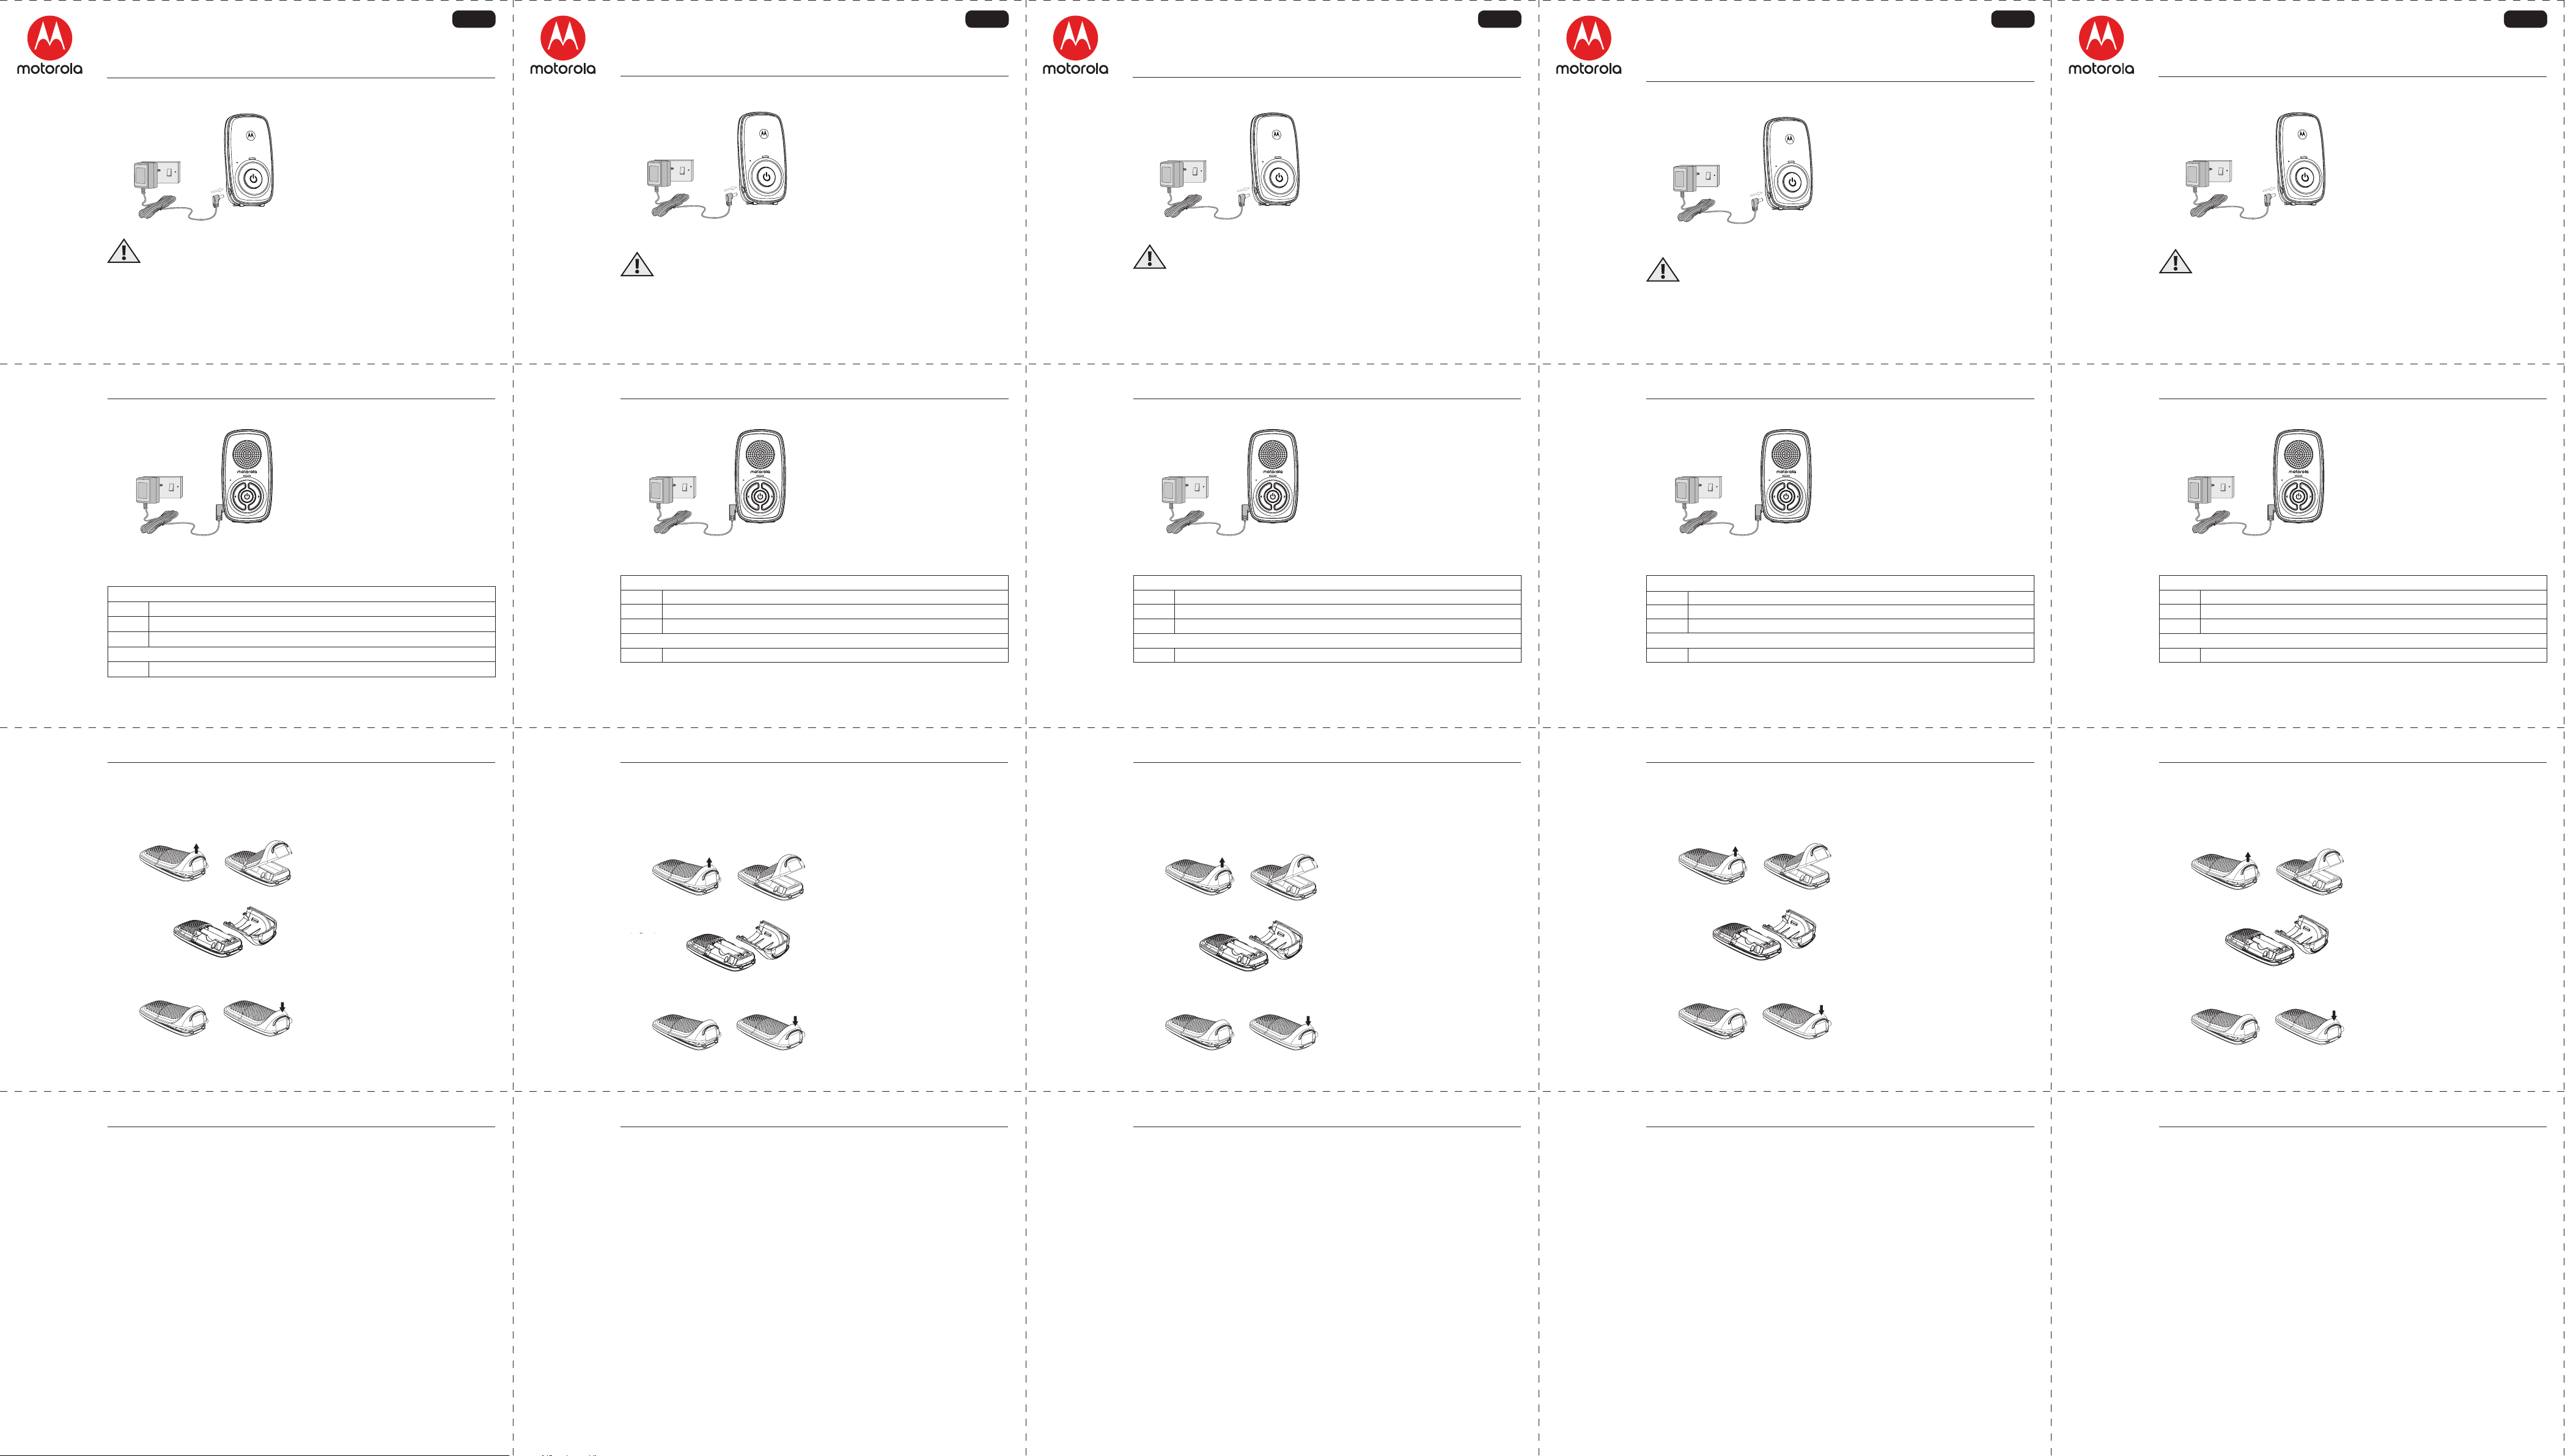
1. Setting up y
A.
• Insert the DC plug of the pow
into the DC jack on the side of the bab
unit, as shown.
• Connect the other end of the po
adapter to a suitable mains po
socket.
• The Po
NO
Only use the pow
(DC6V
W
Str
of the reach of childr
Nev
pro
B. Parent unit po
• Insert the DC plug of the pow
into the DC jack on the side of the
parent unit.
• Connect the other end of the po
adapter to a suitable mains po
socket,
• The par
NO
Only use the pow
(DC6V
2. Basic oper
Parent unit
0 Press and hold t
<Press t
>Press t
Baby Unit
0 Press and hold t
MODELL:
MBP21
MBP21-2
EU DE
SCHNELLST
Eine ausführliche Beschreibung aller Funktionen und An
(zum Herunterladen unter w
1. Einrichten Ihr
A.
• Steck
des Netzteils wie abgebildet in die
Gleichstrombuchse an der Seit
Baby
•
des Netzteils an eine geeignete
Netzsteck
•
HINWEIS:
V
Netzteil (DC6V
W
Str
Dieses Kabel außerhalb der Reich
als 1 m entfernt).
V
Sie nur das mitgeliefert
B. Strom
•
Netzteils in die DC-Buchse an der Seit
der Elterneinheit.
•
des Netzteils an eine geeignete
Netzsteck
•
HINWEIS:
V
Netzteil (DC6V
2. Grundlegende Bedienung der T
Elterneinheit
0 Gedrückt halten, um die Elt
<Drücken Sie, um die Lauts
>
Drücken Sie, um die Lauts
Baby
0 Gedrückt halten, um die Bab
MODÈLES:
MBP21
MBP21-2
EU FR
GUIDE DE DÉMARRA
Pour une e
report
1. Configur
A.
•
secteur dans la prise C
côté de l'unit
•
l’adaptat
secteur appr
•
REMARQUE
Utilisez uniquement l’adapta
fourni (DC6V
A
Danger d’
av
mètre de dis
N’utilisez jamais de pr
uniquement les adaptateurs sect
B. Alimentation de l'unité par
• IInsére
secteur dans la prise C
côté de l'unit
•
l’adaptat
secteur appr
•
REMARQUE
Utilisez uniquement l’adapta
fourni (DC6V
2. Opér
Unité Par
0 Appuye
<Appuye
>Appuye
Unité Bébé
0 Appuye
MODELLEN:
MBP21
MBP21-2
EU NL
SNELST
Zie de Gebruikershandleiding v
en bedieningsaanwijzingen (
1. Uw digitale Audio Bab
A.
•
voedingsadapt
voedingsaansluiting aan de zijk
het Oudertoest
•
voedingsadapt
stopc
•
NO
Gebruik alleen de meegelev
voedingsadapter (DC6V
W
W
dit snoer buiten het ber
Gebruik nooit v
meegelev
B. Baby
•
voedingsadapt
voedingsaansluiting aan de zijk
de Baby
•
voedingsadapt
stopc
•
NO
Gebruik alleen de meegelev
voedingsadapter (DC6V
2. Gebruik v
Oudertoest
0 Houd ingedrukt om de ouderunit in of uit te schak
<Indrukken om het luidspr
>Indrukken om het luidspr
Babyt
0 Houd ingedrukt om de baby
MODEL
MBP21
MBP21-2
EU ES
GUÍA DE INICIO RÁPIDO
Par
la Guía del usuario. (
1. Configur
A.
•
de corriente en el enchuf
costado de la unidad del bebé
muestr
•
de alimentación a una toma de corrient
adecuada.
•
N
Utilice únicamente el adaptador de corrient
provis
AD
Riesgo de estr
los cables. Mantenga est
distancia superior a 1 metr
No utilice nunca alar
únicamente los adaptador
B. Fuente de alimentación de la unidad par
•
de corriente en el enchuf
costado de la unidad par
•
de corriente a una t
adecuada,
•
N
Utilice únicamente el adaptador de corrient
provis
2. Funcionamiento básic
Unidad para padr
0 Mantenga presionado par
<Presione par
>Presione par
Unidad del bebé
0 Mantenga presionado par
3. P
As an option, the Parent Unit can be po
NO
pow
batteries.
(Fig.b2)
(Fig.b3)
• Open and lift the battery door up as
shown in the figur
• Insert the alkaline batteries f
direction int
(fig.b2)
• Insert the catches at the t
battery door then close the door as
shown in the pictur
fig.b1
fig.b2
fig.b3
4. General Inf
If your pr
Guide of one of the models listed on page 1.
Contact Cust
+491805 938 802 in Eur
Email: motorola-mbp@t
Consumer Products and A
Thank y
by Binat
What Does this W
Subject to the e
product ("Pr
manufactur
usage for the period outlined belo
transf
THIS W
THA
BY C
OR, IF DIFFERENT
LIMITED W
SUCH CONSUMER PRO
OF Y
S
Who is co
This W
3. Ins
Optional kann die Elterneinheit mit Alk
Lieferumfang enthalt
vom S
Sie die nachstehenden Schritt
(Fig.b2)
(Fig.b3)
•
Batterieklappe wie in der Abbildung
gezeigt an. (Abb
•
der angegebenen Richtung in das
Batterief
•
Batterief
Sie die Klappe wie in der Abbildung
gezeigt. (Abb
Abb.b1
Abb.b2
Abb.b3
4. Allgemeine Informationen
W
Bedienungsanleitung zu einem der Modelle (siehe S. 1) zur
W
01805 938 802 in Deutschland E-mail: motorola-mbp@t
Eingeschränk
Vielen Dank, dass Sie dieses Pr
Binatone Electr
W
V
von ihm gef
Zubehör („Zubehör“), das für die V
normaler Nutzung durch den V
von Ma
DIE RECHTE DES KÄ
GESETZ
GARANTIE GIL
UND HAFTUNGSREGELUNGEN UND BESCHRÄNKT NICHT DIE RECHTE V
VERBRAUCHERN GEGENÜBER VERK
GEMÄSS DEM RECHT DER ALL
ABDINGBARE RECHTE NA
W
Diese Garantie erstr
3. Ins
En option, l'unité par
NON incluses), afin qu'elle c
pour la transport
pour installer des piles alcalines.
(Fig.b2)
(Fig.b3)
•
batterie c
(fig.b1)
•
la direction dans le c
piles. (fig.b2)
•
couv
couv
(fig.b3)
fig.b1
fig.b2
fig.b3
4. Généralit
Si votr
guide de l'utilisateur de l'un des modèles indiqués en page 1.
Adr
0170 025887
Courriel: motor
Garantie limitée pour les pr
Nous vous r
licence par Bina
Que couvr
Sous réserv
que ce pr
pour être utilisé a
de défauts de mat
pendant la période stipulée ci-dessous. La pr
garantie et n’
LA PRÉSENTE GARANTIE V
ET V
JURIDICTION À UNE AUTRE. POUR LES C
LA LÉGISLA
CONSOMMA
P
LIMITÉE S'AJOUTENT À T
ET RÈGLEMENTS. POUR BIEN C
LES L
Qui est couv
La présent
transf
3. Batt
Als optie kan de ouderunit w
NIET inbegrepen), z
haalt om hem naar een andere locatie t
om alkalinebatterijen t
(Fig.b2)
(Fig.b3)
• Open en til de batterijklep op z
getoond in de afbeelding. (fig.b1)
• Plaats de alkalinebatt
de aangegev
batterijc
• Plaats de v
bov
sluit de klep zoals w
afbeelding. (fig.b3)
fig.b1
fig.b2
fig.b3
4. Algemene informatie
Als uw product niet goed w
Gebruikershandleiding v
Neem contact op met klantenservic
0202621966 (Nederland) 025887
E-mail: motorola-mbp@t
Beperkte gar
Dank u voor de aank
licentie door Binat
W
BINA
verk
acces
vert
beschre
DEZE GARANTIE GEEFT U SPECIFIEKE WETTELIJKE RECHTEN EN U KUNT ANDERE
RECHTEN HEBBEN DIE PER LAND KUNNEN VERSCHILLEN. V
DIE GEDEKT ZIJN ONDER WET
HUN LAND V
GARANTIE GEBODEN V
EN VERHAALSMOGELIJKHEDEN DIE DEZE WET
CONSUMENTENBESCHERMINGS
RECHTEN IN UW LAND V
Wie is gedekt?
Deze Gar
ov
3. Instalación de la bat
Como opción, la unidad par
x 2, NO incluidas), de modo que c
eléctrica para lle
baterías alcalinas.
(Fig.b2)
(Fig.b3)
•
como se muestr
•
instrucciones en el c
baterías. (fig.b2)
•
de la puerta de la batería y luego
ciérre la puerta c
imagen. (fig.b3)
fig.b1
fig.b2
fig.b3
4. Información gener
Si su product
de usuario de uno de los modelos indicados en la página 1.
Póngase en contact
0911366203 desde España Correo electr
Garantía limitada par
Le agradec
por Binatone Electr
¿Qué cubr
Sujeto a las e
product
vendido c
mano de obra c
continuación. Esta Gar
EST
PUEDE TENER O
O P
NORMA
SI ES DIFERENTE, EN SU P
POR EST
RECURSOS OFRECIDOS POR DICHAS LEYES Y NORMA
CONSUMIDOR. P
LALEGISLA
¿Quién r
Esta gar