495145
16
Zoom out
Zoom in
Previous page
1/18
Next page
A-24 Data Transfer
E
A-25Data Transfer
TRANSFER
5. Use the left/right keys to dis-
play the image to be printed.
6. Use the up/down keys to
select the number of copies to
be printed.
7. Repeat the previous steps for
all images to be printed, and
press the central button.
PICTBRIDGE
Images from the camera can be printed directly from a PictBridge
compatible printer.
Neither RAW nor Adobe RGB-embedded images can be print-
ed in PictBridge.
:move :sel. :print
Total number of prints
Number of copies
No. of prints: 3
Print Size: Printer setup
Layout: Printer setup
Print quality: Printer setup
Data print: Printer setup
: start
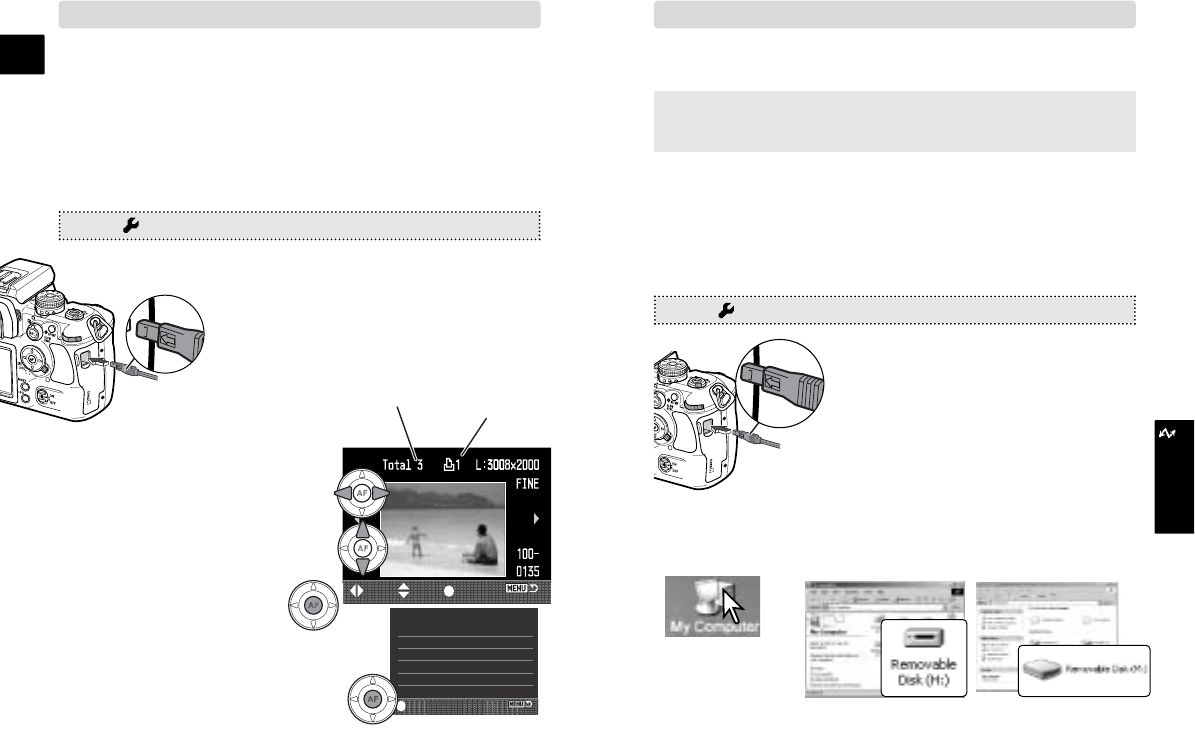
CONNECTING TO COMPUTER
These instructions explain how to connect the camera to the
computer with Windows XP/2000/Me or Mac OS X/9.
Refer to the camera’s instruction manual on how to install the
Windows 98/98SE driver as well as connecting and
disconnecting to a computer using Windows 98.
When the camera’s memory card is full, transfer the data to a
computer. The data can then be deleted from the card so more
images can be recorded.
1. Set the transfer mode to data storage, and turn off the camera.
MENU > 1 > Transfer mode > Data storage > •:enter > MENU
2. Start up the computer.
3. Connect the camera and computer
with the USB cable.
4. Turn on the camera.
Double click on “My
computer”.
Windows 2000: Windows XP:
1. Turn on the printer.
2. Insert the card to the camera and turn on the camera.
3. Set the transfer mode to PTP.
4. Slide open the USB/Video out terminal
cover, and connect the camera and
printer with the USB cable.
Insert the smaller plug with its arrow
facing the camera back.
8. Confirm the setup and press
the central button to start
printing.
MENU > 1 > Transfer mode > PTP > •:enter > MENU
(p. 132) (p. 121)
5. When the camera is properly connected to the computer, a
drive icon, or volume, appears in My Computer or on the
Desktop.
16


Need help? Post your question in this forum.

Forumrules


Report abuse

Libble takes abuse of its services very seriously. We're committed to dealing with such abuse according to the laws in your country of residence. When you submit a report, we'll investigate it and take the appropriate action. We'll get back to you only if we require additional details or have more information to share.

Product:

For example, Anti-Semitic content, racist content, or material that could result in a violent physical act.

For example, a credit card number, a personal identification number, or an unlisted home address. Note that email addresses and full names are not considered private information.

Forumrules

To achieve meaningful questions, we apply the following rules:

Register

Register getting emails for Minolta Dynax Maxxum 7D at:


You will receive an email to register for one or both of the options.


Get your user manual by e-mail

Enter your email address to receive the manual of Minolta Dynax Maxxum 7D in the language / languages: English as an attachment in your email.

The manual is 1,71 mb in size.


You will receive the manual in your email within minutes. If you have not received an email, then probably have entered the wrong email address or your mailbox is too full. In addition, it may be that your ISP may have a maximum size for emails to receive.

Others manual(s) of Minolta Dynax Maxxum 7D

Minolta Dynax Maxxum 7D User Manual - English - 83 pages

Minolta Dynax Maxxum 7D User Manual - English - 65 pages


The manual is sent by email. Check your email

If you have not received an email with the manual within fifteen minutes, it may be that you have a entered a wrong email address or that your ISP has set a maximum size to receive email that is smaller than the size of the manual.

The email address you have provided is not correct.

Please check the email address and correct it.

Your question is posted on this page

Would you like to receive an email when new answers and questions are posted? Please enter your email address.


Info