Manuale dell'utente 19
ITALIANO
Funzionalità aggiuntive
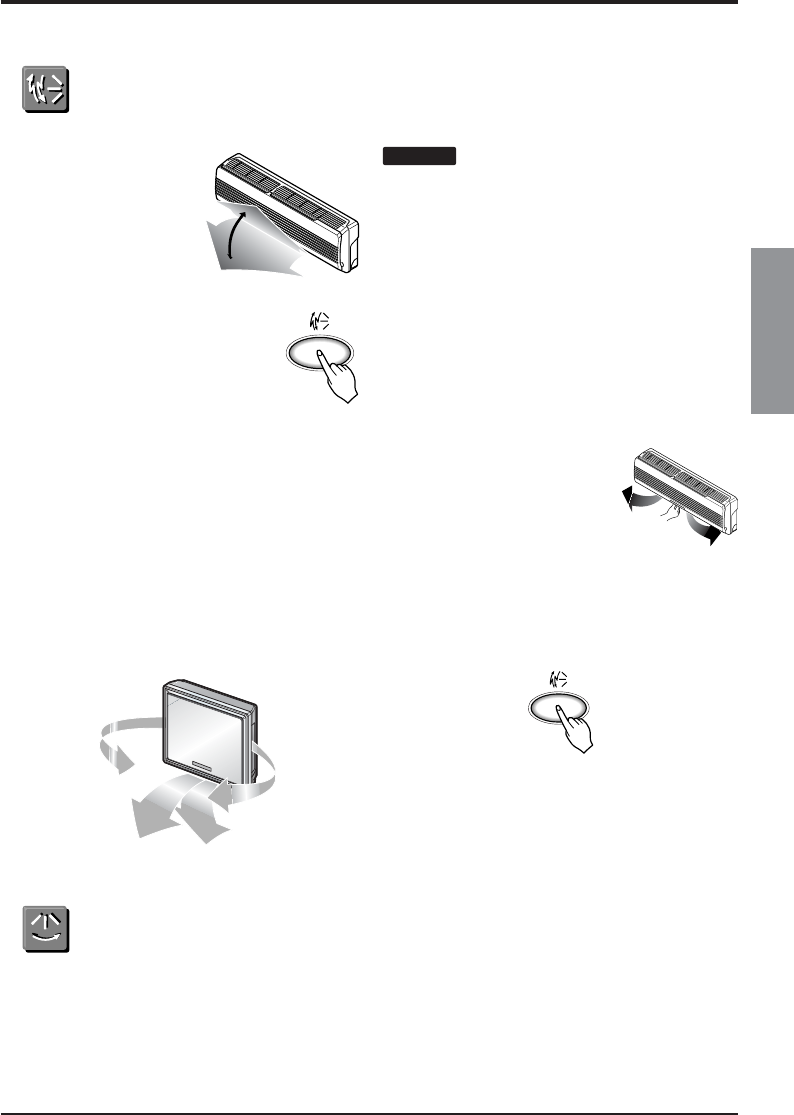
Controllo della direzione del flusso dʼaria verticale
Con il telecomando è possibile
regolare la direzione del flusso
dʼaria verso lʼalto/basso
(flusso verticale).
1. Premere il tasto di Avvio/Stop
per avviare lʼunità.
2. Aprire lo sportellino del
telecomando.
Premere il tasto oscillazione
Chaos per far oscillare le
alette verso lʼalto e il basso.
Premere nuovamente il tasto
di oscillazione Chaos per
impostare lʼaletta verticale
nella direzione di flusso
desiderata.
o Premere il tasto di oscillazione CHAOS per
cambiare automaticamente la direzione del flusso
dʼaria orizzontale sulla base dellʼalgoritmo CHAOS
per distribuire lʼaria nella stanza in modo uniforme
e dare una sensazione di sollievo al corpo, come
se ci fosse una brezza naturale.
o Utilizzare sempre il telecomando per regolare la
direzione del flusso dʼaria. Lo spostamento
manuale dellʼaletta di direzionamento del flusso
può danneggiare il condizionatore.
o Allo spegnimento dellʼunità, lʼaletta di
direzionamento del flusso dʼaria su/giù chiude
lʼuscita dʼaria del sistema.
Regolazione della direzione (flusso dʼaria
orizzontale) destra/sinistra
Avviso :
prima di regolare la direzione
del flusso dʼaria orizzontale,
accertarsi che lʼunità sia spenta.
Aprire delicatamente lʼaletta verticale
per accedere al controllo del flusso
orizzontale.
Regolare manualmente il flusso dʼaria verso
destra/sinistra.
Standard, tipo Artcool Deluxe
Tipo Artcool
Con il telecomando è possibile regolare la direzione
del flusso dʼaria verso lʼalto/basso e destra/sinistra.
Premere il tasto di Avvio/Stop per avviare lʼunità.
Premere il tasto oscillazione Chaos per far oscillare le
alette.
Premere nuovamente il tasto per arrestare le alette.
Dopo 30 minuti, le alette torautomaticamente nella
posizione del massimo flusso dellʼaria.
Comando di direzione flusso dʼaria orizzontale (opzione)
Il (flusso dʼaria orizzontale) sinistra/destra può essere regolato tramite il telecomando.
1. Premere il pulsante di Avviamento/Arresto per avviare lʼunità.
2. Aprire lo sportello del telecomando. Premere il pulsante di Avviamento/Arresto della direzione del flusso dʼaria e le
feritoie di ventilazione oscilleranno a sinistra e a destra. Premere nuovamente il Pulsante di Controllo di Direzione
del Flusso dʼAria Orizzontale per impostare la feritoia di ventilazione orizzontale nella posizione desiderata.