Benutzerhandbuch 19
DEUTSCH
Weitere Funktionen
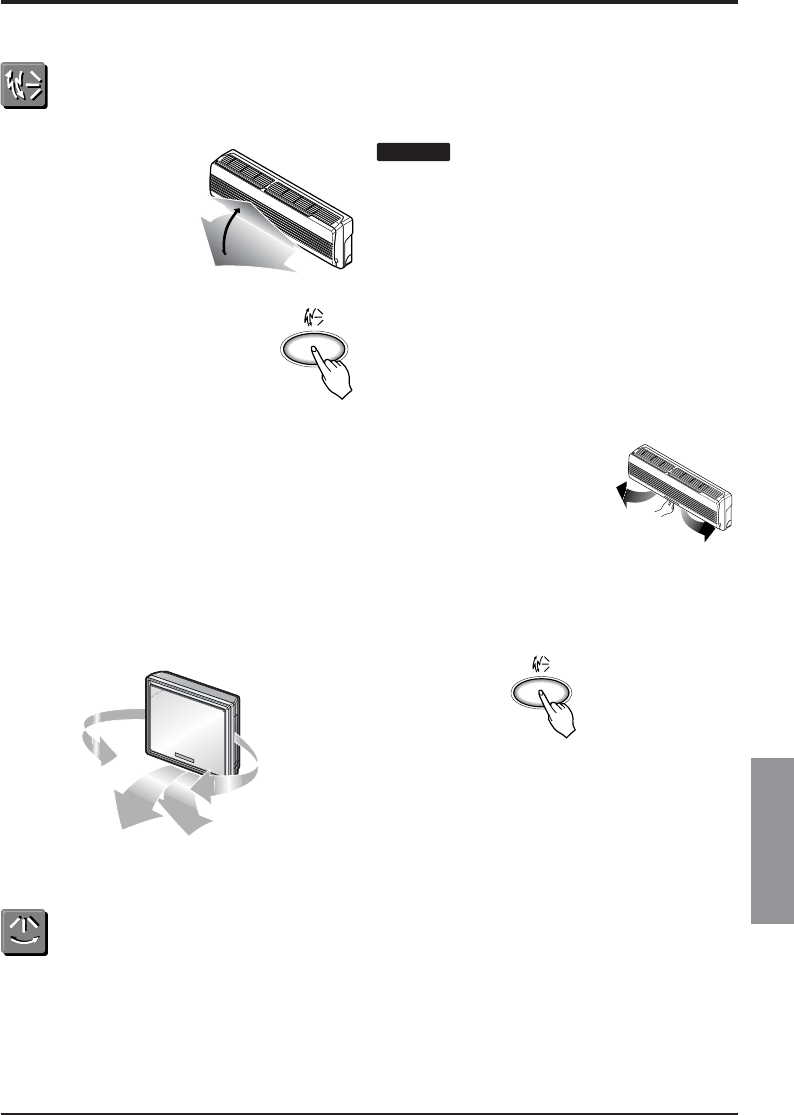
Steuerung der vertikalen Luftstromrichtung
Der Luftstrom nach oben/ nach
unten (vertikaler Luftstrom)
kann über die Fern- bedienung
gesteuert werden.
1. Drücken Sie die Taste
Start/Stop, um das Gerät zu
starten.
2. Öffnen Sie die Klappe der
Fernbedienung. Drücken Sie
die Taste Chaos Swing, damit
sich die Luftklappen bewegen.
Drücken Sie die Taste Chaos
Swing erneut, um die vertikale
Luftklappe in die gewünschte
Luftstromrichtung einzustellen.
o Beim Drücken der Taste Chaos Swing wird die
horizontale Luftstromrichtung gemäß der CHAOS-
Berechnung automatisch angepasst, um die Luft
gleichmäßig im Raum zu verteilen und dabei ein
angenehmes Befinden des Körpers wie bei einer
natürlichen Brise zu erreichen.
o Die Luftstromrichtung nach oben/nach unten muss
über die Fernbedienung eingestellt werden.
Ein Bewegen der vertikalen Luftklappen mit der
Hand könnte das Klimagerät beschädigen.
o Beim Ausschalten des Gerätes werden die
horizontalen und vertikalen Luftklappen und damit
der Luftauslassschlitz des Systems geschlossen.
Einstellen der Richtung links/rechts (Horizontaler Luftstrom)
Vorsicht :
Vor dem Einstellen der
horizontalen Luftstromrichtung muss
das Gerät ausgeschaltet werden.
Öffnen Sie vorsichtig die vertikale
Luftklappe, um die horizontale
Luftstromrichtung einzustellen.
Stellen Sie die Luftstromrichtung
links/rechts manuell ein.
Standard-/Artcool Deluxe-Modell
Artcool-Modell
Der Luftstrom nach oben/nach unten und nach
links/nach rechts kann über die Fernbedienung
gesteuert werden.
Drücken Sie die Taste Start/Stop, um das Gerät zu
starten.
Drücken Sie die Taste Chaos Swing, damit sich die
Luftklappen bewegen.
Drücken Sie die Taste erneut, damit die Luftklappen
angehalten werden. Nach 30 Minuten kehren die
Luftklappen automatisch in die Position für maximalen
Luftstrom zurück.
Steuerung vom horizontalen Luftstrom (option)
Links/rechts (Horizontaler Luftstrom) kann mit der Fernbedienung geregelt werden.
1. Drücken Sie auf die Taste Start/Stop um das Gerät einzuschalten.
2. Öffnen Sie die Klappe der Fernbedienung. Drücken Sie auf die Taste Start/Stop von der Steuerung vom
horizontalen Luftstrom. Die Luftschlitze werden jetzt nach links und rechts bewegt. Drücken Sie nochmals auf
die Steuerungstaste für den horizontalen Luftstrom um den Luftschlitz auf der gewünschten Position
einzustellen.