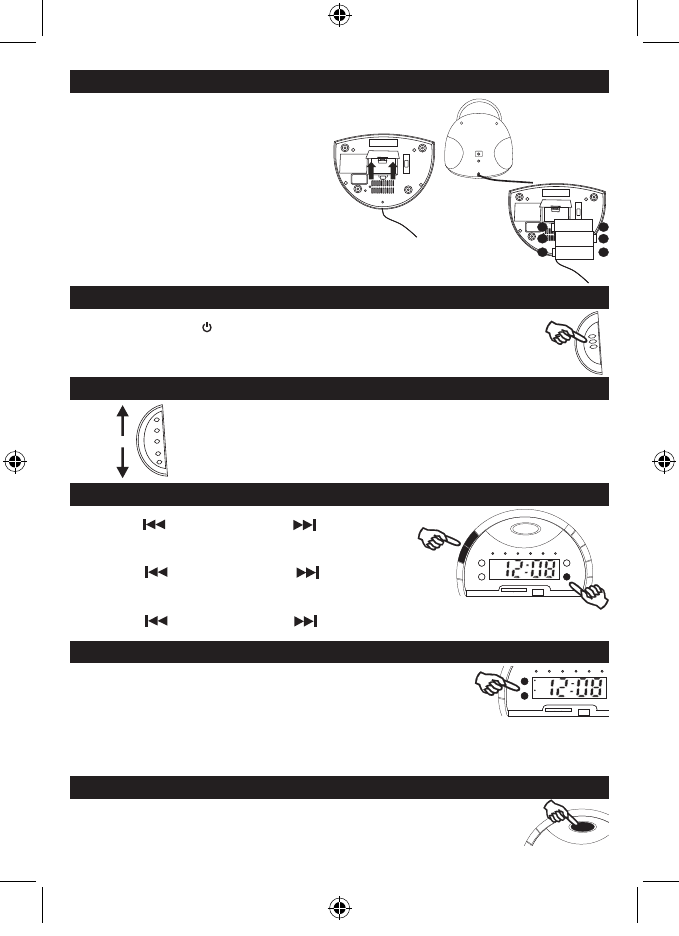
1. Houd de KLOK AANPASSEN knop ingedrukt tot het knippert.
2. Druk op de VORIG/ MINUTEN knop of VOLGEND/ UUR
knop om de 24-uur of 12-uur modus aan te passen.
3. Druk opnieuw op de KLOK AANPASSEN knop, waarna de cijfers voor het
uur beginnen te knipperen op het scherm.
4. Druk op de VORIG/ MINUTEN knop of VOLGEND/ UUR knop om
het uur in te stellen.
5. Druk opnieuw op de KLOK AANPASSEN knop, waarna de cijfers voor de
minuten beginnen te knipperen op het scherm.
6. Druk op de VORIG/ MINUTEN knop of VOLGEND/ UUR knop om de minuten in te stellen.
7. Druk opnieuw op de KLOK AANPASSEN knop. De juiste tijd wordt op het scherm weergegeven.
STROOMTOEVOER
LOKALE STROOM GEBRUIKEN
Controleer of de stroomsterkte van uw toestel overeenkomt
met de lokale stroomsterkte voor u het toestel gebruikt.
BACKUP BATTERIJ
De ingestelde klok en het alarm kunnen beschermd worden
tegen stroomuitval door 3 x AA batterijen (niet inbegrepen).
Bij stroomuitval verschijnt er niets op het scherm, maar
de ingestelde tijd en het alarm worden in het geheugen
bewaard. Als er weer stroomtoevoer is, licht het scherm
weer op (tijdens de stroomonderbreking kan er bij de tijd
enkele minuten per uur bijgekomen of afgegaan zijn en kan
opnieuw instellen nodig zijn).
Plaats 3 AA batterijen.
Als het volume zachter wordt of het geluid verstoord is,
vervang dan alle batterijen door nieuwe.
Naar wisselstroom
NL 2
HET VOLUME AANPASSEN
Draai aan de knop om het volumeniveau te regelen.
ALS U ALLEEN WILT LUISTEREN
Steek de hoofdtelefoon (stereo ministekker van 3,5 mm diameter) in de aansluiting
van de hoofdtelefoon. Als de hoofdtelefoon aan het toestel gekoppeld is, dan worden
de luidsprekers automatisch uitgeschakeld.
VOLUME
Druk op de AAN/ STANDBY knop om de audio aan te zetten. Om van modus te verwisselen
(Radio, CD, USB en CARD), verschuif dan de FUNCTIE knop terwijl het toestel aan staat. De
modus wordt weergegeven.
HET TOESTEL AANZETTEN OF UITSCHAKELEN
Batterijcompartiment
MAX
MIN
INSTELLEN KLOK
1. Zowel de Alarm 1- als de Alarm 2-knop kan ingesteld worden terwijl de klok zichtbaar
blijft, ongeacht welke modus.
2. Druk en houd de Alarm 1- of Alarm 2-knop vast. De cijfers voor het uur beginnen te
knipperen. Druk op de VORIG/ MINUTEN knop of VOLGEND/ UUR knop om het uur
aan te passen.
3. Om te bevestigen, drukt u opnieuw op de Alarm 1- of Alarm 2-knop. De cijfers voor de minuten beginnen te knipperen.
Druk op de VORIG/ MINUTEN knop of VOLGEND/ UUR knop om de minuten aan te passen.
4. Om te bevestigen, drukt u opnieuw op de Alarm 1- of Alarm 2-knop. Het lampje van het alarm zal oplichten.
5. Wanneer de ingestelde Alarm tijd is bereikt, zal het toestel starten volgens de modus die ingesteld is door de SS1.
ALARM 1 EN ALARM 2
1. Druk op de SNOOZE knop die het toestel gedurende 9 minuten zal uitschakelen.
2. Let wel dat de SNOOZE knop enkel werkt in de alarm modus. In een andere modus zal de SNOOZE
knop niet werken.
SNOOZE