INTRODUCTION
Thank you for choosing this Lakeland Pie Maker, which turns out four perfectly baked pies in minutes. Please
take a few moments to read these instructions before using the pie maker for the first time, and keep them in
a safe place for future reference.
FEATURES
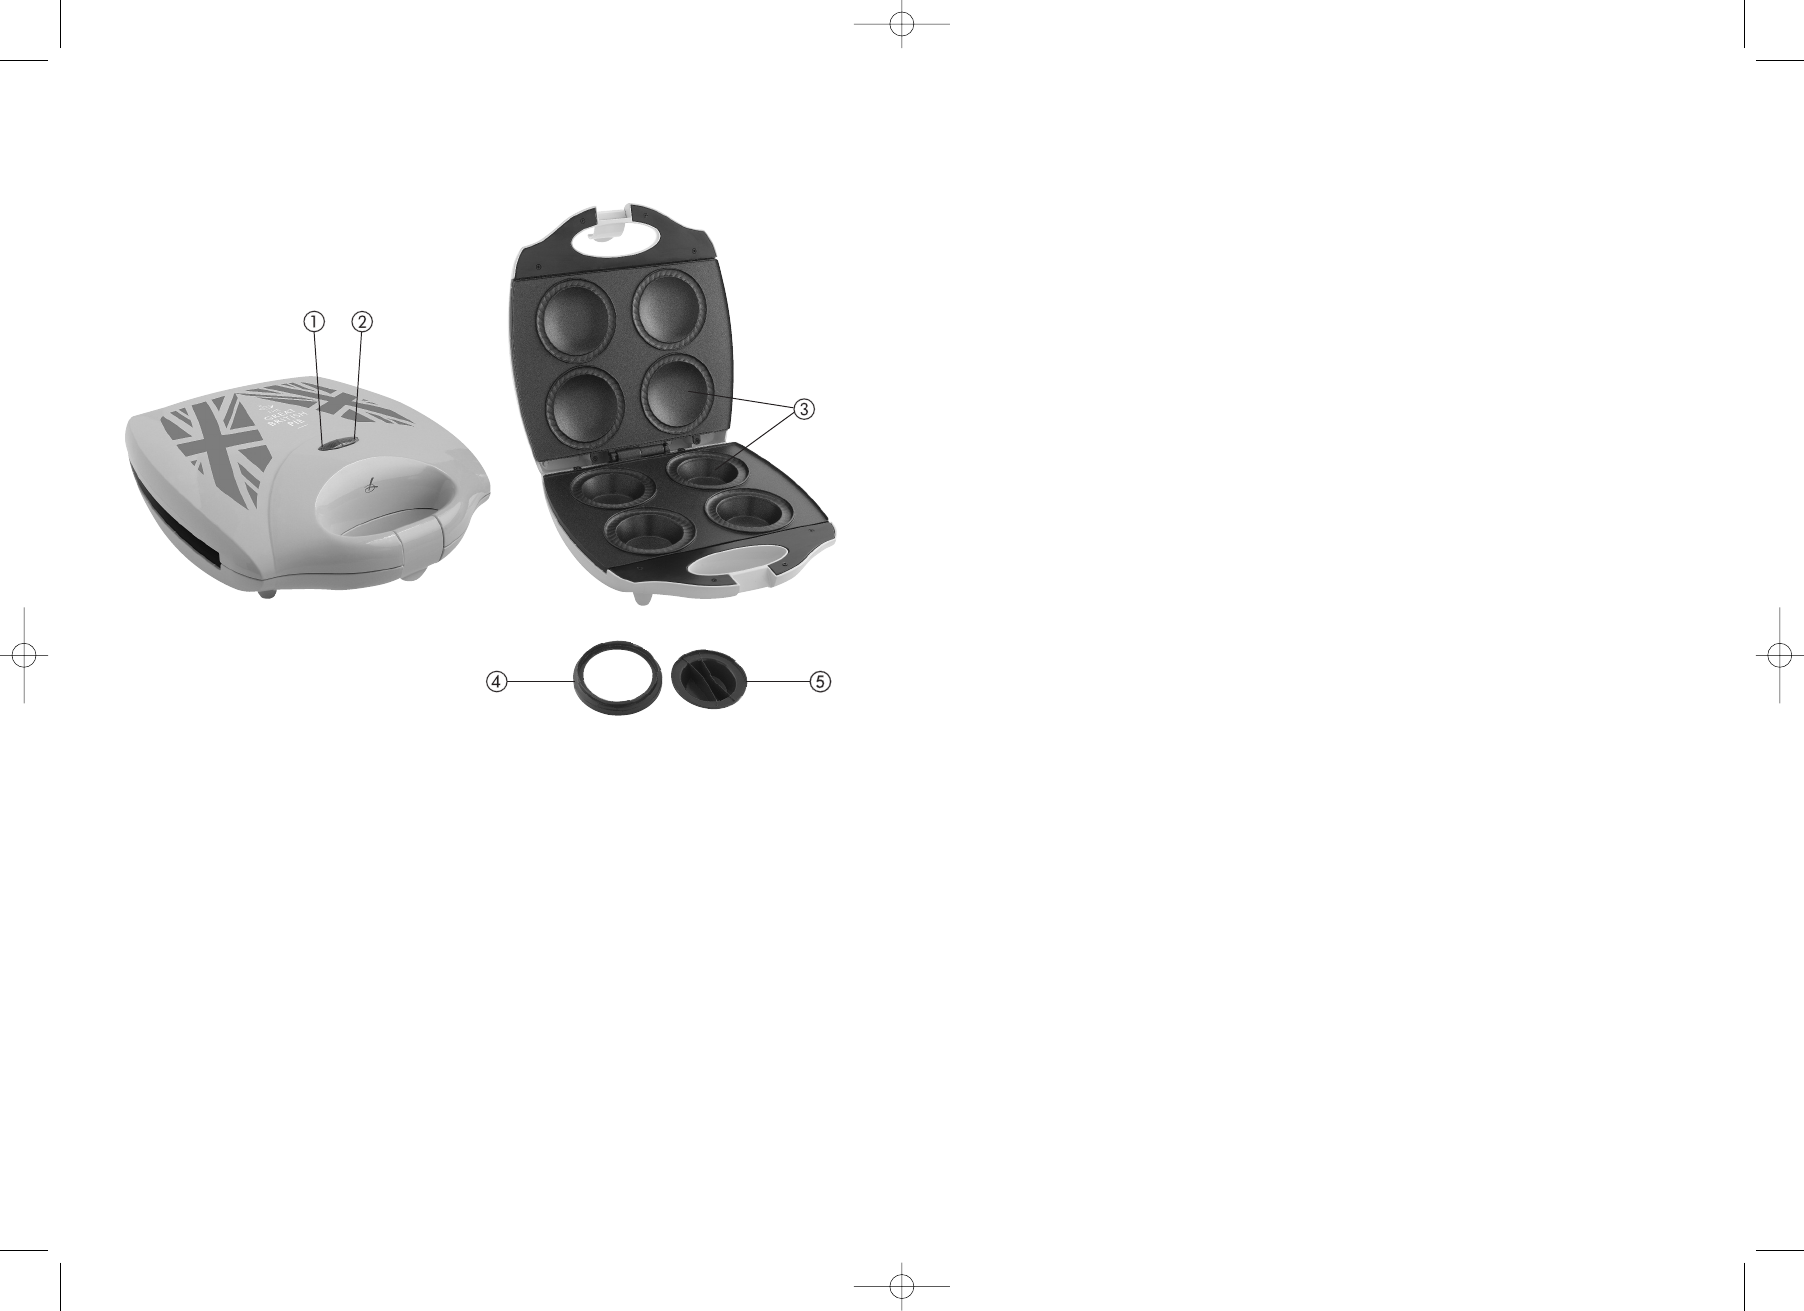
1. Power light
2. Ready light
3. Non-stick coated pie moulds
4. Pastry cutter
5. Pusher/lid shaper
Power: 1400W
Operating Voltage: 220-240V
IMPORTANT SAFEGUARDS
When using this pie maker, please follow these basic safety precautions.
1. Please read all instructions before using.
2. Make sure your electricity supply matches the voltage shown on the appliance.
3. This pie maker is for household use only. It is not suitable for commercial use, or for use outdoors. It
must only be used for its intended purpose.
4. Using accessories not supplied by the manufacturer may result in fire, electric shock or injury, and
should be avoided.
5. Place the pie maker away from the edge of your worktop or table during use. Ensure the surface is level,
sturdy and dry.
6. Do not let the power cord hang over the edge of the worktop or table, or touch any hot surfaces such
as stovetops. Never pull or carry the pie maker by the power cord.
7. An extension cable may be used with care. The electrical rating of the cable should be at least as great
as that of the appliance. Do not allow the cable to hang over the edge of your table or worktop, or touch
any hot surfaces. Never attempt to use the pie maker with an external timer or remote control system.
8. Do not place the pie maker on or near a hot gas or electric burner, or in or near a heated oven.
9. The pie maker will get very hot and should not be placed directly onto a surface that may be damaged
by heat. Never attempt to lift or move the pie maker during use. Do not touch the hot surfaces and let
the pie maker cool completely before cleaning.
10. Always unplug the pie maker after use and before cleaning. Grasp the plug, not the power cord,
ensuring your hands are dry.
11. To protect against electric shock, do not immerse the pie maker, power cord or plug in water, or allow
them to get wet.
12. The pie maker is not intended for use by children or infirm people unless they have been adequately
supervised by a responsible person to ensure they can use it safely. Children should be supervised to
ensure they do not play with the pie maker. It must not be left unattended during use.
13. Do not use the pie maker if the power cord or plug show any signs of damage, or if the product is
dropped, damaged or working incorrectly. Call the helpline on 015394 88100 to arrange a repair or
replacement. Never try to repair the pie maker yourself as this may cause electric shock.
BEFORE USING FOR THE FIRST TIME
Carefully unpack the pie maker and remove any packaging. Wipe the outside of the pie maker and the non-
stick cooking surfaces with a damp cloth then dry with a soft cloth. Do not immerse in water or any other
liquid, and avoid abrasive cleaners or scourers as they will damage the product. Wash the pastry cutter and
pusher in hot, soapy water and dry thoroughly.
USING YOUR PIE MAKER
Baking pies with the pie maker is incredibly easy and bakes four pies or tarts in around 10 minutes. For some
delicious ideas to get you started we’ve included some recipes.
1. With the lid closed, place the pie maker on a suitable surface and plug into the mains socket. The power
light will come on and show that the pie maker is heating up.
2. Whilst the pie maker is heating up, roll out the pastry and cut into four circles using the larger side of
the base/lid cutter. Then cut out four circles using the smaller side of the base/lid cutter. These will be
the lids of the pies.
3. After around five minutes the ready light will come on. Lift the lid, taking great care not to touch the hot
surfaces. Carefully take the pastry pie base, place centrally over a pie mould and, using the pusher, push
gently into the mould.
4. Spoon the filling into the pie being careful not to let it overflow the edges. Do not overfill the pie as the
edge of the lids will not seal properly.
5. Place the pastry lid onto the pie and use the pusher/ lid shaper to press down and shape the pastry lid.
Remove any excess pastry from around the pie.
6. Brush each pie with either beaten egg for a savoury pie, or milk for a pie with a sweet filling. Close the
lid.
7. Cook the pies for around 10 minutes until golden brown. Remove the pie by carefully inserting a slim
wooden, nylon or silicone spatula underneath the pie and lift out. Do not use metal or sharp edged
utensils as this may damage the non-stick coating.