GEBRAUCH
4
INHALT
Warnungen und wichtige Hinweise . . . . . . . . . . . . . . . . . . . . . . . . . . . . . . . . . . . . . . . . . . . . . . . . . . . . . . . .2
Hinweise zur Verpackungsentsorgung . . . . . . . . . . . . . . . . . . . . . . . . . . . . . . . . . . . . . . . . . . . . . . . . . . . . .3
Gebrauch - Reinigung - Bedienungsblende - Tasten zur Temperatureinstellung - Temperaturanzeige . . . . . . . . . .4
Gebrauch - Inbetriebnahme - Temperaturregelung - Richtig kühlen . . . . . . . . . . . . . . . . . . . . . . . . . . . . . . . . .
Transportsicherungen - Höhenverstellbare Abstellregale - Höhenverstellung der Innentürablagen . . . . . . . . .5
Tips - Tips für das Kühlen . . . . . . . . . . . . . . . . . . . . . . . . . . . . . . . . . . . . . . . . . . . . . . . . . . . . . . . . . . . . . . .6
Wartung - Regelmäßige Reinigung - Stillstandzeiten - Innenbeleuchtung . . . . . . . . . . . . . . . . . . . . . . . . . . .6
Abtauen - Störungen . . . . . . . . . . . . . . . . . . . . . . . . . . . . . . . . . . . . . . . . . . . . . . . . . . . . . . . . . . . . . . . . . . .7
Installation - Aufstellung - Elektrischer Anschluß - Nischenmaße . . . . . . . . . . . . . . . . . . . . . . . . . . . . . . . . . .8
Reinigung der Innenteile
Bevor Sie das Gerät in Betrieb nehmen, beseitigen
Sie den typischen «Neugeruch» am besten durch
Auswaschen der Innenteile mit lauwarmem Wasser
und einem neutralen Reinigungsmittel Sorgfältig
nachtrocknen.
Bitte keine Reinigungs- bzw. Scheuermittel
verwenden, die das Gerät beschädigen
könnten.
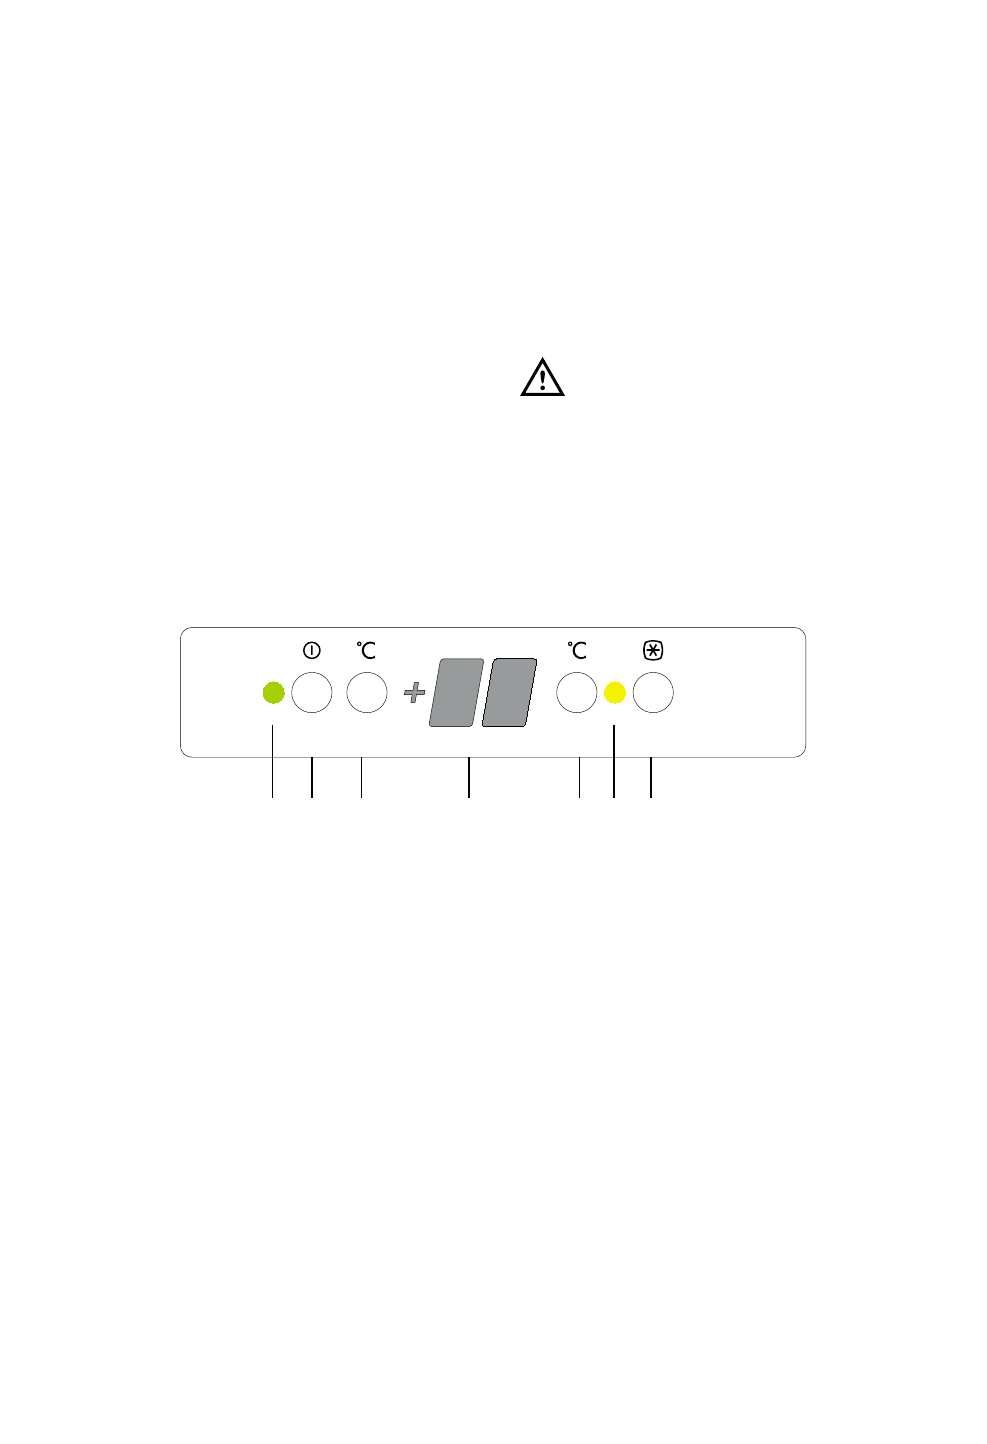
Bedienungsblende
A. Netzkontrollanzeige (grün)
B. EIN/AUS Taste
C. Taste zur Temperatureinstellung (wärmer)
D. Temperaturanzeige
E. Taste zur Temperatureinstellung (kälter)
F. Schnellkühlenanzeige (gelb)
G. Schnellkühlen Taste
Tasten zur Temperatureinstellung
Die Temperatur im Kühlraum kann zwischen +2 °C
und +8°C gewählt werden.
Durch Druck auf eine der Tasten zur Temperatur-
einstellung (C oder E) wird die Temperaturanzeige
vom Anzeigemodus (Temperaturanzeige leuchtet)
auf den Eingabemodus (Temperaturanzeige blinkt)
umgeschaltet. Mit jedem weiteren Druck auf eine der
Tasten C oder E wird die gewünschte Gefrierraum-
Temperatur um 1°C verstellt.
Möchten Sie die eingestellte Temperatur erhöhen,
müssen Sie die Taste (C) drücken. Um die
eingestellte Temperatur zu vermindern, müssen Sie
die Taste (E) drücken. Nach der Eingabe blinkt die
Anzeige noch einige Sekunden und zeigt danach
wieder die aktuelle Innentemperatur des
Gefrierraumes an.
Die eingestellte Temperatur muß innerhalb 24
Stunden erreicht werden.
Temperaturanzeige
Im Normalbetrieb wird im Display die mittlere
Temperatur des Gerätes angezeigt.
Achtung:
Zu häufiges Öffnen oder zu langes Offenhalten der
Türe kann zu Temperaturschwankungen führen.
Abweichungen können auch durch eine zu große
Menge an neu eingelagerten warmen Lebensmitteln
verursacht werden.