Montaje del portared
1 Extraer el regulador del espesor de la placa en ambos lados del portared. Elegir el espe-
sor descado de la plaen (por ejemplo 19 mm) y volver a colocar debidamente el regu-
lador del espesor de la placa.
2 Introducir el portared entre los segmentos (3) de la placa.
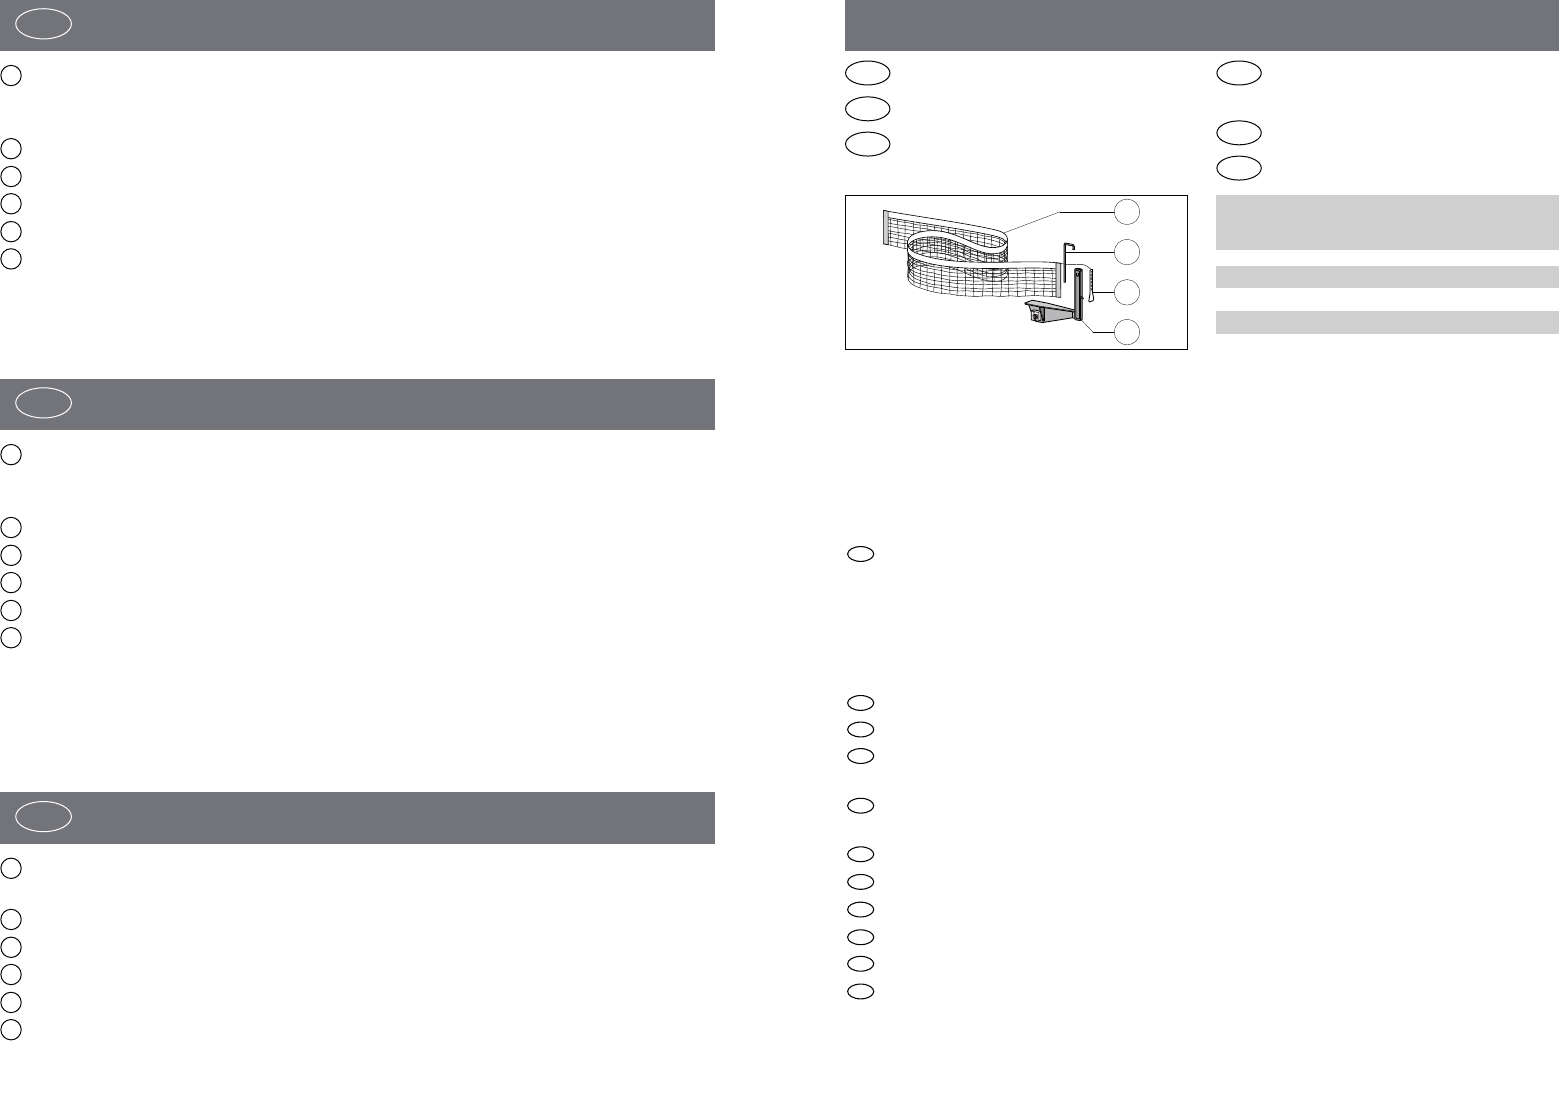
4 Introducir la barra de la red por el borde lateral de la red.
5 Insertar la barra de la red en las escotaduras del portared.
6 Anudar el hilo tensor a la botella de plástico.
7 Introducir el hilo tensor en la barra de la red (4) por la muesca superior. Tensar la red
encajando debidamente la botella de plástico (7) en el clavillo del portared.
E
Montaggio dell’attacco della rete
1 Rimuovere il dispositivo di regolazione dello spessore del tavolo dall’attacco della rete
su ambedue i lati. Scegliere lo spessore richiesto del tavolo (ad esempio 19 mm) e
rimontare il dispositivo di regolazione dello spessore del tavolo.
2 Spingere l’attacco della rate tra le due metà del tavolo (3).
4 Spingere la stecca della rete attraverso il bordo laterale della rete.
5 Introdurre la stecca della rete negli incavi dell’attacco della rete.
6 Annodare il fito tenditore e il passante di plastica.
7 Tirare il filo tenditore attraverso l’intaglio superiore nella stecca di rete (4). Tendere la
rete scegliendo una posizione del passante di plastica (7) sulla spina dell’attacco della
rete.
I
Montaż uchwytu siatki
1 Nastawnik grubości blatu z obu stron ściągnąć z uchwytu siatki. Wybrać żądaną gru-
bość blatu (np. 19 mm) i odpowiednio z powrotem założyć nastawnik grubości blatu.
2 Uchwyt siatki wsunąć między połówki blatów (3).
4 Drążek siatki przesunąć przez boczną krawędź siatki.
5 Drążek siatki włożyć w wycięcia na uchwycie siatki.
6 Linkę napinającą związać (na supeł) z nasadką z tworzywa sztucznego.
7 Linkę napinającą prowadzić przez górne nacięcie w drążku siatki (4). Napiąć siatkę
przez odpowiednie zaczepienie plastikowej nasadki (7) na trzpieniu uchwytu siatki.
PL
Ersatzteilzeichnung und –liste
Spare parts drawing and list
Dessin et liste des pièces de rechange
Reserveonderdeeltekening en -lijst
Designación y lista de las piezas de
recambio
Disegno ed elenco dei pezzi di ricambio
Rysunek i lista części zamiennych
GB E
F
NL
I
PL
Geben Sie bei Ersatzteilbestellungen bitte die vollständige Artikelnummer, die Ersatzteil-
nummer und die benötigte Stückzahl an.
Bestellbeispiel: Art.-Nr. 07096-100/Ersatzteil-Nr. 10128002/ 1 Stück
Wichtig: Zu verschraubende Ersatzteile werden grundsätzlich ohne Verschraubungsmaterial
berechnet und geliefert. Falls Bedarf an entsprechendem Verschraubungsmaterial besteht, ist
dieses durch den Zusatz „mit Verschraubungsmaterial“ bei der Ersatzteilbestellung anzugeben.
HEINZ KETTLER GmbH & Co. KG ·
SERVICECENTER
Henry-Everling-Str. 2
D-59174 Kamen
Tel.: 02307 / 974-2111
Fax: 02307 / 974-2295
KETTLER Austria GmbH · Ginzkeyplatz 10 · 5020 Salzburg
Trisport AG · Im Bösch · CH–6331 Hünenberg
KETTLER GB Ltd. · KETTLER House, Merse Road · North Moons Moat · Redditch,
Worcestershire B98 9HL
KETTLER International Inc. · 1355, London Bridge Road · Virginia Beach · Virginia
VA 23453,USA
KETTLER Benelux B.V. · filiaal België · Brandekensweg 9 · B–2627 Schelle
KETTLER France · 5, Rue du Chateau · Lutzelhouse · F–67133 Schirmeck Cedex
KETTLER Benelux B.V. · Indumastraat 18 · NL–5753 RJ Deurne
BM Sportech S.A. · C/ Terracina, 12 PLA-ZA · 50197 Zaragoza
KETTLER SRL · Strada Per Pontecurone 5 · I–15053 Castelnuovo Scriva (AL)
KETTLER Polska · al. Piastow 3 · PL–64-920 Pila
http://www.kettler.net