7
2.0 Recording of pulse
This display offers two or three ways of recording the pulse:
1.with the hand pulse sensors (not with Racer and Crossbike)
2. with the ear clip
3. with a chest belt (as accessory available in shops)
Recording pulse with the hand pulse sensors
The hands cover the hand pulse sensors
Recording pulse with the ear clip
Plug the ear clip in the connection
Rub an earlobe to improve the circulation
Put the ear clip on the earlobe
Recording pulse with the chest belt
Put on the chest belt. Take notice of the corresponding instructions.
Pulse display
You have adjusted the start display (Picture 4).
The heart symbol (h) blinks in tact with your pulse.
After a few seconds, the pulse is shown as a value (6).
3.0 Exercising without specification of exercise data
Start exercising. All values are counted upward.
4.0 Exercising with specification of exercise data
Setting time (1), Kilojoule (2), Distance (3) and Pulse (6).
You have set the start display (Picture 4). Press the set key, enter the set-
ting mode and set the desired values with the + or – keys.
If you press the +/– key longer, a quick advance or return of the setting
values will follow.
If you press the +/– keys together, the value will go back to „OFF“.
With the set key, you will reach the next settings.
After the pulse setting, leave the setting mode with the set key and see the
display with the possible settings (Picture 16/17).
Press the set key longer and the display will go to the full display (reset
function) (Picture 2).
Note
If you do not enter a setting value within 4 minutes, the display will go to
room temperature (Picture 1).
Picture 5 Picture 6
Picture 7 Picture 8
Picture 5: The time setting begins with “OFF“
Picture 6: Time setting: e.g. 18 minutes
Picture 7: Energy consumption setting: e.g. 270 Kilojoule
Picture 8: Distance setting: e.g. 10 KM
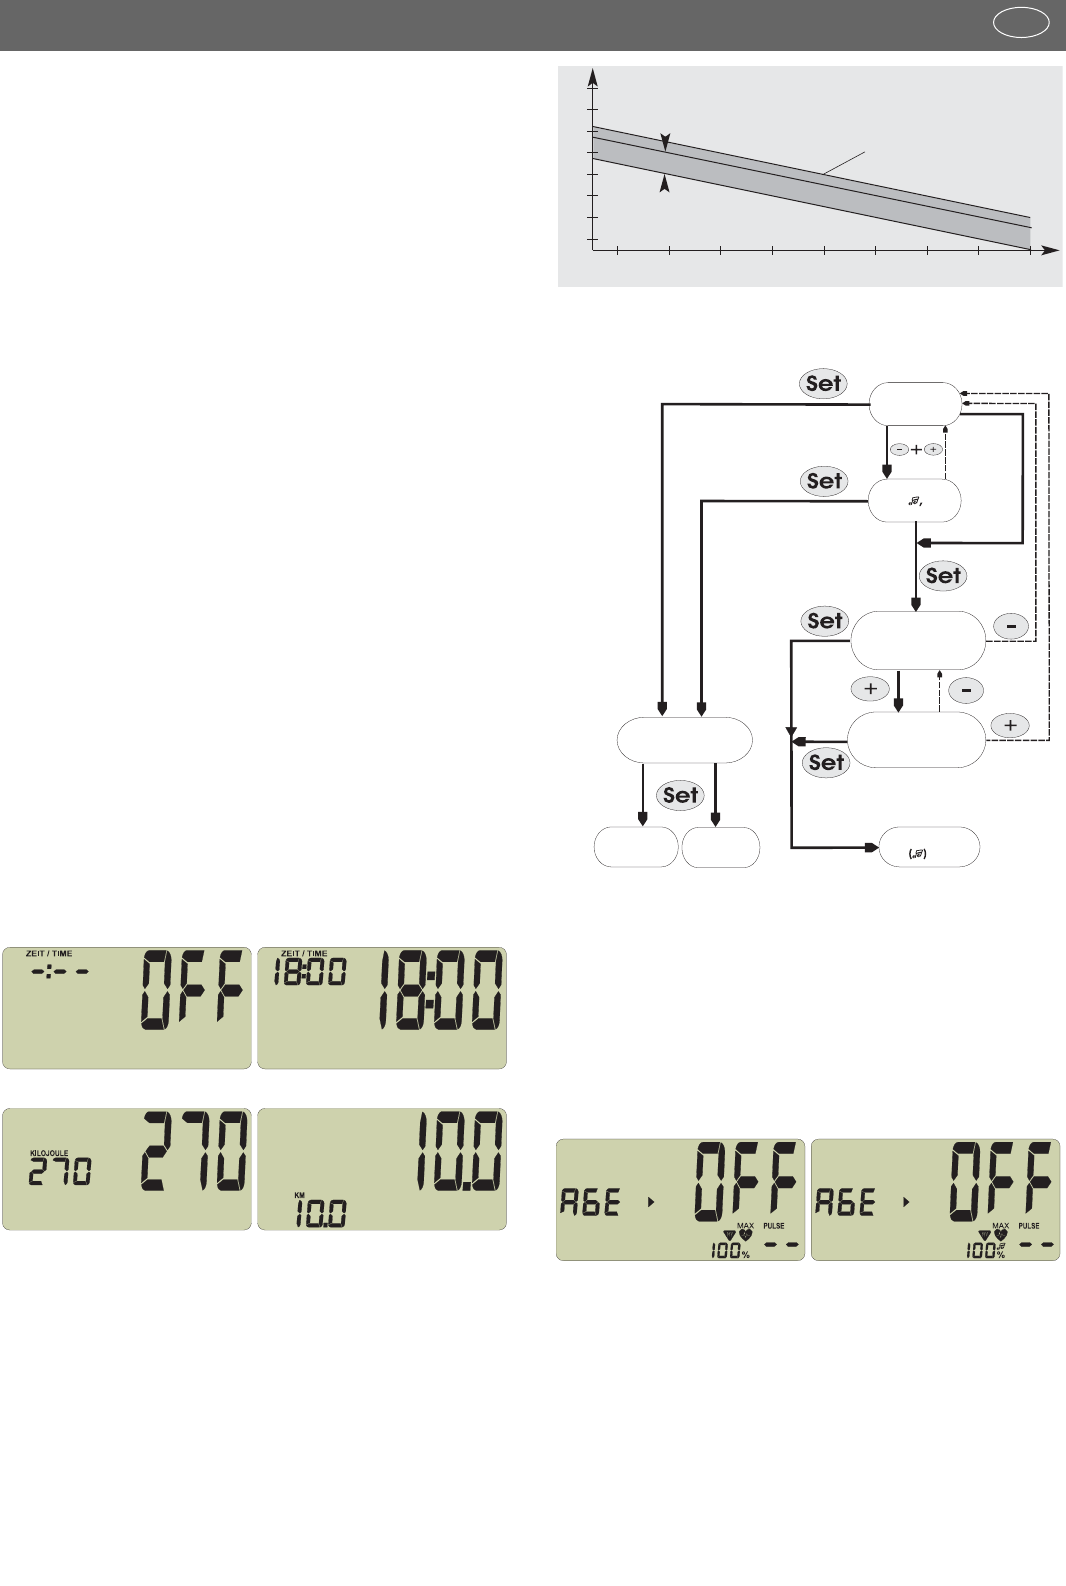
The right exercising pulse
The exercising pulse depends on age and exercise goal. For each age
and exercise goal there is the “right“ so-called aerobe exercise area
which is designated by an upper and lower pulse limit (+/- 10 beats). The
exercise pulse should always be within the aerobe zone. The maximum
pulse frequency (220 minus age) may not be exceeded. Healthy people
orient themselves on the following diagram (compare also 4.2).
Pulse setting possibilities
The scheme shows the course of the pulse settings
In detail:
Setting – exercise pulse
With the set key, you have access to successively 2 setting areas:
1. Age (Picture 9/10)
2. Pulse zones : burning of fat [Fa 65%] (Picture 12)
Fitness [Fi 75%] (Picture 13)
4.1 Age setting / alarm signal ON/OFF
The age setting serves for the calculation of your maximum pulse.
When you enter your age, in the PULSE display (6) there will be a maxi-
mum pulse which depends o the age (Formula: 220 – age) (Picture
11).With settings up to 21 years, only 199 can be displayed as maximum
pulse but the right value will be calculated.
Picture 10
No setting “OFF“ with “grade“.
When you exceed the maximum
pulse, an alarm signal will ring.
Picture 9
No setting “OFF“. Shutting on of
the alarm signal: press +/– keys to-
gether.
pulse /min.