21
19
1
2
3
4
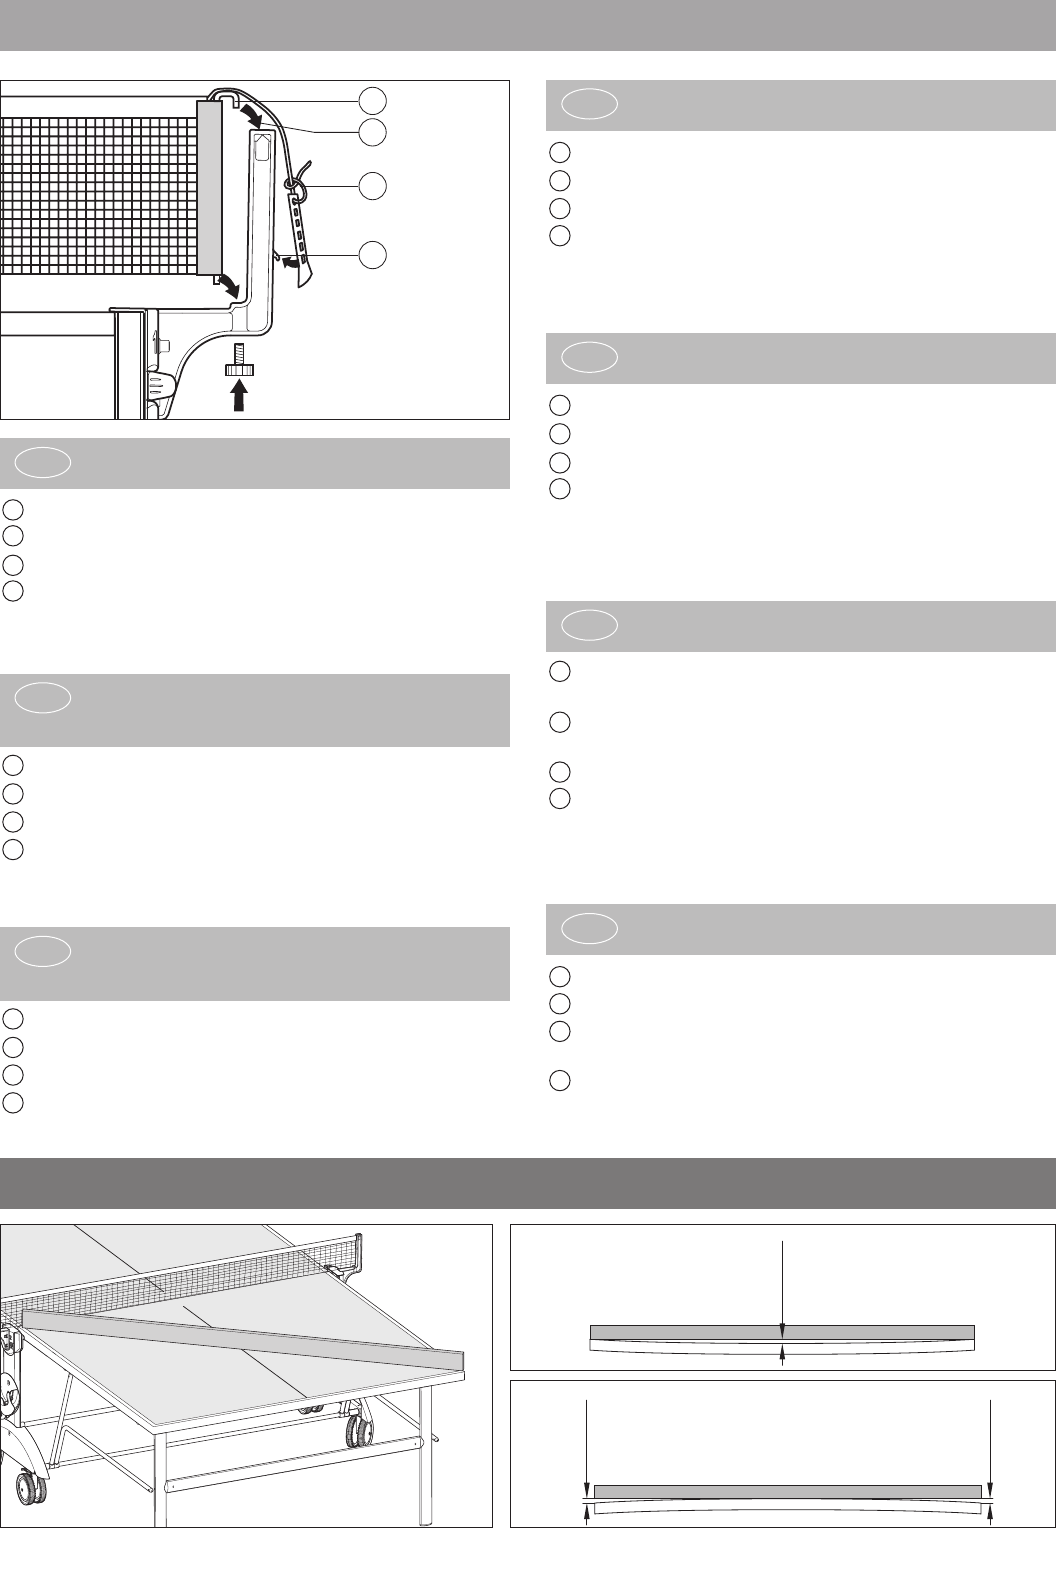
1 Passez la barre de tension à travers le filet.
2 Fixez la barre de tension sur le poteau.
3 Prenez la corde et faite un noeud sur la patte de réglage.
4 Passez la corde dans la rainure de la barre de tension. Ten-
dre le filet en fixant la patte de réglage sur la pointe du po-
teau.
1 Slide the tension pin through net
2 Place pin in designated slots
3 Tie tension string to plastic tension tab.
4 Place tension string in slots over tension pin and net post. Ad-
just net tension by adjusting plastic tension tab.
1 Netzstange durch seitliche Netzkante schieben.
2 Netzstange in Aussparungen am Netzhalter einstecken.
3 Spannfaden mit Kunststofflasche verknoten.
4 Spannfaden über obere Einkerbung in Netzstange führen.
Netz spannen durch entsprechende Einklinkung der Kunst-
stofflasche am Netzhalter-Dorn.
1 Schuif de netstang door de zijkant van het net.
2 Steek de netstang in uitsparingen van de nethouder.
3 Knoop het spandraad door kunststof lus.
4 Laat het spandraad via inkeping boven in de netstang lopen.
Span het net door de kunststof lus op het haakje van de
nethouder te klemmen.
Montage des Netzhalters
Instructions for Assembling
the net set
GB
D
Instructions de montage pour
l’ensemble poteaux-filet
F
Montage van de netpost
NL
1 Introducir la barra de la red por el borde lateral de la red.
2 Insertar la barra de la red en las escotaduras del portared.
3 Anudar el hilo tensor a la botella de plástico.
4 Introducir el hilo tensor en la barra de la red por la muesca
superior. Tensar la red encajando debidamente la botella de
plástico en el clavillo del portared.
Montaje del portared
E
1 Spingere la stecca della rete attraverso il bordo laterale del-
la rete.
2 Introdurre la stecca della rete negli incavi dell’attacco della
rete.
3 Annodare il fito tenditore e il passante di plastica.
4 Tirare il filo tenditore attraverso l’intaglio superiore nella stec-
ca di rete . Tendere la rete scegliendo una posizione del pas-
sante di plastica sulla spina dell’attacco della rete.
Montaggio dell’attacco della rete
I
1 Wsunąć pręty mocujące w boczne kieszenie siatki.
2 Wetknąć pręty mocujące siatkę do nacięć w uchwytach siatki.
3 Związać sznurek naciągający z nakładką z tworzywa sz-
tucznego.
4 Włożyć sznurek napinający do górnego nacięcia pręta mo-
cującego siatkę. Naciągnąć siatkę przez zaczepienie
nakładki z tworzywa sztucznego na trzpieniu uchwytu siatki.
Montaż uchwytów siatki
PL
max 1 cm = ok.
max 1 cm = ok.
max 1 cm = ok.