465319
3
Zoom out
Zoom in
Previous page
1/13
Next page
4
C-414
English
5
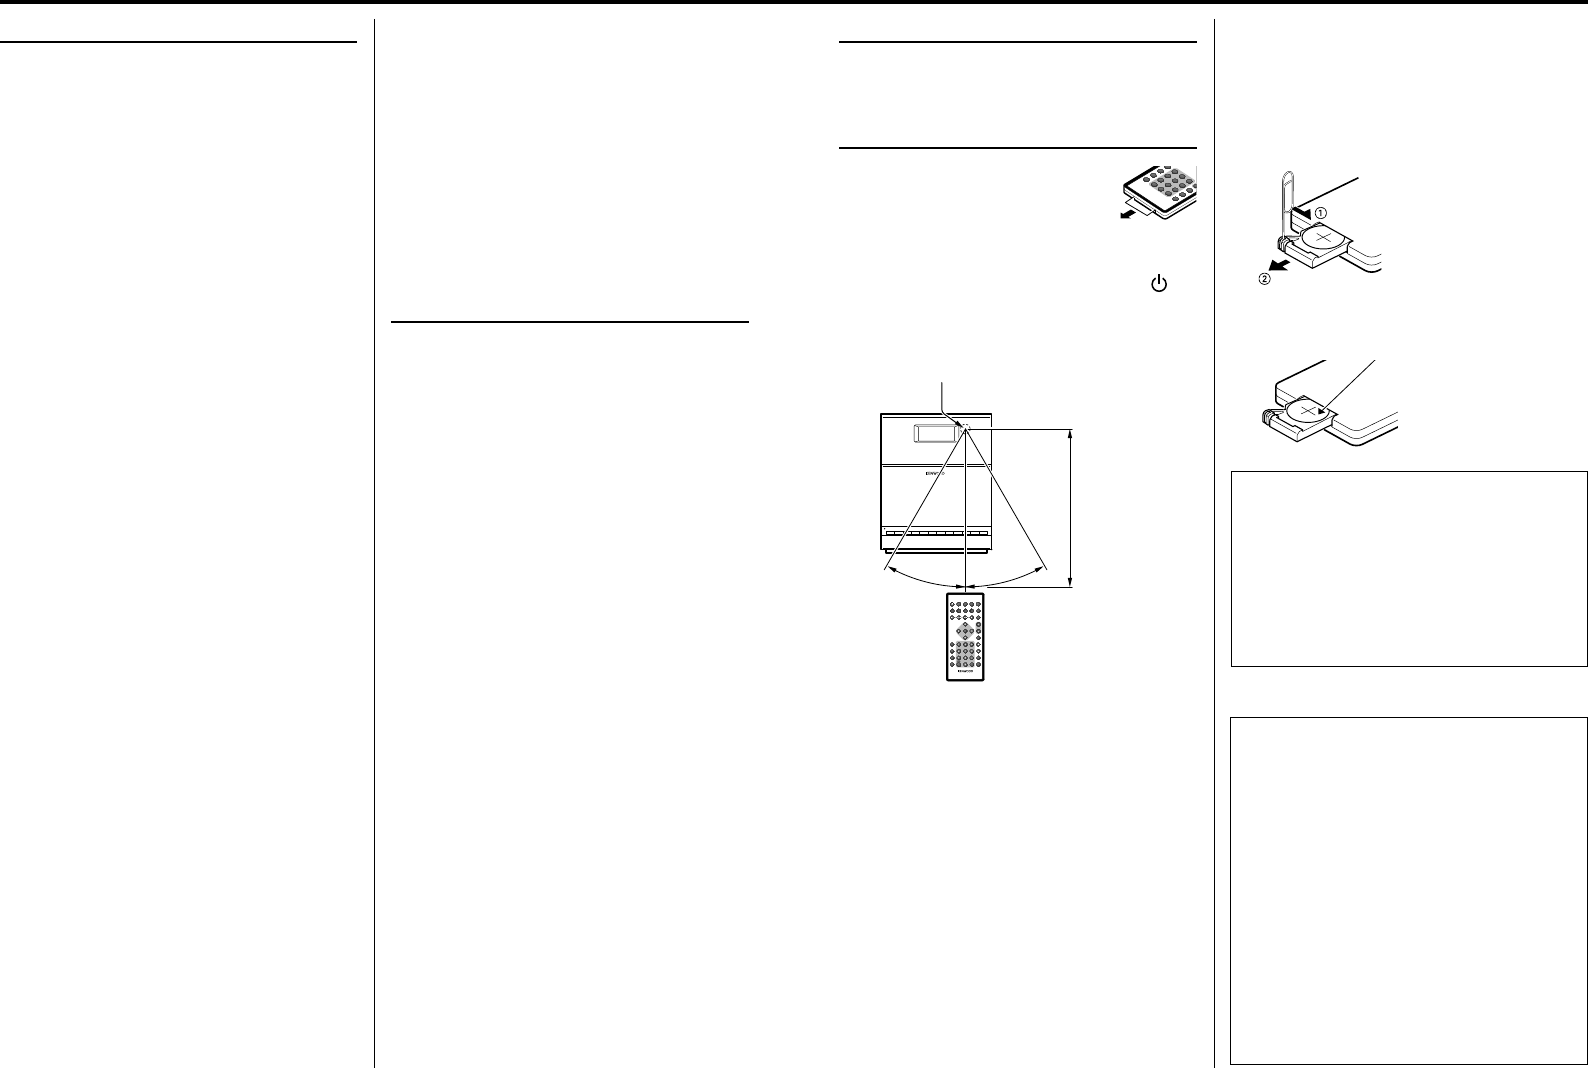
Preparing the remote control unit
Pull the battery sheet out from the
remote control unit to the direction of
the arrow.
Operation
When the power cord is plugged in, STANDBY/TIMER
indicator is lit. The power turns ON by pressing
button on the remote control unit pointing at the
remote sensor. When the power comes on, press the
button you want to operate.
DISPLAYSLEEP
USB/SD
CD
STOP D-BASS
VOLUME
MUTE
D.AUDIO/iPod AUX SOUND
EQ
BAND
TUNER
STEREO/MONO
P.MO D E
FOLDER
P.CA L L
TIMER SET
RANDOM
REPEAT
TIMER
ON/OFFMEMORY
BACKLIGHT
CONTRAST
REMOTE CONTROL UNIT
RC-F0514E
ENTER
Approx. 6 m
30°
30°
Remote sensor
The supplied battery may have shorter live than ordinary
battery due to use during operation checks.
When the remote-controllable distance gets shorter than
before, replace the battery with a new one.
Placing the remote sensor in direct sunlight, or in direct
light from a high frequency fluorescent lamp may cause a
malfunction.
In such a case, change the location of the system installation
to prevent malfunction.
Contents
Caution : Read the pages marked
¤
carefully to
ensure safe operation.
Unpacking
Unpack the unit carefully and make sure that all
accessories are present.
FM indoor antenna ..............................................................................(1)
AM loop antenna ..................................................................................(1)
iPod applied part ..................................................................................(1)
Remote control unit
with a built-in button battery (RC-F0514E) ................(1)
AC adapter (AC-18335A) ..................................................................(1)
Power cord (For Europe) ..................................................................(1)
Power cord (For Australia) ...............................................................(1)
Stand ............................................................................................................(1)
If any accessories are missing, or if the unit is damaged of
falls to operate, notify your dealer immediately. If your unit
was shipped to you directly, notify your shipper immediately.
Kenwood recommends that you retain the original carton and
packing materials in case you need to move or ship the unit in
the future.
Keep this manual handy for future reference.
Before applying power ...................................2
Safety precautions ......................................................................2
IMPORTANT SAFETY INSTRUCTIONS ............2
Before use .......................................................4
Connections ....................................................6
About MP3 and WMA .....................................8
About USB device ...........................................9
Supported iPod/iPhone .................................9
Handling discs.................................................9
About SD card .................................................9
Usable D.AUDIO ..............................................9
Component names and functions ...............10
Basic function ...............................................12
Switching the system on .....................................................12
Switching the system to standby mode ....................12
Volume control ..........................................................................12
Sound control ............................................................................. 12
Headphones ................................................................................ 12
Using the CD/USB device/SD card ...............13
Preparation ................................................................................... 13
Playing a CD/ audio fi le ........................................................14
Programming tracks/fi les .................................................... 14
Random play ...............................................................................14
Repeat play...................................................................................15
Changing the display information................................. 15
Using the AUX ..............................................15
Playing an external component......................................15
Using the radio .............................................16
Tuning in radio stations ........................................................16
Auto preset ................................................................................... 16
Manual preset ............................................................................. 16
Tuning to a preset radio station ......................................16
Using Radio Data System .................................................... 17
Changing the Radio Data System display
information .......................................................................... 17
Tuning by Program Type (PTY search) ......................... 17
Using the iPod/iPhone .................................18
Playing an iPod/iPhone ........................................................ 18
Repeat play...................................................................................18
Random play ...............................................................................18
Using the D.AUDIO .......................................18
Playback of Digital Audio Player ...................................... 18
System setup .................................................19
Adjusting the display brightness (BACKLIGHT)..... 19
Adjusting the display contrast (CONTRAST)............ 19
Setting Auto Power Save (A.P.S.) ...................................... 19
Clock/timer operation ..................................20
Clock setting ................................................................................ 20
Timer setting ...............................................................................20
To activate/deactivate the timer ..................................... 21
Sleep timer setting ..................................................................21
In case of di culty ........................................22
General information .....................................23
Maintenance ............................................................................... 23
To install speakers on a wall ............................................... 23
Speci cations ................................................24
¤
CAUTION
• Lithium battery.
Danger of explosion if the battery is incorrectly replaced.
Replace only with the same or equivalent type.
The battery pack or batteries shall not be exposed to
excessive heat such sunshine, fire or the like.
Keep battery out of reach of children and in original
package until ready to use. Dispose of used batteries
promptly. If swallowed contact physician immediately.
Changing the battery of the remote control
unit
Use a commercially available button battery
(CR2025).
1 Insert something narrow like a paperclip into
the hole 1 and pull out the battery tray.
Keep on slide
Pull out
2 Replace the old battery with a new one.
CR2025(+side)
Before use
How to read this manual
Most of the functions are designed to be able to
operate from the remote control unit.
Windows Media is a trademark of Microsoft Corporation
registered in the U.S. and other countries.
SDHC logo is a trademark of SD-3C,LLC.
“Made for iPod, and “Made for iPhone” mean that an
electronic accessory has been designed to connect
specifically to iPod, or iPhone, respectively, and has been
certified by the developer to meet Apple performance
standards. Apple is not responsible for the operation of
this device or its compliance with safety and regulatory
standards. Please note that the use of this accessory
with iPod, or iPhone may affect wireless performance.
iPhone, iPod, iPod classic, iPod nano, and iPod touch are
trademarks of Apple Inc., registered in the U.S. and other
countries.
Manufactured under license from DTS Licensing
Limited. DTS is a registered trademark & the DTS Logos
and Symbol are trademarks of DTS, Inc. © 1996-2009
DTS, Inc. All Rights Reserved.
3


Need help? Post your question in this forum.

Forumrules


Report abuse

Libble takes abuse of its services very seriously. We're committed to dealing with such abuse according to the laws in your country of residence. When you submit a report, we'll investigate it and take the appropriate action. We'll get back to you only if we require additional details or have more information to share.

Product:

For example, Anti-Semitic content, racist content, or material that could result in a violent physical act.

For example, a credit card number, a personal identification number, or an unlisted home address. Note that email addresses and full names are not considered private information.

Forumrules

To achieve meaningful questions, we apply the following rules:

Register

Register getting emails for Kenwood C-414 at:


You will receive an email to register for one or both of the options.


Get your user manual by e-mail

Enter your email address to receive the manual of Kenwood C-414 in the language / languages: English as an attachment in your email.

The manual is 0,82 mb in size.


You will receive the manual in your email within minutes. If you have not received an email, then probably have entered the wrong email address or your mailbox is too full. In addition, it may be that your ISP may have a maximum size for emails to receive.

Others manual(s) of Kenwood C-414

Kenwood C-414 User Manual - German - 24 pages

Kenwood C-414 User Manual - Dutch - 24 pages


The manual is sent by email. Check your email

If you have not received an email with the manual within fifteen minutes, it may be that you have a entered a wrong email address or that your ISP has set a maximum size to receive email that is smaller than the size of the manual.

The email address you have provided is not correct.

Please check the email address and correct it.

Your question is posted on this page

Would you like to receive an email when new answers and questions are posted? Please enter your email address.


Info