22
A
B
Hochklappen der Plattenhälften
Collapsing the table halves
Replier les moitiés de la table
Tesamenslaan van de plaathelften
Plegar los segmentos de las placas
Chiudere le metà del tavolo
Składanie płyt stołu
Откидывание половин плиты кверху
GB E
F
NL
I
PL
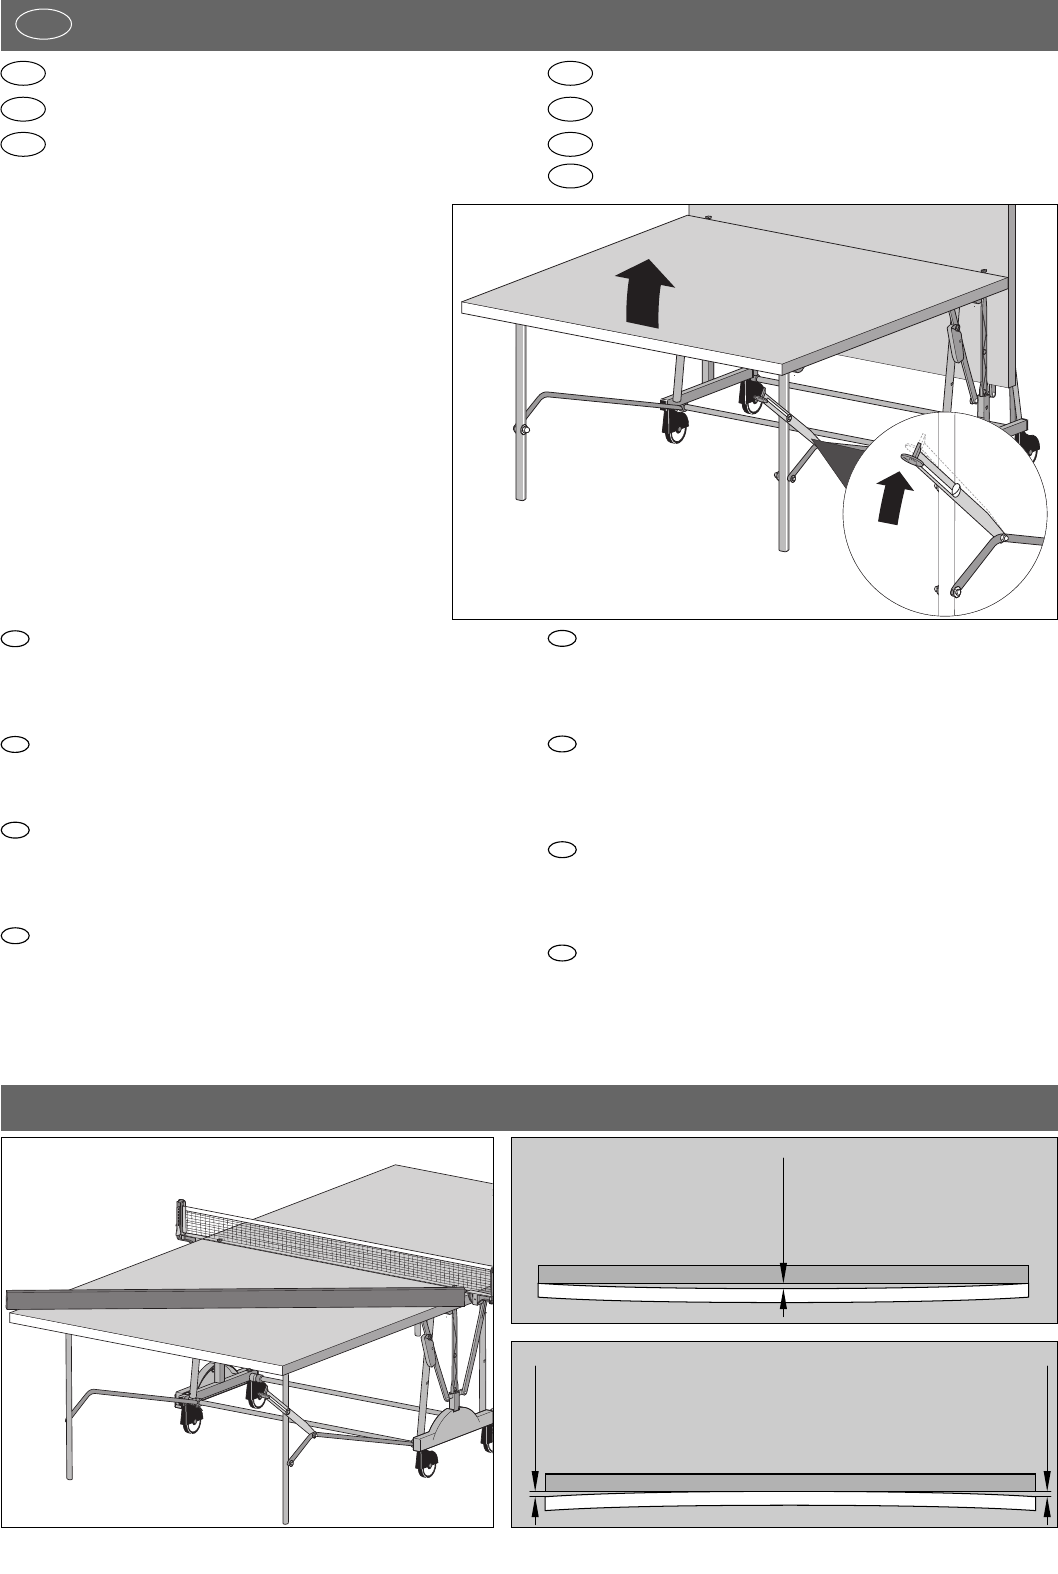
Drücken Sie den Hebel der Standsicherung nach oben (A)
und heben Sie die Plattenhälfte an (B). Behalten Sie in der An-
fangsphase des Hochklappens den Druck bei. Führen Sie die
Plattenhälften in die obere Abstellposition, in der die Trans-
portsicherung automatisch einrastet.
Push the lever of the stabilisation upwards (A) and lift the disk
half (B). Maintain the pressure in the initial lifting phase.
Bring the disk halves in the upper parking position in which
the transport lock automatically clicks into place.
Poussez le levier de stabilité au sol vers le haut (A) et soule-
vez la moitié de table (B). Maintenez la pression dans la pha-
se de début du relèvement. Amenez les moitiés de table à la
position de rangement supérieure à laquelle le blocage de
transport s'enclenche automatiquement.
Druk de hendel van de standzekering omhoog (A) en til de
plaathelft op (B). Behoud de druk in de beginfase van het om-
hoog klappen. Leid de plaathelften naar de bovenste stelpo-
sitie, waarin de transportzekering automatisch arrêteert.
Empuje la palanca del bloqueo de soporte hacia arriba (A)
y eleve la mitad de la placa (B). Mantenga la presión al co-
menzar a doblar hacia arriba. Lleve las mitades de la placa
a la posición superior de parada, en la que se encaja el blo-
queo de transporte automáticamente.
Premere la leva di sicurezza verso l’alto (A) e sollevare il se-
mipiano (B). Mantenere la pressione nella fase iniziale di sol-
levamento del semipiano. Portare i semipiani verso l’alto, nel-
la posizione verticale di arresto, per cui il dispositivo di sicu-
rezza per il trasporto scatta automaticamente.
Nacisnąć dźwignię zabezpieczenia postojowego do góry
(A) i podnieść połówkę płyty (B). Nie zwalniać docisku w
początkowej fazie podnoszenia do góry. Przemieścić
połówki płyty do położenia górnego, w którym zabezpiec-
zenie transportowe zostanie automatycznie zatrzaśnięte.
Нажмите рычаг установочного стопора вверх (A) и
приподнимите половинуплиты(B). Сохраняйтедав-
ление в начальной фазе откидывания кверху. При-
ведите половины плиты в верхнее положение хра-
нения, в котором автоматически фиксируется бло-
кировка перемещения.