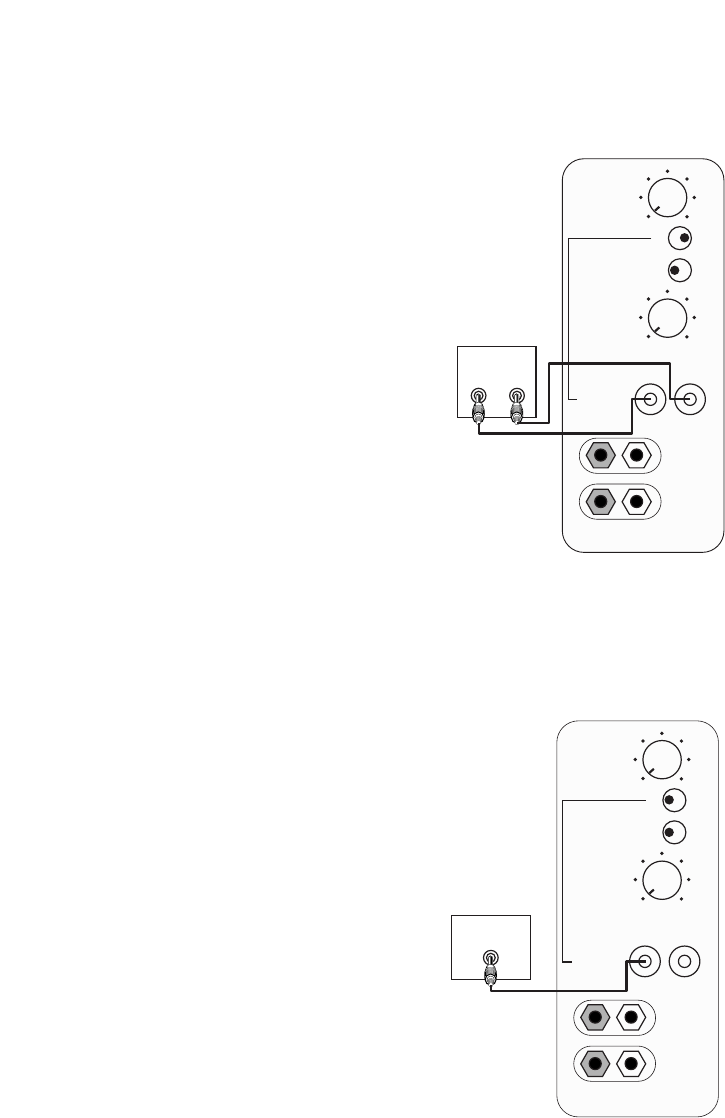
Digital Receiver/Processor – LFE Connection
Use this installation method
for Dolby Digital, DTS
®
or other
digital surround processors
that have bass-management
programming, or for analog
receivers/processors that
have a filtered subwoofer
output:
IMPORTANT: Make sure that
the LFE toggle switch on the
subwoofer is in the “LFE”
position. Use the line-level
input jacks for the Low-
Frequency Effects channel.
Connect these jacks to the LFE
output or subwoofer output on
your receiver or amplifier.
Note: If your receiver or ampli-
fier has only one subwoofer
output jack, you may connect
the subwoofer output on your
receiver/preamplifier to either
the left or right line-level input
on the subwoofer. It makes no
difference which jack you
choose.
Connect each speaker to
the corresponding speaker
terminals on your receiver or
amplifier.
Make sure that you have
configured your surround
sound processor for
“Subwoofer On” or
“LFE On.” The front,
center and surround
speakers should be
set to “Small” or “Large”
depending on their size and
frequency response. Consult
your receiver’s or processor’s
owner’s manual.
Analog Receiver/Processor – Line-Level Connections
Use this installation method
with an analog receiver/
processor that does not have
digital processing or bass
management, and that is
equipped with a full-range
subwoofer output or a volume-
controlled preamp (line-) level
output:
Use RCA-type interconnect
cables to connect the line-
level subwoofer outputs on
your receiver or amplifier to
the line-level inputs on the
subwoofer.
IMPORTANT: Make sure that
the LFE toggle switch on the
subwoofer is in the “Normal”
position. Do not use the
“LFE” position with Dolby*
Pro Logic*-only processors.
Note: If your receiver or
amplifier has only one sub-
woofer output jack, then you
may connect the subwoofer
output on your receiver/pre-
amplifier to either the left or
right line-level input on the
subwoofer. It makes no differ-
ence which jack you choose.
Connect each speaker to
the corresponding speaker
terminals on your
receiver or amplifier.
Make sure your receiver
or processor is config-
ured so
that the sub-
woofer is “On.”
Note for advanced
users: If your receiver/
processor has a built-in low-
pass crossover filter for the
subwoofer output, then the LFE
switch should be set to the
“LFE” position to bypass the
subwoofer’s internal
crossover.
5