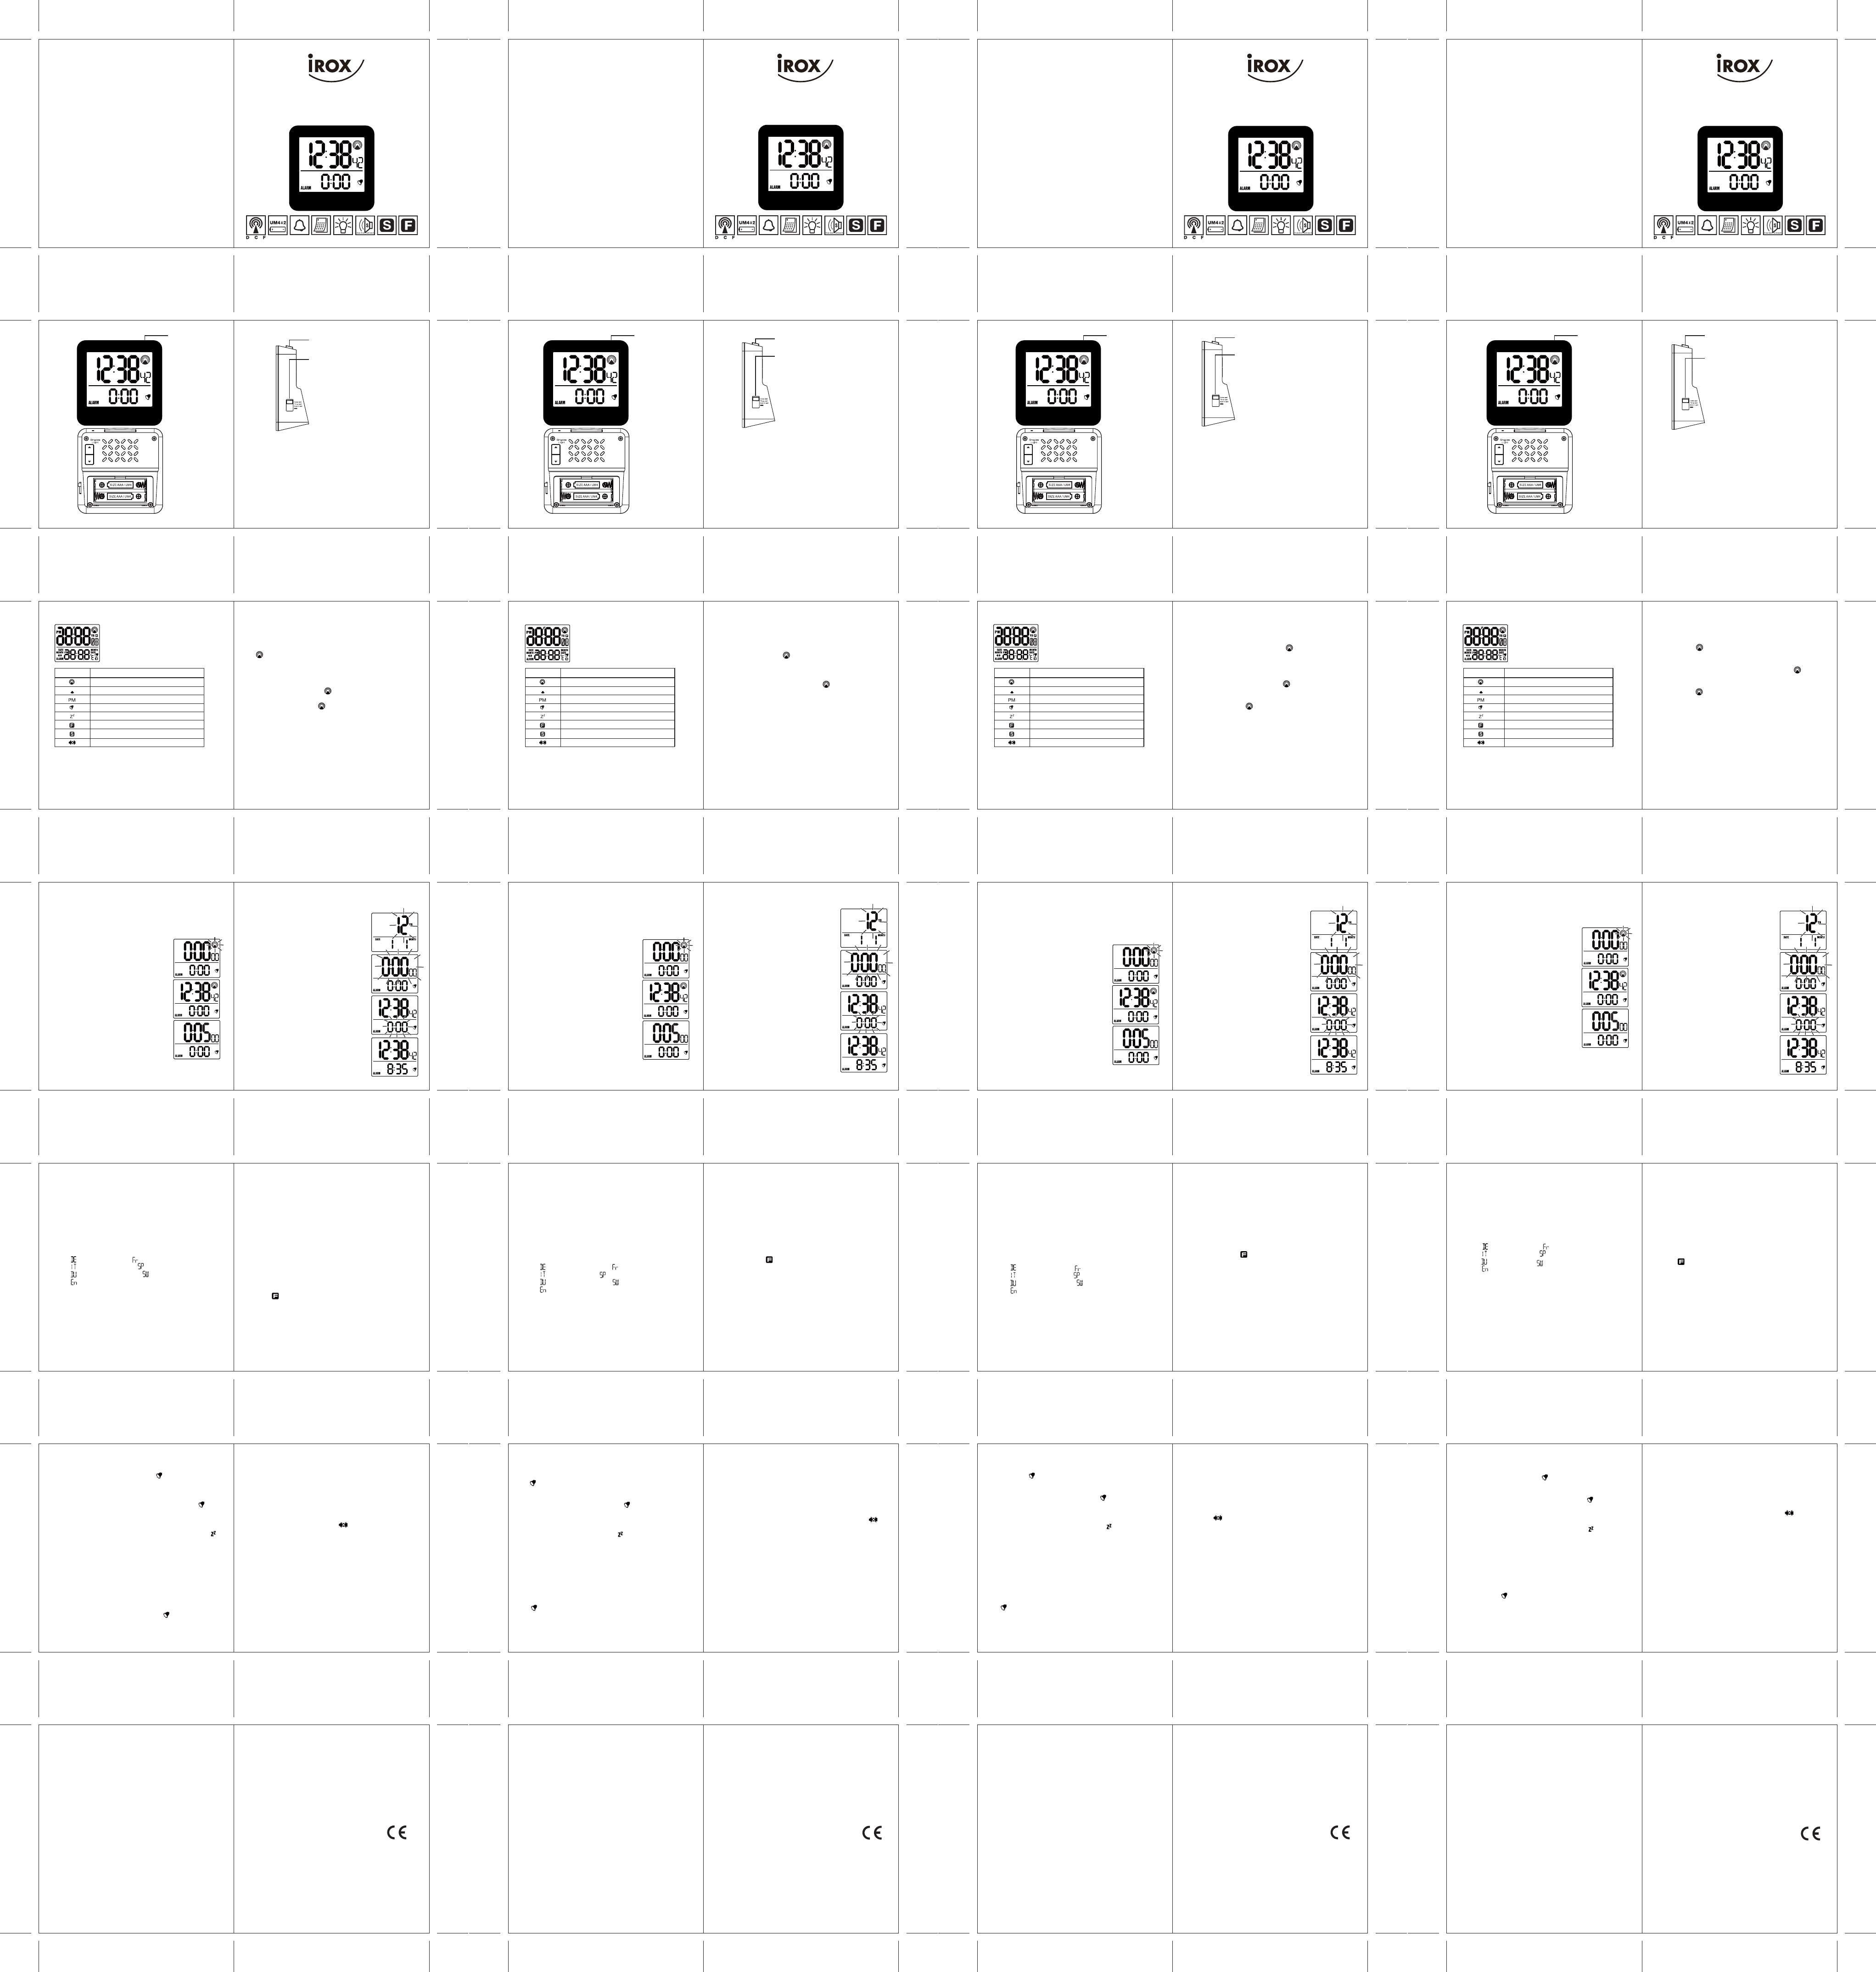
ORA-5
Funk-Wecker
Mit Bewegungssensor, Datum, Zeitzonenfunktion,
Crescendo Wecker, Snooze und Anzeigenbeleuchtung
Funktionen
• Funkuhr (DCF77 Signal aus Frankfurt)
• Datum (Monat , Tag) Anzeige
• Sommerzeit aktiv Anzeige
• Zeitzonen Funktion
• Format Ihrer Wahl 12 oder 24 Stunden
• Crescendo Wecker mit Snooze Funktion
• Zeigt den Wochentag in 7 Sprachen an
• Anzeigenbeleuchtung
• Bewegungssensor
Wecker Ein / Aus (Alarm on/off)
Bewegungssensor
Schiebeschalter für:
- Datum einstellen (Date set)
- Zeit einstellen (Time set)
- Weckzeit einstellen (Alarm set)
- Einstellungen speichern (-)
LCD ANZEIGE
Empfang Funkuhrsignal gut
Anzeig BEDEUTUNG
Zeitzone aktiv
PM Anzeige bei 12 Std. Anzeige
Wecker aktiv
Kein Funkuhrsignal Empfang
Snooze Funktion aktiv
Sommerzeit aktiv
Batterien schwach
KSPO:0777-14(OST)
iROX RC223X MANUAL 1(Ger)
SIZE: W75 X H80mm
Material: 80LBS WF-PAP
Printing Color: BLACK(双面印刷)
BY Lai H Z 21/11/14
INBETRIEBNAHME
1. Nach dem Einlegen der Batterien werden während 2
Sekunden alle LCD Segmente angezeigt. Danach beginnt
der Wecker automatisch mit der Suche nach Funkuhrsignal
DCF, das Funkuhrsignalzeichen
[ ] fängt an zu blinken. Die Synchronisation von Uhrzeit
und Datum dauert 3-5 Minuten.
2. Wurde das Funkuhrsignal empfangen und konnte die
Uhrzeit synchronisiert werden, wird die Mitteleuropäische
Zeit angezeigt und das Zeichen für guten
Funkuhrsignal-Empfang [ ] erscheint.
3. Konnte kein Funkuhrsignal empfangen werden, erlischt das
Funkuhrsignalzeichen [ ]. Uhrzeit und Datum können in
diesem Fall manuell eingestellt werden.
Anmerkung: Die Funkuhr kann nicht deakiviert werden. Der
Wecker wird auch nach der manuellen Zeiteinstellung
regelmässig versuchen, sich mit dem Funkuhrsignal zu
synchronisieren. Wenn Sie im Empfangsbereich des
Funkuhrsignals sind aber eine andere Uhrzeit anzeigen
möchten müssen Sie die Zeitzonen-Funktion verwenden.
ANMERKUNG ZUR FUNKUHR
Das Zeitzeichen DCF 77 wird von der Atomuhr in
Mainflingen bei Frankfurt am Main ausgestrahlt. Der LW
Sender hat eine Reichweite von bis zu 1500km.
Haben Sie bei sich Empfangsprobleme, beachten Sie folgende
Punkte:
12/24 STUNDEN ZEITANZEIGE
1. Drücken Sie die ▲ Taste um zwischen der 12 und 24
Stunden Anzeige hin und her zu wechseln. Der erste Klick
wird die Beleuchtung einschalten. Mit jedem weiteren Klick
wird die Stundenanzeige wechseln.
WOCHENTAGSSPRACHE EINSTELLUNG
1. Zur Einstellung der Wochentagssprache drücken und halten
Sie die ▼ Taste. Nach 3 Sekunden beginnt die Anzeige von
einer Sprache zur nächsten zu springen nach der folgenden
Reihenfolge:
(1) “ ” für Deutsch (2) “ ” für Französisch
(3) “ ” für Italienisch (4) “ ” für Spanisch
(5) “ ” für Holländisch (6) “ ” für Schwedisch
(7) “ ” für Englisch
2. Lassen Sie die ▼ Taste los sobald die gewünschte Sprache
angezeigt wird. Diese wird dann automatisch gespeichert.
ZEITZONEN EINSTELLUNG
Mit der Zeitzoneneinstellung können Sie die Uhrzeit einer
anderen Zeitzone anzeigen lassen. Als Basis dient immer die
Uhrzeit der normalen Einstellung, zu welcher die Zeitdifferenz
eingestellt wird. Wenn Sie z.B. in eine Zeitzone reisen, in
welcher die Zeit 4 Std. vor geht, können Sie die Zeitzonenzeit
anzeigen und auf -4 Std. einstellen.
Oder wenn Sie im Empfangsbereich des Funkuhrsignals DCF
sind aber in einer anderen Zeitzone als die Mitteleuropäische,
wie z.B. in England, stellen Sie die Zeitzone entsprechend ein.
Der Wecker wird nach wie vor mit dem DCF Signal die Zeit
synchronisieren, der Wecker und seine Funktionen arbeiten
aber im Beispiel von England mit der Uhrzeit von -1 Std.
gegenüber der DCF Zeit.
1. Drücken und halten Sie die ▲ Taste 3 Sekunden gedrückt
bis das erscheint.
2. Schieben Sie den Schiebeschalter auf die Position TIME
SET und stellen Sie mit den Tasten ▲ und ▼ die
Zeitdifferenz zur Normalzeit ein.
3. Schieben Sie den Schiebeschalter auf die — Position um
die Einstellung zu speichern.
4. Drücken und halten Sie die ▲ Taste 3 Sekunden gedrückt
um zwischen der Zeitzonenzeit und der Normalzeit zu
wechseln.
WECKER EIN- UND AUSSCHALTEN
1. Drücken Sie die ALARM ON/ OFF Taste, die Taste erhebt
sich leicht und das Weckerzeichen [ ] sowie der
Schriftzug ALARM erscheint. Der Wecker ist nun
eingeschaltet. Bei eingeschaltetem Wecker wird die
Weckzeit permanent angezeigt.
2. Wenn der Alarm ertönt blinkt das Weckerzeichen [ ].
3. Drücken Sie eine der SNOOZE/ LIGHT ▲ oder ▼ Taste
oder bewegen Sie Ihre Hand über den Bewegungssensor um
die Snoozefunktion zu aktivieren. Der Weckton wird
vorübergehend ausgeschaltet und das Snooze Symbol [ ]
blinkt während dem Unterbruch. Der Alarm ertönt erneut
nach 5 Minuten. Nach 7 Mal Snooze schaltet der Weckton
ganz aus und ertönt am nächsten Tag wieder wenn der
Alarm nicht ausgeschaltet wird.
4. Wird der Weckton nicht ausgeschaltet, piept der Wecker in
immer kürzeren Intervallen. Nach 2 Minuten stellt er sich
automatisch aus. Die Weckzeit bleibt aktiv für den nächsten
Tag.
5. Um den Wecker ganz auszuschalten drücken Sie die
ALARM ON/ OFF Taste. Die Taste rastet wieder im
Gehäuse ein und das Weckerzeichen [ ] sowie der
Schriftzug Alarm erlischt. In der unteren Anzeige wird nun
das Datum (Tag und Monat) angezeigt.
ANZEIGENBELEUCHTUNG
Drücken Sie die SNOOZE/ LIGHT ▲ oder ▼ Taste oder
bewegen Sie Ihre Hand über den Wecker um die
Anzeigenbeleuchtung zu aktivieren. Die Beleuchtung schaltet
automatisch nach 5 Sekunden aus.
SCHWACHE BATTERIEN ANZEIGE
Ist das Energieniveau der Batterien nicht mehr genügend für
alle Funktionen des Weckers, erscheint in der Anzeige das
Zeichen für schwache Batterien [ ]. Die Batterien sollten
so rasch als möglich ersetzt werden.
Bitte entsorgen Sie die Batterien umweltgerecht!
PFLEGE DES GERÄTES
- Setzen Sie das Gerät keinen extremen Temperaturen oder
über längere Zeit direkter Sonnenstrahlung aus.
- Vermeiden Sie am Gerät starke Schläge oder Schocks jeder
Art.
- Benutzen Sie für die Reinigung ein trockenes, sanftes Tuch,
das Sie mit einer Mischung aus Wasser und sehr mildem
Reinigungsmittel benetzt haben. Sie dürfen niemals flüchtige
Substanzen wie Benzol, Verdünner, Reinigungsmittel in
Sprühdosen, usw. einsetzen.
- Lagern Sie das Gerät wenn es nicht benutzt wird an einem
trockenen Ort und ausserhalb der Reichweite von
Kleinkindern. Entfernen Sie in einem solchen Fall unbedingt
die Batterien!
- Bei extremer Kälte kann es vorkommen, dass die Anzeige
unlesbar wird. Sobald das Gerät sich erneut in einer
wärmeren Umgebung befindet, wird das Gerät wieder
ordnungsgemäss funktionieren.
- Bewahren Sie die Gebrauchsanweisung und die sonstigen
Unterlagen aus dem Lieferumfang bitte sorgfältig auf, um sie
auch später noch lesen zu können.
- Wichtig: Bei allen Irox Geräten sind sämtliche
Entsorgungsgebühren in der Schweiz (vRG) sowie in der EU
(WEEE) abgegolten.
SUPPORT
Dieses Gerät ist eine Neuentwicklung der Irox Development
Technology. Alle Angaben wurden anhand eines
funktionstüchtigen Gerätes gemacht und überprüft. Es kann
vorkommen, dass Anpassungen und Verbesserungen im Gerät
vorgenommen werden, die aus drucktechnischen Abläufen
nicht mehr in diese Anleitung einfliessen konnten. Sollten Sie
Abweichungen feststellen, die Ihnen die Bedienung und den
Betrieb des Gerätes erschweren, können Sie über
www.irox.com immer die letzte gültige Anleitung gratis auf
Ihren PC laden.
© Irox Development Technology
1. Schieben Sie den Schalter auf DATE
SET und stellen Sie mit den Tasten ▲
und ▼ den Tag, Monat und das Jahr ein.
2. Schieben Sie den Schalter auf TIME
SET und stellen Sie mit den Tasten ▲
und ▼ die Stunden und Minuten der
gewünschten Uhrzeit ein.
3. Schieben Sie den Schalter auf ALARM
SET und stellen Sie mit den Tasten ▲
und ▼ die Stunden und Minuten der
gewünschten Weckzeit ein.
4. Schieben Sie den Schalter auf die —
Position um die Einstellungen zu
speichern.
Anmerkung: Bei allen Einstellungen halten
Sie die Tasten ▲ oder ▼ gedrückt für ein
schnelles Vor- bzw. Zurückstellen der Werte.
SCHIEBESCHALTER (DATUM EINSTELLEN / ZEIT
EINSTELLEN / WECKZEIT EINSTELLEN /
EINSTELLUNGEN SPEICHERN)
- Während der Nacht hat es weniger
Störungen in der Atmosphäre und somit
wird die Empfangswahrscheinlichkeit
erhöht. Ein Empfang pro Tag reicht
vollkommen aus, um die Genauigkeit von
+/- 1 Sekunde der Uhrzeit zu
gewährleisten
- Achten Sie darauf, dass das Gerät
mindestens 2 Meter Abstand hat von
möglichen Störquellen wie TV, Computer
Monitor, Mikrowelle, Sparlampen etc.
- In Räumen mit Beton- oder
Metall-Wänden (z.B. Kellerräume,
moderne Bürogebäude etc.) kann der
Signalempfang durch Abschirmung
erschwert werden. In einem solchen Fall
suchen sie einen besseren Standort in der
Nähe eines Fensters. Manchmal hilft es
auch, das Gerät um 90° zu drehen und so
die Empfangsantenne besser auszurichten.
ORA-5
Réveil avec horloge radio pilotée
Avec détecteur de mouvement, date, fuseau horaire,
Snooze et éclairage
CARACTERISTIQUES
• Horloge radio pilotée (Signal DCF77 de Francfort)
• Date (jour, mois)
• Indicateur heure d‘été
• Réglage du deuxième fuseau horaire
• Réveil Crescendo avec fonction de Snooze
• Affichage 12 heures ou 24 heures à choix
• Indication du jour de semaine en 7 langues
• Éclairage
• Détecteur de mouvement
Alarm on/off
Détecteur de
mouvement
Interrupteur à coulisse:
- Réglage du date (Date set)
- Réglage de l’heure (Time set)
- Réglage du l’alarme (Alarm set)
- Enregistrer les changements (-)
AFFICHAGE LCD
Réception horloge radio pilotée bibbe
SYMBOLE SIGNIFICATION
Deuxième fuseau horaire
PM (Affichage de 12h seulement)
Alarme
Pas de réception horloge radio pilotée
Fonction Snooze active
Heure été
Piles faibles
KSPO:0777-14(OST)
iROX RC223X MANUAL 2(Fre)
SIZE: W75 X H80mm
Material: 80LBS WF-PAP
Printing Color: BLACK(双面印刷)
BY Lai H Z 21/11/14
MISE EN SERVICE
1. Une fois les piles sont posées correctement, tous les
affichages sur la face du réveil s’allument brièvement pour 2
secondes. Après le réveil télécommandé commence à
chercher le signal automatique de l’heure DCF et le symbole
horloge radio pilotée [ ] commence à clignoter. La
synchronisation peut prendre environ 3-5 minutes si les
conditions sont bonnes.
2. Si la synchronisation a réussit l’heure et la date sont affiché
et le symbole horloge radio pilotée [ ] est affiché
3. Si au bout de 5 minutes l‘heure DCF n’a pas pu être captée,
il faut régler l’heure manuellement.
Note : La synchronisation avec le signal horloge radio pilotée
ne peut pas être désactivée. Si vous êtes dans le rayon de
réception du signal DCF mais voulez avoir un autre temps il
faut utiliser la fonction du deuxième fuseau horaire.
REMARQUE À L‘HORLOGE RADIO PILOTÉE
Le signal horaire DCF 77 est émis par l'horloge atomique
située à Mainflingen près de Francfort sur le Main. L‘émetteur
grandes ondes a une portée allant jusqu’à 1500 km. Si le
symbole de réception de l'heure est représenté sans ondes,
vous aurez des problèmes de réception. Veuillez prendre en
considération les points suivants :
AFFICHAGE 12/24 HEURES
1. Pressez la touche ▲ pour alterner entre l’affichage de
l’heure en 12 heures ou 24 heures. Le premier click va
allumer l’éclairage. Avec chaque clique suivante l’affichage
horaire change.
REGLAGE DE LA LANGUE DES JOURS DE
SEMAINE:
1. Pour sélectionner la langue pour l’affichage de jour pressez
est restez sur la touche ▼. Après 3 secondes l’affichage de
jour commence à clignoter et change entre les langues
automatiquement comme suivante:
(1) “ ” pour Allemande (2) “ ” pour Français
(3) “ ” pour Italien (4) “ ” Pour Espagnol
(5) “ ” pour Hollandais (6) “ ” pour Suédois
(7) “ ” pour Anglais
2. Lâchez la touche ▼ quand votre langue de choix apparait
pour l’enregistrer.
RÉGLAGE FUSEAU HORAIRE
Avec le réglage du fuseau horaire vous pouvez afficher l’heure
d’un autre fuseau horaire. La base est toujours l’heure normale
et vous réglez juste la différence entre l’heure de base et
l’heure d’autre fuseau horaire. Ou si vous recevrez le signal
horloge radio pilotée avec l’heure de l’Europe Centrale mais
vous êtes dans un autre fuseau horaire comme l’Angleterre
vous réglez l’heure du fuseau horaire à -1 heure et vous
pouvez profiter de l’horloge radio pilotée avec l’heure
correcte.
1. Pressez et restez sur la touche ▲ pendant 3 secondes juste
que le symbole s’allume.
2. Poussez l’interrupteur à coulisse vers la position TIME
SET et réglez avec les touches ▲ et ▼ la différance de
l’heure à l’heure normale.
3. Poussez l’interrupteur vers la position — pour enregistrer
l’ajustage.
4. Pressez et restez sur la touche ▲ pendent 3 secondes pour
alterner entre l’heure normale et l’heure fuseau horaire.
ACTIVER EST DÉACTIVER L’ALARME
1. Pressez la touche ALARM ON/ OFF, la touche se lève, le
symbole
[ ] et le mot ALARM apparaitront. L’alarme est active
maintenant. Quand l’alarme est active l’heure de l’alarme
est indique permanent.
2. Quand l’alarme sonne le symbole [ ] clignote.
3. Pressez le touche SNOOZE/ LIGHT ▲ ou ▼ ou bougez
votre main au-dessus le détecteur de mouvement pour
activer la fonctionne SNOOZE. La sonnerie va être
désactivé et le symbole Snooze [ ] clignote. L’alarme
sonne de nouveau après 5 minutes. Après la septième fois
l’alarme s’arrête complètement. L’heure d’alarme reste
active pour le jour suivant.
4. Si l’alarme sonnant n’est pas désactivé, l’alarme commence
à piauler dans des intervalles plus courts. Après 2 minutes
l’alarme s’arrête complètement. L’heure d’alarme reste
active pour le jour suivant.
5. Pour désactiver l’alarme complètement pressez la touche
ALARM ON/ OFF. La touche s’enclenche et le symbole
[ ] plus le mot ALARM disparaitront. La date (jour et
mois) va être affichée de nouveau.
L’ÉCLAIRAGE
Pressez la touche SNOOZE/ LIGHT ▲ ▼ ou bougez votre
main au-dessus le détecteur de mouvement pour activer
l’éclairage. L’éclairage s’éteint automatiquement après 5
secondes.
INDICATION DE L’ETAT DE LA PILE
Si la capacité de la pile atteint un niveau insuffisant pour faire
fonctionner le réveil, le symbole pour des piles faibles [ ]
s’allume. Les piles devront alors être remplacées le plus
rapidement possible.
ENTRETIEN DE L’APPAREIL
- Ne soumettez pas l’appareil à des températures extrêmes ou
au rayonnement direct du soleil pendant une période
prolongée.
- Evitez des coups ou des chocs violents de tout type sur
l’appareil.
- Utilisez pour le nettoyage un chiffon sec, doux que vous
avez humecté avec un mélange d’eau et de produit nettoyant
très léger. Vous ne devez jamais utiliser des substances
volatiles, telles que du benzène, un diluant, des produits
nettoyants en bombe.
- Entreposez votre appareil lorsqu’il n’est pas utilisé dans un
endroit sec et hors de portée des enfants. Dans ce cas, retirez
impérativement les piles !
- En cas de froid extrême, il se peut que l’affichage soit
illisible. Dès que l’appareil se trouve de nouveau dans un
environnement plus chaud, l’appareil fonctionnera à nouveau
correctement.
- Conservez soigneusement le mode d’emploi et les autres
documents fournis à la livraison pour pouvoir les relire
ultérieurement si nécessaire.
- Important : Pour tous les appareils Irox, toutes les taxes
d’élimination en Suisse (TAR) et dans l’UE (WEEE) sont
acquittées.
SUPPORT
Cet appareil est un nouveau produit d’ Irox Development
Technology. Toutes les données ont été fournies et contrôlées
au moyen d’un appareil fonctionnel. Il se peut que des
ajustements et améliorations soient effectués sur l’appareil,
n’ayant pas pu être ajoutés à ce mode d’emploi pour des
raisons liées à la technique d’impression. Si vous constatez
des divergences qui vous compliquent la manipulation et
l'utilisation de l'appareil, vous pouvez toujours télécharger
gratuitement sur www.irox.com le dernier mode d'emploi en
vigueur sur votre PC.
© Irox Development Technology
1. Poussez l’interrupteur à coulisse vers la
position DATE SET et réglez avec les
touches ▲ et ▼ le jour, mois et l’année.
2. Poussez l’interrupteur à coulisse vers la
position TIME SET et réglez avec les
touches ▲ et ▼ l’heure et les minutes
pour l’heure désire.
3. Poussez l’interrupteur à coulisse vers la
position ALARM SET et réglez avec les
touches ▲ et ▼ l’heure et les minutes
pour l’heure de réveil.
4. Poussez l’interrupteur à coulisse vers la
position — pour enregistrer les ajustages.
Remarque: Pendant le réglage restez sur
les touches ▲ ou ▼ pour une modification
des valeurs rapide.
INTERRUPTEUR À COULISSE POUR RÉGLAGE DE
LA DATE, L’HEURE ET L’ALARME
- Au cours de la nuit, l’atmosphère contient
moins de perturbations et la probabilité de
réception est ainsi accrue. Une réception
par jour suffit largement pour garantir une
précision de l’heure de +/- 1 seconde
- Veillez à respecter un écart de l'appareil
d'au moins 2 mètres (8 pas) par rapport à
des sources parasites éventuelles comme
la TV, l’écran d’ordinateur, les
micro-ondes etc.
- Dans des locaux possédant des murs en
béton ou en métal (par ex. des caves, des
bureaux modernes etc.), la réception du
signal peut être aggravée par
l‘antiparasitage. Dans un tel cas, cherchez
un lieu plus adapté à proximité d’une
fenêtre. Il peut parfois être utile de pivoter
l’appareil de 90° pour mieux orienter
l’antenne de réception.
ORA-5
Sveglia con orologio radiocontrollato
Con sensore di movimento, la data, il fuso orario,
Snooze e l’illuminazione.
CARATTERISTICHE
• Sveglia con orologio radiocontrollato (Segnale DCF77 di
Francoforte)
• Data (giorno, mese)
• Indicazione dell’ora legale
• È possibile impostare diverse funzioni fusi orari
• Sveglia con segnale crescendo con funzione Snooze
• Formato dell’ora a scelta 12 o 24 ore
• Indicazione del giorno della settimana in 7 lingue
• Illuminazione del display
• Rilevatore di movimento
Alarm on/off
Rilevatore di
movimento
Interruttore a scorrimento:
- Impostazione della data (Date set)
- Impostazione del tempo (Time set)
- Impostazione della sveglia (Alarm
set)
- Registrare le modifiche (-)
DISPLAY LCD
Ottima ricezione radio
ICONA SIGNIFICATO
Fuso orario
PM (Nel formato a12 ore)
Orario sveglia
Scarsa ricezione radio
Snooze attivo
Ora legale attiva
Indicatore batteria in esaurimento
KSPO:0777-14(OST)
iROX RC223X MANUAL 3(Ita)
SIZE: W75 X H80mm
Material: 80LBS WF-PAP
Printing Color: BLACK(双面印刷)
BY Lai H Z 21/11/14
MESSA IN SERVIZIO
1. Dopo aver inserito le batterie, tutti i segmenti del display
vengono visualizzati per 2 secondi. Poi la sveglia inizia
automaticamente la ricerca del segnale radio controllato
DCF. Il segnale radio controllato [ ] inizia a lampeggiare.
La sincronizzazione può richiedere circa 3-5 minuti se le
condizioni sono buone.
2. Se il segnale radio viene ricevuto e l'ora del giorno può
essere sincronizzata, viene visualizzata l’ora dell'Europa
centrale e si vede poi il simbolo [ ] per una buona
ricezione del segnale radio .
3. Se dopo 5 minuti il tempo DCF non è stato catturato alcun
segnale, il simbolo[ ] scompare sul display. In questo
caso è necessario impostare l'ora e la data manualmente.
Nota : Sincronizzazione con segnale orario radio controllato
non può essere disattivato, se siete nel raggio di ricezione
DCF. Ma, se si vuole avere un altro tempo deve essere
utilizzato la funzione del secondo fuso orario.
NOTA SULL'OROLOGIO RADIOCONTROLLATO
Il segnale orario DCF 77 è trasmesso dall'orologio atomico di
Mainflingen presso Francoforte sul Meno. Il trasmettitore LW
ha una portata fino a 1500 km.
Se l'icona della ricezione del segnale orario appare senza
onde, significa che ci sono problemi di ricezione. Si prega di
osservare quanto segue:
VISUALLIZZAZIONE 12 /24 ORE
1. Premere il tasto ▲ per commutare tra la visualizzazione del
tempo in 12 ore o 24 ore. Con il primo clic si accende la
luce. Ad ogni click successivo la visualizzazione dell’ora
cambia.
IMPOSTAZIONE DELLA LINGUA DEL GIORNO
DELLA SETTIMANA:
1. Per selezionare la lingua per la visualizzazione dei giorni
premere il pulsante ▼. Dopo 3 secondi, il display inizia a
lampeggiare, cambiando automaticamente di una lingua
all’altra come segue:
(1) “ ” per il tedesco (2) “ ” per i francese
(3) “ ” per l’italiano (4) “ ” per lo spagnolo
(5) “ ” per l’olandese (6) “ ” per lo svedese
(7) “ ” per l’inglese
2. Rilasciare il pulsante ▼quando la lingua di scelta appare
per salvare.
IMPOSTAZIONE DEL FUSO ORARIO
Con l'impostazione del fuso orario è possibile visualizzare
l'ora in un altro fuso orario. La base è sempre il tempo
normale e basta regolare la differenza tra la base di tempo e
l'ora di un altro fuso orario. Oppure, se si riceve il segnale
radio controllato orologio con il tempo in Europa centrale, ma
ci si trova in un fuso orario diverso, come l'Inghilterra si
imposta il fuso orario da -1 ore e si può godere l'orologio
controllata con la radio ora corretta.
1. Premere e tenere premuto il pulsante ▲ per 3 secondi,
finché il simbolo s’illumina.
2. Premere l'interruttore a scorrimento sulla posizione TIME
SET e impostare con i tasti ▲ e ▼ la differenza di tempo a
l’ora normale.
3. Premere l'interruttore sulla posizione — per salvare le
impostazioni.
4. Premere e tenere premuto il pulsante ▲ durante 3 secondi
per cambiare dell’ora normale con l’altro fuso orario.
ATTIVARE E DISATTIVARE L’ALLARME
1. Premere il tasto ALARM ON/ OFF, il tasto si alza un po’ e
il simbolo [ ] e la parola ALARM appariranno. Adesso
l’allarme è attivo. Quando l’allarme è attivo l’ora
dell’allarme viene permanentemente indicato.
2. Quando la sveglia suona, il simbolo [ ] lampeggia.
3. Premere il tasto SNOOZE/ LIGHT ▲ o ▼ spostare la
mano sopra il sensore di movimento per attivare le funzioni
di SNOOZE. Quando l’allarme viene temporaneamente
spento il simbolo a ripetizione Snooze [ ] lampeggia
durante l’interruzione. L'allarme suonerà di nuovo dopo 5
minuti. Dopo la settima volta l'allarme si spegne
completamente. Il tempo d’allarme è attivo anche per il
giorno successivo.
4. Se l'allarme non si spegne, inizierà a cinguettare in
intervalli più brevi. 2 minuti dopo l'allarme si arresta
completamente. Il tempo d’allarme è attivo per il prossimo
giorno.
5. Per disattivare l'allarme completamente premere il tasto
ALARM ON/ OFF. Il pulsante scatta indietro e il simbolo
[ ] più la parola ALARM scompaiono. La data (giorno e
mese) sarà visualizzata di nuovo.
ILLUMINAZIONE
Premere il tasto SNOOZE/ LIGHT ▲ ▼ spostare la mano
sopra il sensore di movimento per attivare la luce.
L’illuminazione si spegne automaticamente dopo 5 secondi.
INDICAZIONE DELLO STATO DELLA BATTERIA
Se la capacità della batteria raggiunge un livello sufficiente
per far funzionare la sveglia, il simbolo per le batterie/pile
scariche [ ]si accende. Le batterie/pile verranno sostituiti
nel più breve tempo possibile.
MANUTENZIONE
- Non esporre l'apparecchio a temperature estreme o
direttamente per un lungo periodo al sole.
- Evitare urti violenti o colpi di qualunque tipo
all'apparecchio.
- Per la pulizia utilizzare un panno morbido, inumidito con
acqua e un detergente molto delicato. Non utilizzare MAI
sostanze volatili, come benzolo, diluenti, detergenti spray e
simili.
- Quando non è in uso, riporre l'apparecchio in un luogo
asciutto e fuori dalla portata dei bambini. In tal caso è
assolutamente necessario togliere le batterie!
- In presenza di temperature estremamente basse, può
accadere che il display non sia leggibile. L'apparecchio
riprenderà a funzionare correttamente non appena viene
collocato in un ambiente più caldo.
- Conservare accuratamente le istruzioni per l'uso e l'ulteriore
documentazione contenuta nella confezione, per poterla
consultare anche successivamente.
- Importante: le imposte di smaltimento rifiuti in Svizzera
(TRA) e nell'Unione Europea (WEEE) sono già corrisposte
per tutti gli apparecchi Irox.
ASSISTENZA
Questo apparecchio è un nuovo prodotto di Irox Development
Technology. Tutte le indicazioni sono state fornite e verificate
sulla base d’un apparecchio perfettamente funzionante. È
possibile che siano state fatte delle apportate modifiche e
migliori all'apparecchio, non incluse nella presente
documentazione per motivi legati alle esigenze di stampa. In
caso d’incongruenze o indicazioni incomplete, che rendono
difficoltosi l'uso o il funzionamento dell'apparecchio è
possibile scaricare gratuitamente in ogni momento le ultime
istruzioni aggiornate dal sito www.irox.com.
© Irox Development Technology
1. Premere l'interruttore a scorrimento sulla
posizione DATE SET e impostare con i
tasti ▲ e ▼il giorno, il mese e l’anno.
2. Premere l'interruttore a scorrimento sulla
posizione TIME SET e impostare con i
tasti ▲ e ▼ l’ora e i minuti per l’ora
desiderata.
3. Premere l'interruttore a scorrimento sulla
posizione ALARM SET e impostare con
i tasti ▲ e ▼ l’ora e i minuti per l’ora
della sveglia.
4. Premere l'interruttore a scorrimento sulla
posizione — per salvare le regolazioni.
Nota: Durante l'impostazione tenere
premuto il tasto ▲ o ▼ per un rapido
cambiamento di valori.
INTERRUTTORE A SCORRIMENTO PER
IMPOSTARE LA DATA, L’ORA E LA SVEGLIA
- Durante la notte ci sono meno
interferenze nell'atmosfera, pertanto la
probabilità di ricezione è superiore. Una
ricezione al giorno è pienamente
sufficiente per garantire la precisione di
+/- 1 secondo dell'ora.
- Verificare che l'apparecchio sia almeno a
2 metri (8 piedi) di distanza da possibili
fonti di disturbi come TV, schermo di
computer, microonde ecc.
- Negli ambienti con pareti in cemento o
metallo (es. scantinati, uffici moderni
ecc.), la ricezione del segnale può essere
schermata ed ostacolata. In tali casi,
ricercare un luogo migliore vicino a una
finestra. A volte è sufficiente girare
l'apparecchio di 90° e di posizionare
l'antenna meglio.
ORA-5
Radio Controlled Clock
With Motion Sensor, Date Display. Foreign Time
Setting, Crescendo Alarm, Snooze and
Light
FEATURES
• Controlled by radio signal (German DCF77)
• Date display (Month and Day)
• Summer time display
• Foreign time function
• Crescendo repeat alarm function with snooze
• Light function
• Motion sensor
Alarm on/off
Motion Sensor
Switch for:
- Date set
- Time set
- Alarm set
- Save settings
LCD DISPLAY LAYOUT
Radio signal
INDICATOR STANDING FOR
Foreign time indication
PM (12 HR Display only)
Alarm
Radio signal weakly
Repeat Alarm indication
Summer time indication
Low battery indication
KSPO:0777-14(OST)
iROX RC223X MANUAL 4(Eng)
SIZE: W75 X H80mm
Material: 80LBS WF-PAP
Printing Color: BLACK(双面印刷)
BY Lai H Z 21/11/14
GETTING STARTED
1. After the batteries are installed, all LCD segments will turn
on for 2 seconds. After 2 seconds the clock will
automatically search the radio signal and the radio control
signal icon [ ] will start blinking. It takes about 3-5
minutes to finish this process.
2. If the radio signal is received, the date & time will be set
automatically and the radio control signal icon [ ] turns
on.
3. If the clock fails to receive the time signal, the radio control
signal icon [ ] turns off. In this case the time has to be set
manually.
Note: The radio clock synchronisation cannot be deactivated!
If you are in the reception area of the DCF radio clock signal
but you like to set another time you have to use the foreign
time setting.
SPECIAL NOTES ABOUT THE RADIO CONTROLLED
CLOCK
The atomic clock time signal DCF 77 is transmitted from
Germany. The long-wave transmitter has a range of up to
1500km. If you have reception problems, please observe
following points:
12/24 HOUR TIME DISPLAY
1. Press the ▲ key to switch the time display between 12 and
24 hours format. The first click will turn the light on. Every
following click will change the time format.
CALENDAR SETTING
1. To change the weekday display language, press and keep
holding the ▼ key. After 3 seconds the languages start to
scroll as below.
(1) “ ” for German (2) “ ” for French
(3) “ ” for Italian (4) “ ” for Spanish
(5) “ ” for Dutch (6) “ ” for Swedish
(7) “ ” for English
2. Releases the ▼ key when your desired language shows up
to confirm setting.
FOREIGN TIME SETTING
With the foreign time setting you can set the time for another
time zone based you our normal time. For example if you
travel to a time zone that is 4 hours in advance of yours you
can set the foreign time to -4hrs.
This setting can be used when the German radio clock signal
DCF can be received but the time zone is a different one, for
example Great Britain. Then just set the foreign time to -1hr
and the clock will show the time for Great Britain and still
synchronise to the radio clock signal DCF.
1. Press and hold the▲ key for 3 seconds, the foreign time
icon [ ] will be turned on.
2. Slide the button to TIME SET, press the ▲ or ▼ keys to set
the offset hour to the normal time.
3. Slide the button to the — position to save and lock the
settings.
4. Press and hold the ▲ key for 3 seconds again to choose
between local and foreign time display.
TURN ALARM ON AND OFF
1. Press the ALARM ON/ OFF key, the key will pop up. The
alarm is activated and the [ ] icon and the word ALARM
turn on. The alarm time will be shown permanently as long
as the alarm is turned on.
2. When the alarm is ringing, the alarm icon [ ] will be
flashing
3. Press the SNOOZE/ LIGHT ▲ or ▼ key or swing your
hand on above the clock, the alarm will be stopped
temporarily with the repeat alarm indicator [ ] flashing.
The alarm will sound again after 5 minutes. After 7 times
using Snooze the alarm will be turned off and the alarm will
sound again the next day at the set alarm time.
4. If the alarm is not turned off, it will beep in shorter intervals
and will stop automatically after 2 minutes. The Alarm stays
turned on for the next day.
5. To turn off the alarm press the ALARM ON/ OFF key
again. The button will stay plugged in the clock and the
alarm icon [ ] and the word ALARM will be turned off.
The lower line switches back to the date (day and month)
indiation.
LIGHT FUNCTION
Press SNOOZE/ LIGHT ▲ or ▼ key or swing your hand on
above the clock and the light will be activated. It turns off
automatically after 5 seconds.
LOW BATTERY LEVEL DETECTION
Should the battery capacity drop to a level that is not sufficient
to operate the clock, the low battery indicator [ ] will light
up. The battery should be replaced as soon as possible.
Attention! Please dispose of used batteries in an ecologically
safe manner.
CARE OF THE DEVICE
- Do not expose the device to extreme temperatures or direct
sunlight over longer periods.
- Avoid blows and shocks of any kind to the device.
- For cleaning use a dry soft cloth that you have moistened
with water and a very mild cleaning agent. Never use
volatile substances such as benzene, thinner, cleansing
agents in spray cans etc.
- When the device is not being used store it in a dry area and
out of the reach of small children. In such cases it is
important to remove the batteries!
- If the device is activated under extreme coldness it may
occur that the display becomes illegible. As soon as it is
returned to a warm environment the device will function
normally again.
- Please keep the Instruction Manual and other documents
delivered with the device stored carefully so that you can
reference them at a later point if necessary.
- Important: All disposal fees in Switzerland (vRG) as well as
in the EU (WEEE) for all Irox devices are covered.
SUPPORT
This device is a new development of Irox Development
Technology. All information was made and checked by means
of a functioning device. It may occur that adjustments and
improvements of the device will take place that due to
typographical procedures were not able to be listed in this
manual. Should you notice deviations which make it difficult
for you to operate and use of the device, you may at any time
download the latest manual onto your PC free of charge at
www.irox.com.
© Irox Development Technology
1. Slide the button to DATE SET, press the
▲ or ▼ keys to set the date, month and
year.
2. Slide the button to TIME SET, press the
▲ or ▼ keys to set the hour and minutes.
3. Slide the button to ALARM SET, press
the ▲ or ▼ keys to set the hour and
minutes of the alarm time.
4. Slide the button to the — position to save
and lock all the settings.
Note: During any setting mode, keep
pressing and holding the▲ or ▼ keys for
fast setting.
SLIDE SWITCH (DATE SET/ TIME SET/ ALARM
SET/— LOCK)
- There are fewer disturbances in the
atmosphere during the night which
increases the likeliness of reception.
- Make sure that the device is at least 2
meters (8 feet) away from possible
sources of disturbance such as TV,
computer, monitor, microwave etc.
- In rooms with concrete or metal walls
(e.g. cellars, modern office buildings etc.)
the receipt of the signal may be more
difficult due to the shielding. In such
cases find a better location for the device
near a window. Sometimes it also helps to
simply turn the device by 90°, thereby
improving the alignment of the receiving
antenna.
2 3
4 5
6 7
8 9
10 11
15 16
17 18
19 20
21 22
23 24
28 29
30 31
32 33
34 35
36 37
41 42
43 44
45 46
47 48
49 50
12 13 25 26 38 39 51 52