39 40
3837
2c) PREPARATION OF THE RECEIVER UNIT
1. Open the cover of the battery compartment
2. Insert the 2 batteries (1.5 V, UM-3 or size ‘AA’) in
accordance with the respective polarities.
3. Close the battery compartment again.
2d) BATTERY ‘EMPTY’ DISPLAY
When it is time to replace the battery with a new one,
an indicator [ ] will appear next to the display of the
indoor temperature (batteries receiver unit) or outdoor
temperature (batteries transmitter unit) respectively.
2e) SETTING THE EXTERNAL SENSOR –
THERMO/HYGRO
a. As soon as the batteries are in the outdoor sensor, the
sensor starts to transmit the values measured in
intervals of approx. 45 seconds. The main appliance
also looks for signals (for approx. 2 minutes) as soon
as the batteries are inserted. When the signal from the
outdoor sensor is received, the outdoor temperature
and the air humidity values appear on the display.
b. If no sensor signals are received within 2 minutes,
[ ] then appears on the display. Press the [ ] key
for 3 seconds to initiate a search for the signals of the
external sensor. In this way, you can synchronise the
receiving and transmitting signal between the outdoor
sensor and the main appliance. Important: The
external sensor must be set to channel 1.
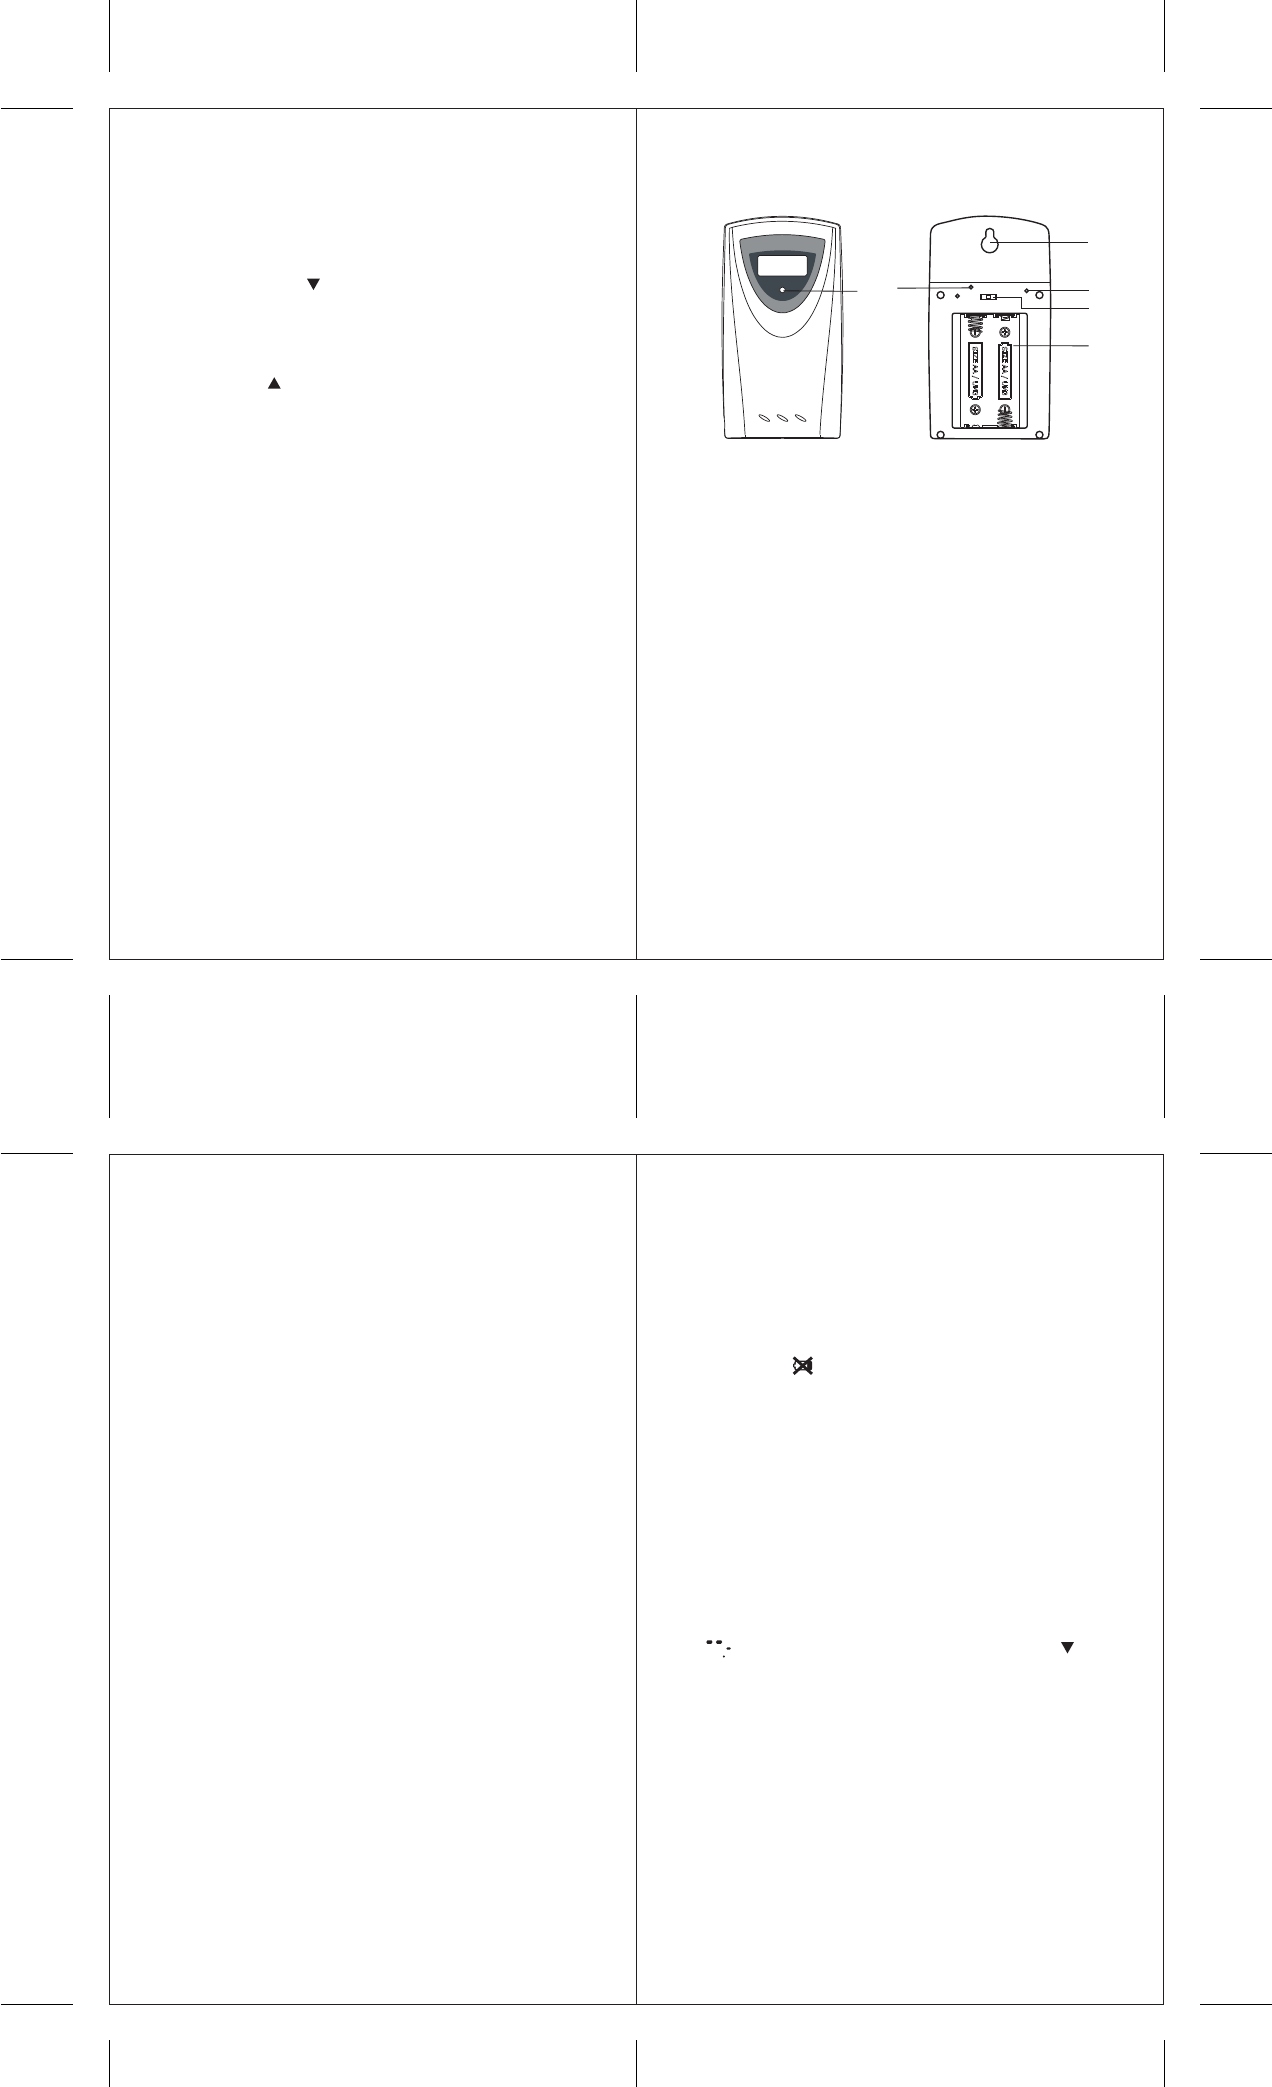
A LCD DISPLAY
For the convenient reading of all values.
B MODE KEY (BACK PANEL)
Manual setting of clock / data (if required)
C DOWN KEY ( )
- Reduces settings
- Switch radio signal reception on/off
- New search for the temperature sensor.
D UP KEY ( )
- Increases settings´
- Keep pressed: Changes the display
Barometric pressure – Date (barometric pressure is
not compensated at sea level)
- Changes the display unit for the temperature
display in degrees Celsius (°C) or degrees
Fahrenheit (°F)
E HOLDER FOR WALL HANGING
For wall hanging
F BATTERY COMPARTMENT
For two batteries of the type UM-3 or ‘AA’. 1.5V
alkaline batteries or better are recommended.
G REMOVABLE STAND
For setting the appliance up on a table
A
C
B
D
F
E
RESET
CHANNEL
1 2 3
WIRELESS THERMO • HYGRO
1
FEATURES OF THE THERMO/HYGRO
TRANSMITTER UNIT HTS33
A LED DISPLAY
Flashes 1 x briefly during signal transmission and 2 x
when battery is running out.
B BATTERY COMPARTMENT
For two batteries of the type UM-3 or ‘AA’. 1.5V
alkaline batteries or better are recommended.
C RESET BUTTON
Resetting of the appliance to the default settings and
after a change of channel.
D TRANSMISSION CHANNEL – SELECTOR
SWITCH
Allocates channel 1, channel 2 or channel 3 to a
sensor
E HOLDER FOR WALL HANGING
For wall hanging
F °C/°F SWITCH
Switching between the temperature display in degrees
Celsius (°C) or degrees Fahrenheit (°F) on the display
unit.
2. PUTTING INTO OPERATION
2a) PLEASE READ BEFORE USE
Please note the following instructions to ensure
optimum operation of the appliances:
- Place the receiver unit and the transmitter unit within
1 metre of one another.
- Please follow the sequence described in 2b and 2e
and wait until the measured value appears on the
display.
- Then install the receiver unit and the external
transmitter unit within the possible range of the
appliances, i.e. within a maximum radius of 30
metres.
Please note that the actual range of the transmitters
depends on the building materials of the respective
building and on the respective position of the
external transmitter unit and that the possible
distance can be greatly reduced from the 30 metres
by external influences (various radio transmitters and
other sources of interference). In such cases, we
recommend that you seek another position for both
the transmitter and the receiver. Sometimes, moving
them by just a few centimetres is sufficient!
Although the external transmitter units are
weatherproof, you should not position them in places
where they are exposed to direct sunlight, rain or
snow.
2b) PREPARATION OF THE EXTERNAL
THERMO/GYRO TRANSMITTER UNITS
1. Remove the cover of the battery compartment.
2. Set channel 1 by moving the sliding switch
(important: only set to channel 1!)
3. Insert the 2 batteries (1.5 V, UM-3 or size ‘AA’) in
accordance with the respective polarities.
4. Press the RESET button (e.g. with a paper clip)
5. Screw down the cover of the battery compartment
again.