How can I s
MovOFF position.
frost protection feature
automatically switch back on to pre
How do I know when the batteries need
changed and how do I change them?
Y
battery power lev
other than electric heating, the batteries should last about 4 years.
When the batteries need replaced, a flashing symbol will be
displa
T
1. Lift up the front flap to rev
battery compar
right edge of the flap and lift it out.
2. Replace the used batteries with 2 new AA LR6 Alkaline Batteries
(Duracell are recommended) and push the battery compar
firmly back into the front of the unit.
RESPECT Y
T
The Chronotherm has a per
settings while you change the batteries, you should ne
reprogram.
them, you ma
DA position and pressing the + b
What other accessories can I buy that work with
the Chronotherm?
Honeyw
be used with your Chronotherm, ask your installer f
1. Automatic
The A
Central Europe and corrects the time on the Chronotherm display
• Y
• There is no need to adjust the unit by -/+ 1 hour in summer / winter
since the unit does this automatically
• Y
can use this information to set-up all your other cloc
* Not av
range and home location
2. Outside
The Outside
Chronotherm to display the outside temperature.INFO
button twice, the Chronotherm displa
How do I set the time and da
1. Move the slider to the D position.
will now be flashing on the display indicating the
2. Press the + or -
button press will change the time by
display from flashing.
will change the time slowly at first, then quickly
3. Press the DAb
the correct day (DA is Monday).
day marker by one da
How do I get started with the built-in tempera-
ture program?
Move the slider to the A position.
The Chronotherm will now control your heating using the built-in
temperature program:-
Monda
Program 1 2 3 4 5 6
Time 06:30 08:00 12:00 14:00 18:00 22:30
T 21°C 18°C 21°C 18°C 21°C 16°C
Saturday and Sunda
Program 1 2 3 4 5 6
Time 08:00 10:00 12:00 14:00 18:00 23:00
T 21°C 21°C 21°C 21°C 21°C 16°C
How do I set m
each day of the week?
1. Move the slider to the PROGram position.
temperature change time and temperature le
program (the two small arrows are displa
programmed temper
indicates that you can mak
DAY/
PR
AU
MAN
OFF
2. Press the + or - button to adjust the first temperature change
time.
change time can be set in 10 minute steps from 03:00 in the
morning.
on the next morning, so you can maintain the e
after midnight.
(Note: + b
the ne2 , it means the next change time 2
will be pushed f + b
3. Press the TEMPerature or button to adjust the first
temperature le
temperature quickly
from 5°C to 30°C.
4. Press the PROGram 2 b
change time and temperature le
pressing the + or - bTEMPerature or button.
5. The remaining temperature changes for Monda
by pressing PROGram b3, 4, 5 and 6 and adjusted by
using the + or - button and TEMPerature or b
(If you don’t want to use all the temperature change times 2, 3, 4,
5 or 6 refer to the ne
temperature change times?”).
Y
6a. Press the COPY D button to cop
T
press the COPY DA b
6b. Press the DA b
2).
2 to 5.
set in the same waDA button.
7 MA position when you ha
completed steps 6a or 6b
room temperature to match your prog
What if I don’t want to use all 6 temperature
change times?
The built-in progr
the numbers 1, 2 , 3, 4 , 5 and 6 on the displa
PROGram position, unwanted change times can be deleted by holding
the appropriate PROGram buttons (2, 3, 4, 5 or 6 ) down for a f
seconds.
dashes instead of a time / temperature displa
Deleted temperature change times can be brought back
pressing the appropriate program button (2, 3, 4, 5 or 6 ) for a f
seconds, with the slider in the PROGram position.
Can I change the programmed temperature f
shor
When the slider is in the A position the temperature can be
adjusted temporarily by pressing the TEMP or b
This temperature will return to the program at the next temper
change time.
How do I chec
In normal operation the temperature displa
temperature.
INFOrmaton button and the displa
temperature with the two small arro
Ho
T
dayMANual position.
ture byTEMPerature
or
button.
temperature can be set anywhere from 5°C to 30°C in 0.5°C steps
DA/
PROG
AU
MAN
OFF
1234567
1234567
123456
I am having some friends r
can I extend m
When the slider is in the Aposition the temperature can be
adjusted temporarily by pressing the (P button.
party time (1 - 23 hours) by pressing the + or - b
parTEMP
or
button.
number of hours and then go bac
TPA setting press the button a second time or
mov
The button can also be used when you go out (shopping, out with
friends for coff
ture for a f
I have a da
at home,
No, with one b
day off
Sunday’
When the slider is in the AU matic position, press the (D
OFF) button. symbol will appear and the day mark
tomorrow will flash.
program will be f symbol will still
appear but without the flashing da
ling tomorrow’
TD, press the button twice or mov
the slider
If you ha button each night bef
going to bed.
If you hav D toda
using Sunday’ button twice.
TDAsetting, either press the button repeatedly
until the symbol disappears or mov
I am going on holiday f
save ener
when I return?
1. Mov
from holiday (A or MANual position)
2. Press the (HOLIDbutton to displa
counter and temperature.
3. Press the + or - b
extr
4. Press the TEMP or b
temperature (5°C - 30°C).
The unit will control to the new temperature f
holiday
until the selected number of da
return to norMANual or Aslider
position.
THOLIDA setting, press the
mov
1234567
1234567
DA/
PROG
AU
MAN
OFF
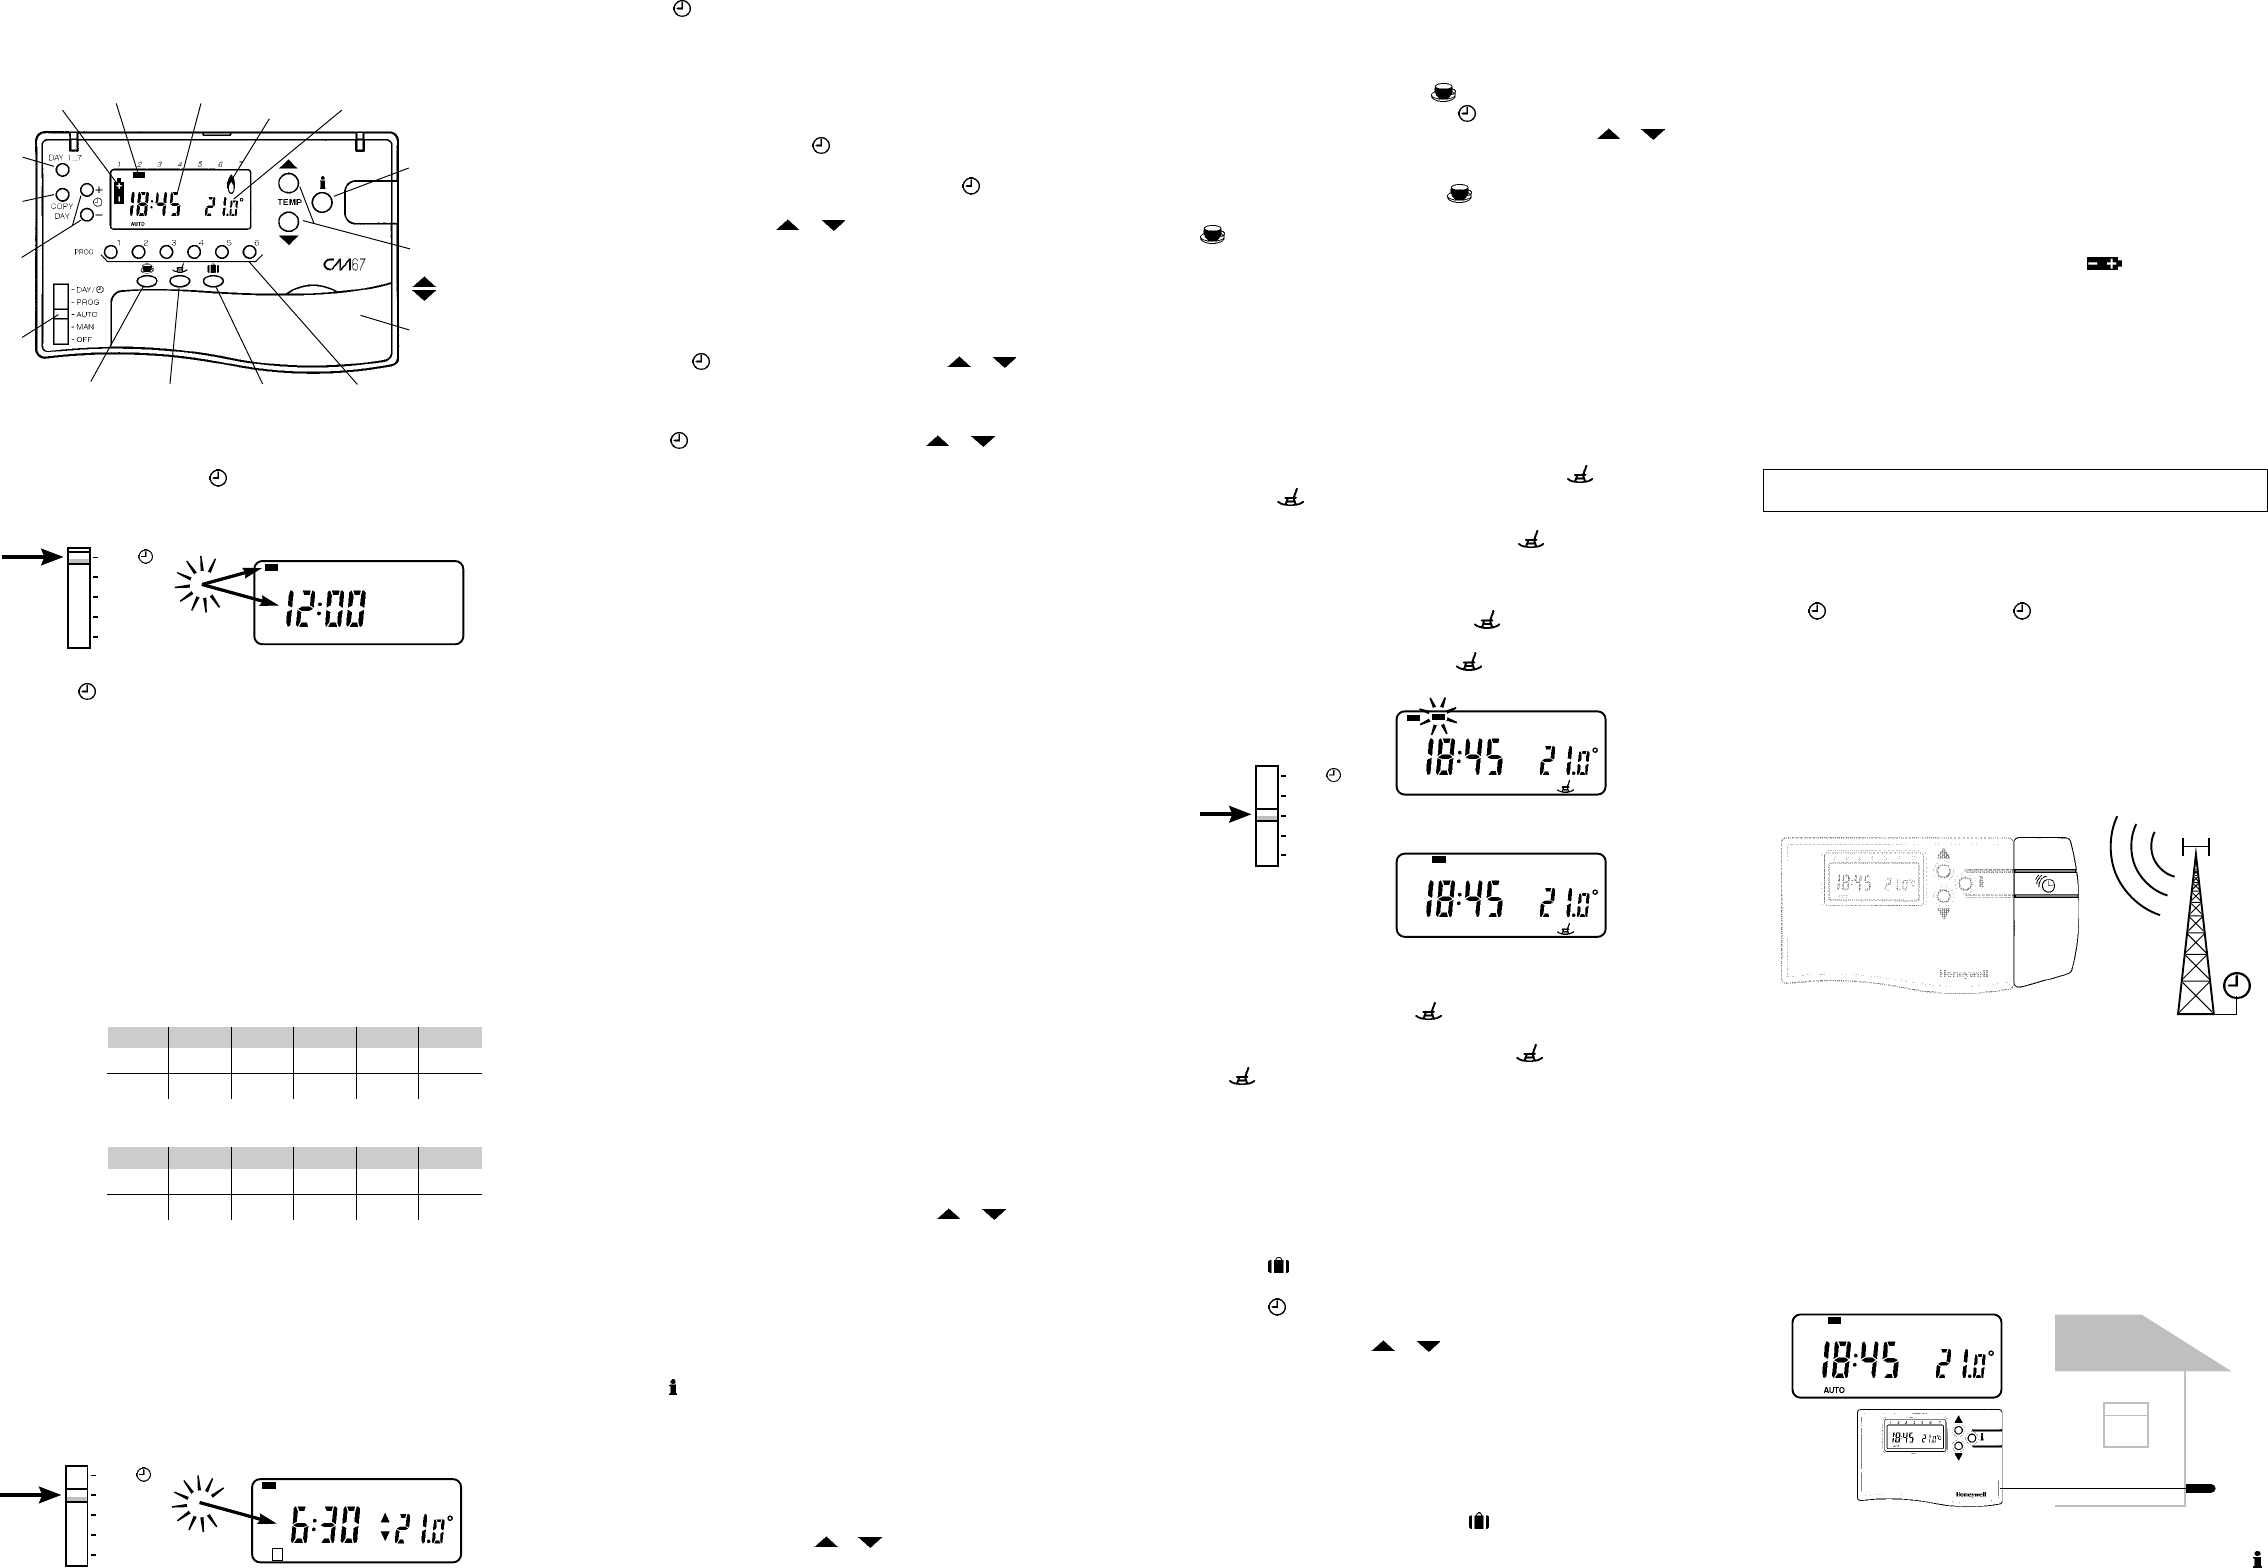
Display T
Display T
Batter
Indicator
Day Mark Time Displa Burner on
Indicator
T
Change
Buttons
= increase
= decrease
Inf
Enquiry
Button
T
Display
Holiday ButtonDay Off Button
Party Button
Battery
Compartment
Da
Button
Copy Da
Button
Time
Change
Buttons
Setting
Slider
Program
Buttons
EXT
CM67 Controls/Displa
The diagram below details the k
information.