461398
11
Zoom out
Zoom in
Previous page
1/32
Next page



      

O Termostato controla constantemente o nível
de energia das pilhas, que costumam durar
cerca de 2 anos antes de precisarem de ser
substituídas. Quando a energia começar a fa
-
lhar, aparece o símbolo
a piscar no visor.
Para mudar as pilhas, siga as etapas descri
-
tas na secção anterior (‘
 na página 8), substituindo as pilhas
usadas por novas no ponto ‘c’. As definições
do seu programa são guardadas durante a
substituição das pilhas, mas poderá ter de
acertar as definições da hora e da data.



Para funcionar como um simples termostato
com apenas uma temperatura para todo o
dia, seleccione o modo de operação manual,
premindo o botão . Premindo os botões
ou , ajuste a temperatura, que pode
ser definida em qualquer posição, de 5°C a
35°C, em intervalos de 0,5°C. O Termostato
continuará a manter esta temperatura até
outro modo de operação ser seleccionado ou
a temperatura ajustada.

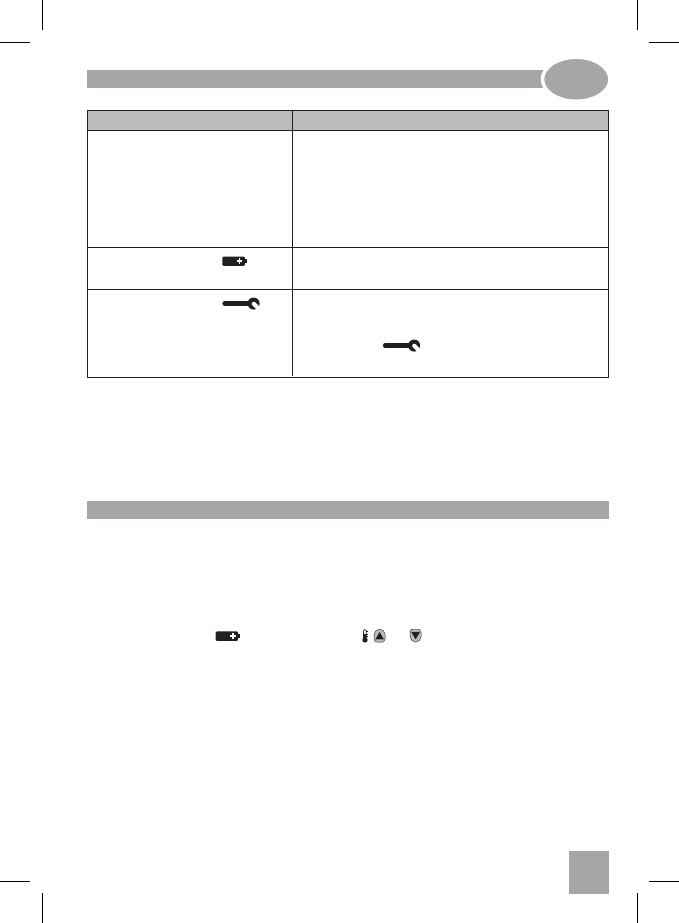
Visor sem imagem (Perda de
energia).
O visor exibe o símbolo
a
piscar.
O visor exibe o símbolo
.

Verificar se as pilhas estão colocadas, removendo a
tampa do compartimento das pilhas.
Verificar se as pilhas foram colocadas na orientação
correcta.
Substituir as pilhas.
As pilhas do termostato têm pouca carga Substituir
as pilhas.
Ocorreu uma avaria no seu sistema de aquecimento.
Remova as pilhas e volte a colocá-las.
Se o símbolo
não desaparecer depois de al-
guns minutos, contacte o instalador.
11


Need help? Post your question in this forum.

Forumrules


Report abuse

Libble takes abuse of its services very seriously. We're committed to dealing with such abuse according to the laws in your country of residence. When you submit a report, we'll investigate it and take the appropriate action. We'll get back to you only if we require additional details or have more information to share.

Product:

For example, Anti-Semitic content, racist content, or material that could result in a violent physical act.

For example, a credit card number, a personal identification number, or an unlisted home address. Note that email addresses and full names are not considered private information.

Forumrules

To achieve meaningful questions, we apply the following rules:

Register

Register getting emails for Honeywell CM 702 at:


You will receive an email to register for one or both of the options.


Get your user manual by e-mail

Enter your email address to receive the manual of Honeywell CM 702 in the language / languages: German, Dutch, French, Italian, Portuguese, Spanish as an attachment in your email.

The manual is 0,46 mb in size.


You will receive the manual in your email within minutes. If you have not received an email, then probably have entered the wrong email address or your mailbox is too full. In addition, it may be that your ISP may have a maximum size for emails to receive.

Others manual(s) of Honeywell CM 702

Honeywell CM 702 Installation Guide - German, Dutch, French, Italian, Portuguese, Spanish - 3 pages


The manual is sent by email. Check your email

If you have not received an email with the manual within fifteen minutes, it may be that you have a entered a wrong email address or that your ISP has set a maximum size to receive email that is smaller than the size of the manual.

The email address you have provided is not correct.

Please check the email address and correct it.

Your question is posted on this page

Would you like to receive an email when new answers and questions are posted? Please enter your email address.


Info