•This instruction manual is copyrighted and all rights are
reserved by NIKKARI.
•In case of handover or rent of the product, be sure to attach
this instruction manual to the product.
J
Transporting
When transporting, remove the product from
the attachment and powerheard.
* Otherwise, it could cause injury.
When transporting, remove
the product from the
attachment and powerhead.
For removing, refer to
"
<
Removing."
J
Storing
When storing this product with the hook of the
pipe cap attached to the pipe, etc., do not pull
or swing the attachment.
Or, attach it to the xed bar having enough
strength.
* Otherwise, it will fall off, causing a serious injury.
When storing this product, store it in the place
out of reach of children and animals.
* Otherwise, it could cause injury due to coutact with the
product which is falling off or falling down.
1
Remove the shaft tube from the attachment and
powerhead
For removing procedure, refer to "
<
Removing."
2
Check the shaft tube
Ⓑ
for any damage.
B
B
3
Insert the hook [2] of the
pipe cap
Ⓐ
into the hole
[1] of the shaft tube
Ⓑ
.
21
AB
4
Insert the pipe cap
Ⓐ
into the shaft tube
Ⓑ
.
AB
5
Store this product in the following place.
(a) Locked place
(b) High place out of reach of children and other
unauthorized person
(c) Dry and cool dark place
J
Safety
The following are instructions to prevent injury or property
damage. Be sure to observe the instructions.
J
Degree of injuries or damages caused by negligence of
the instructions are categorized as follows.
Indicates an immediately hazardous
situation which, if not avoided, will result in
death or serious injury.
Indicates a potentially hazardous situation
which, if not avoided, could result in death
or serious injury.
Indicates a potentially hazardous situation
which, if not avoided, could result in mild to
moderate injury or property damage.
Note
Indicates to emphasize important
information or provide helpful information.
Read the instruction manuals for the
attachment and powerhead thoroughly, and
have a good understanding of the contents.
* Otherwise, it will cause a serious acident.
J
Warning Labels
•Only one extension pipe should be
used.
•Usable attachment is the hedge
trimmer and pruner only.
J
Serial No.
AAAA ; Model code
BBBBBBB ; Serial No.
Model Code and Serial No.
The model code is 4-digit
numeric number for
management.
The model code is different
from the model name.
Record serial No.
J
Parts List
Refer to the following list and make sure that you have all
the necessary parts. If there is any part missing or damaged,
contact the sales agency.
Note
•In this instruction manual, the parts below are shaded in gray.
Ⓐ
Pipe cap1
Ⓑ
Shaft tube
SSES-L
:
Pipe length
1m
SSES-S
:
Pipe length
50cm
1
Instruction Manual
Extension Pipe
SSES
Q
If you do not have instruction manuals for the attachment and
powerhead, purchase from the sales agency.
Q
Keep this instruction manual and the manuals for attachment and
powerhead carefully so that you can read when necessary.
J
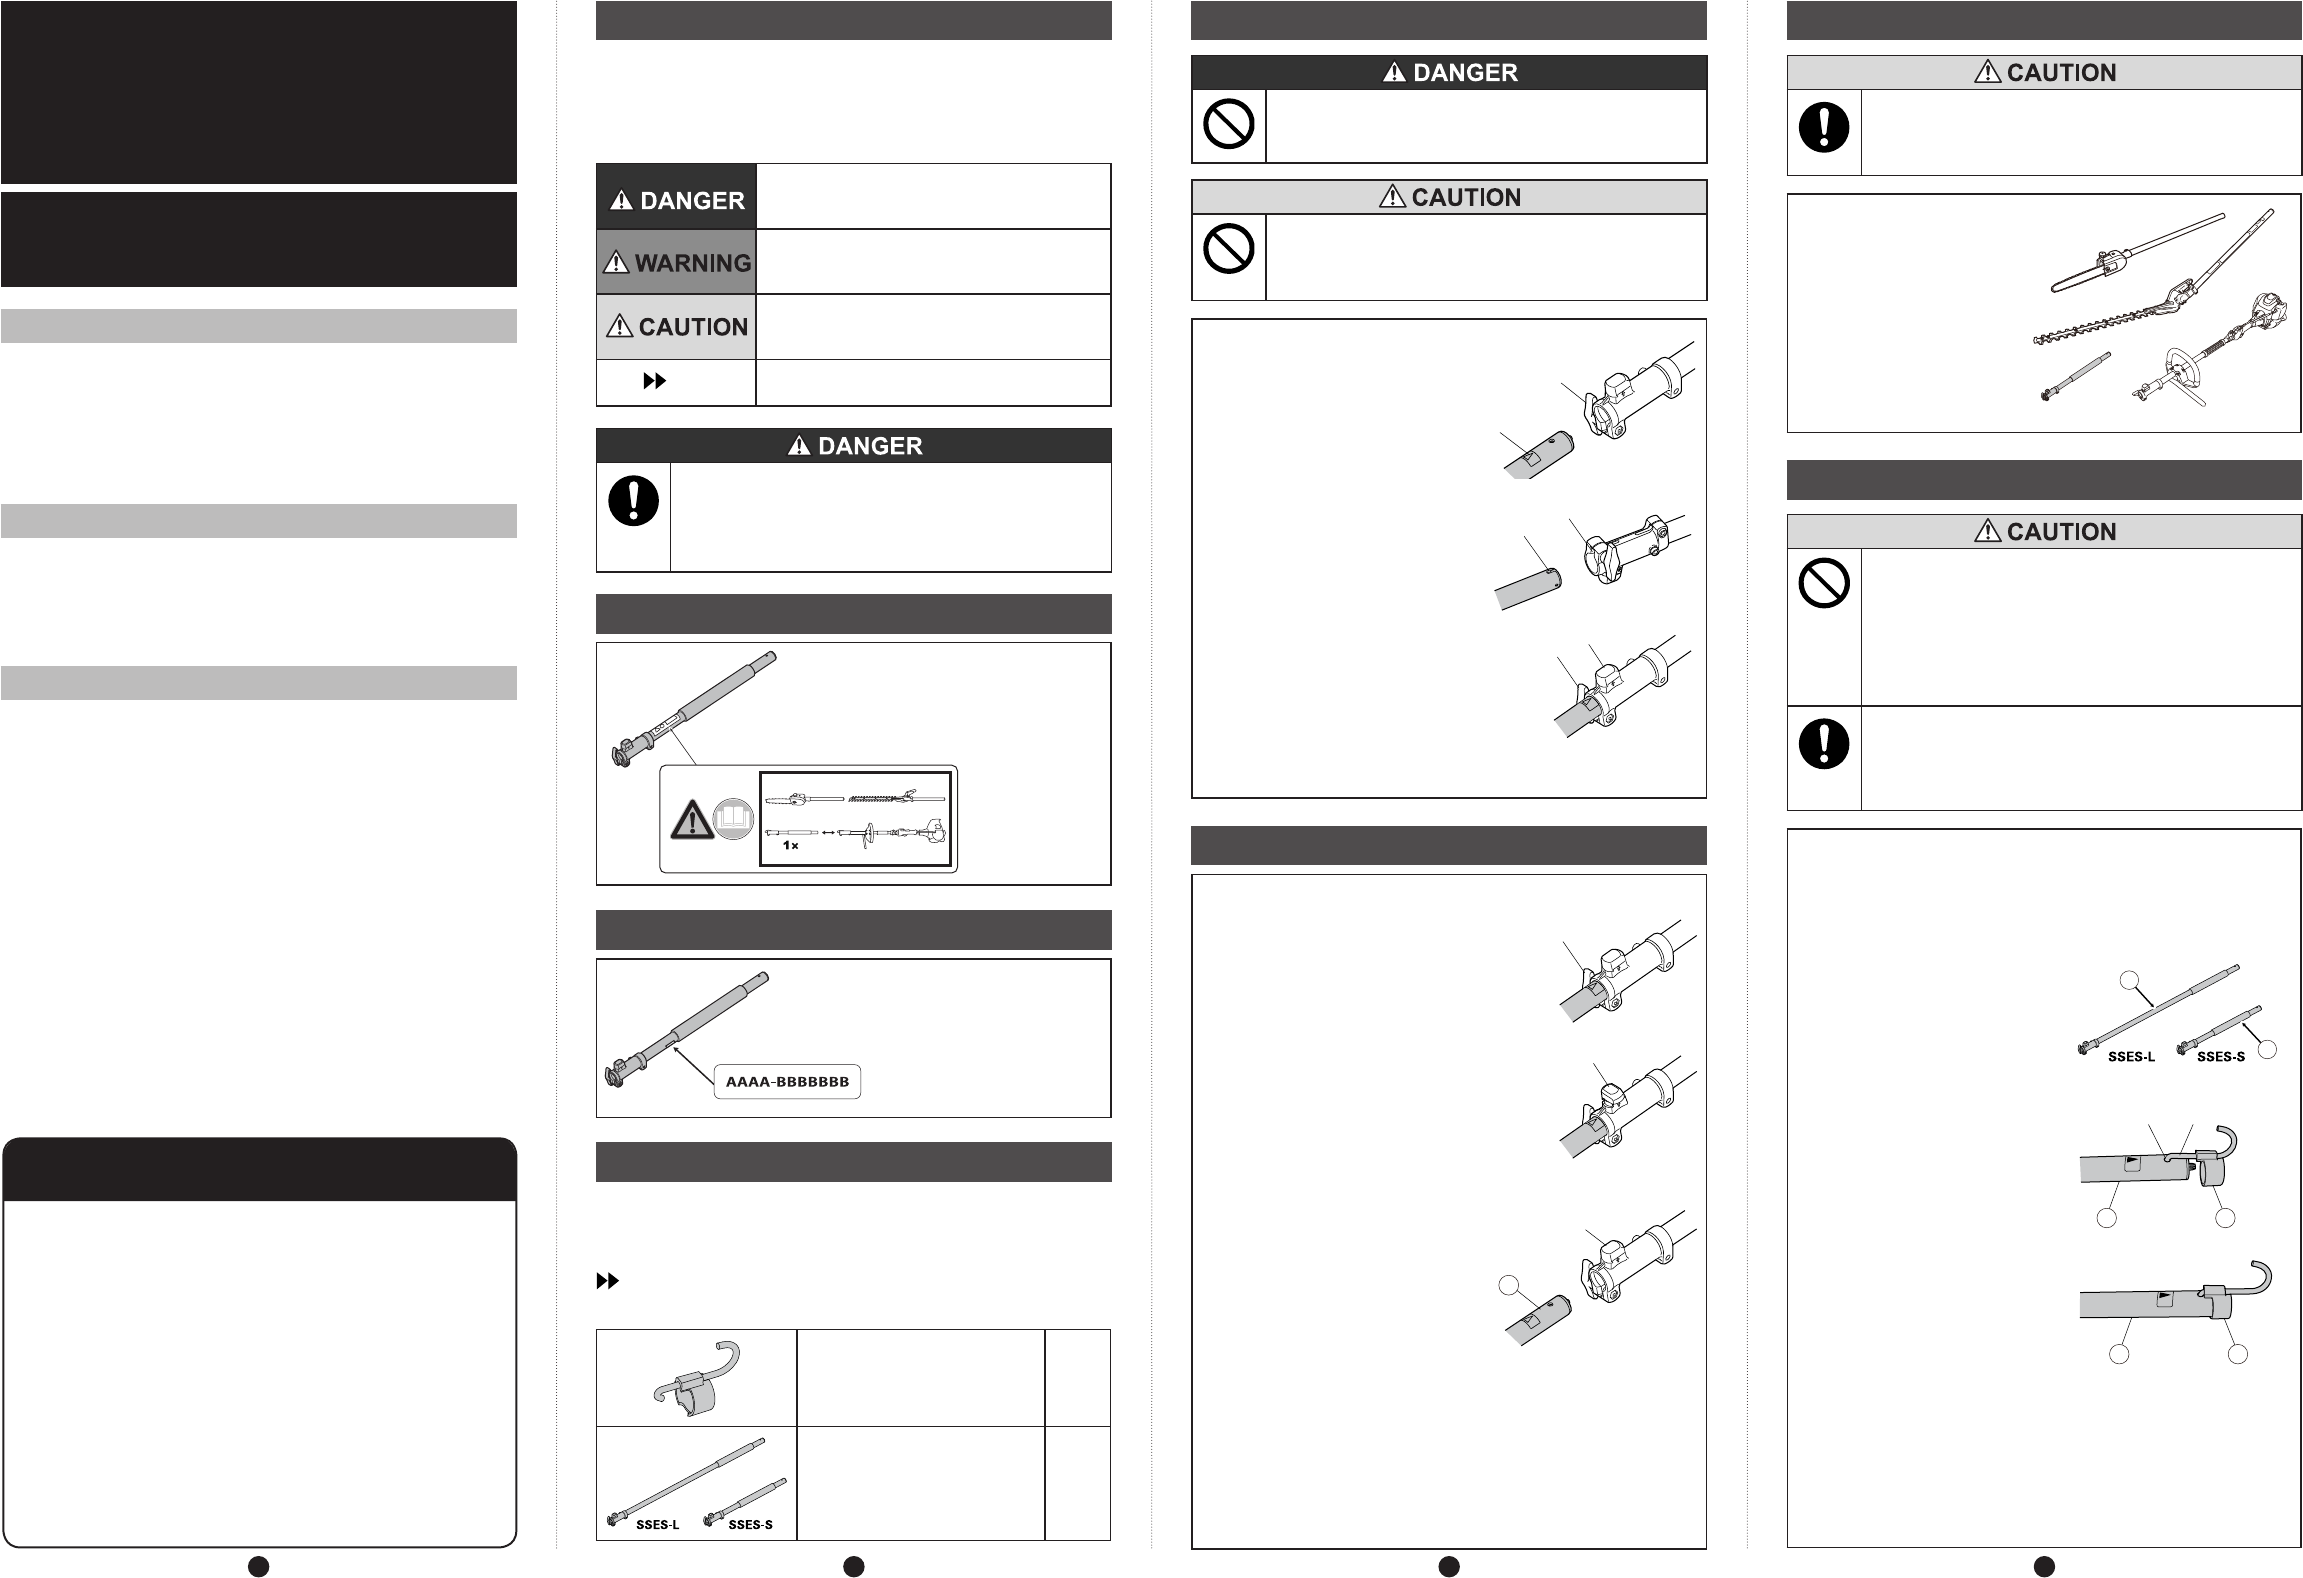
Connecting
Do not use more than one extension pipe.
* It could cause a serious accident.
Do not connect to any attachment other than
hedge trimmer or pole pruner.
* Otherwise, you could fall down, resulting in injury.
Connect the shaft tube and powerhead.
1
Loosen the knob bolt
[1] of powerhead
connections.
1
4
2
Align the boss (protrusion)
[2] at the end of the pipe
with the slit of the joint
case [3], and insert it to
the label [4] position.
2
3
3
Make sure that the positioning
knob [5] is lowered to the
original position, and then
tighten the knob bolt [1] of
powerhead connections.
1
5
Connect the shaft tube and attachment in the same manner.
J
Removing
Remove the shaft tube from the powerhead.
1
Loosen the knob bolt [1] of
powerhead connections.
1
2
Lift the positioning knob [5],
and turn it.
When the positioning knob [5]
is lifted, it can be rotated both
clockwise and counterclockwise
by 90°.
5
3
Pull out the shaft tube
Ⓑ
.
If the shaft tube
Ⓑ
is hard to
remove, hold it so that the
attachment is parallel to the
pipe of the powerhead, and
then pull out it.
5
B
4
Turn the positioning knob [5] until it comes to the
center.
When the positioning knob [5] is returned to the center,
it will be released downward.
Remove the shaft tube from the attachment in the same
manner.
Copyright (C) 2012 NIKKARI Co., Ltd. All Rights Reserved
E1386-0 2012.10
3421
Inquiry/Sales Agency
If you have any question about our product, contact the following.
Record serial No. in the space below.
Model code & Serial No.
SELE -
SELU -
SESE -
Purchased date
Sales agency
Need help? Post your question in this forum.
Report abuse
Libble takes abuse of its services very seriously. We're committed to dealing with such abuse according to the laws in your country of residence. When you submit a report, we'll investigate it and take the appropriate action. We'll get back to you only if we require additional details or have more information to share.
Product:
Forumrules
To achieve meaningful questions, we apply the following rules:
First, read the manual;
Check if your question has been asked previously;
Try to ask your question as clearly as possible;
Did you already try to solve the problem? Please mention this;
Is your problem solved by a visitor then let him/her know in this forum;
To give a response to a question or answer, do not use this form but click on the button 'reply to this question';
Your question will be posted here and emailed to our subscribers. Therefore, avoid filling in personal details.
Register
Register getting emails for Honda SSES at:
new questions and answers
new manuals
You will receive an email to register for one or both of the options.
Get your user manual by e-mail
Enter your email address to receive the manual of Honda SSES in the language / languages: English as an attachment in your email.
The manual is 0,59 mb in size.
You will receive the manual in your email within minutes. If you have not received an email, then probably have entered the wrong email address or your mailbox is too full. In addition, it may be that your ISP may have a maximum size for emails to receive.
If you have not received an email with the manual within fifteen minutes, it may be that you have a entered a wrong email address or that your ISP has set a maximum size to receive email that is smaller than the size of the manual.
The email address you have provided is not correct.
Please check the email address and correct it.
Your question is posted on this page
Would you like to receive an email when new answers and questions are posted? Please enter your email address.