6
Uitleg toetsen op de afstandbediening
Opmerking:
• Na het inschakelen van de voeding is een pieptoon hoorbaar en de indicator rood
gekleurd. De airconditioner is nu te bedienen met de afstandsbediening.
• Als het toestel is ingeschakeld, zal bij iedere bediening, het signaal icoon op de
afstandsbediening één keer knipperen. Het toestel zal tevens iedere keer een pieptoon laten
horen, dit geeft aan dat het signaal naar het toestel wordt gezonden.
• Als het toestel is uitgeschakeld, geeft het display van de afstandsbediening de ingestelde
temperatuur aan.
Als het toestel is ingeschakeld, dan laat het display de ingeschakelde functies zien.
• Na het drukken op de “+” of “-” toets, wordt de ingestelde temperatuur veranderd
met 1° C. Door de toetsen langer dan 2 sec. vast te houden gaat dit instellen sneller. De
temperatuur op het toestel zal ook mee veranderen
• Tijdens de TIMER ON of TIMER OFF mode kunt u d.m.v. deze toetsen ook de tijd instellen.
Voor verdere informatie hierover zie TIMER toets.
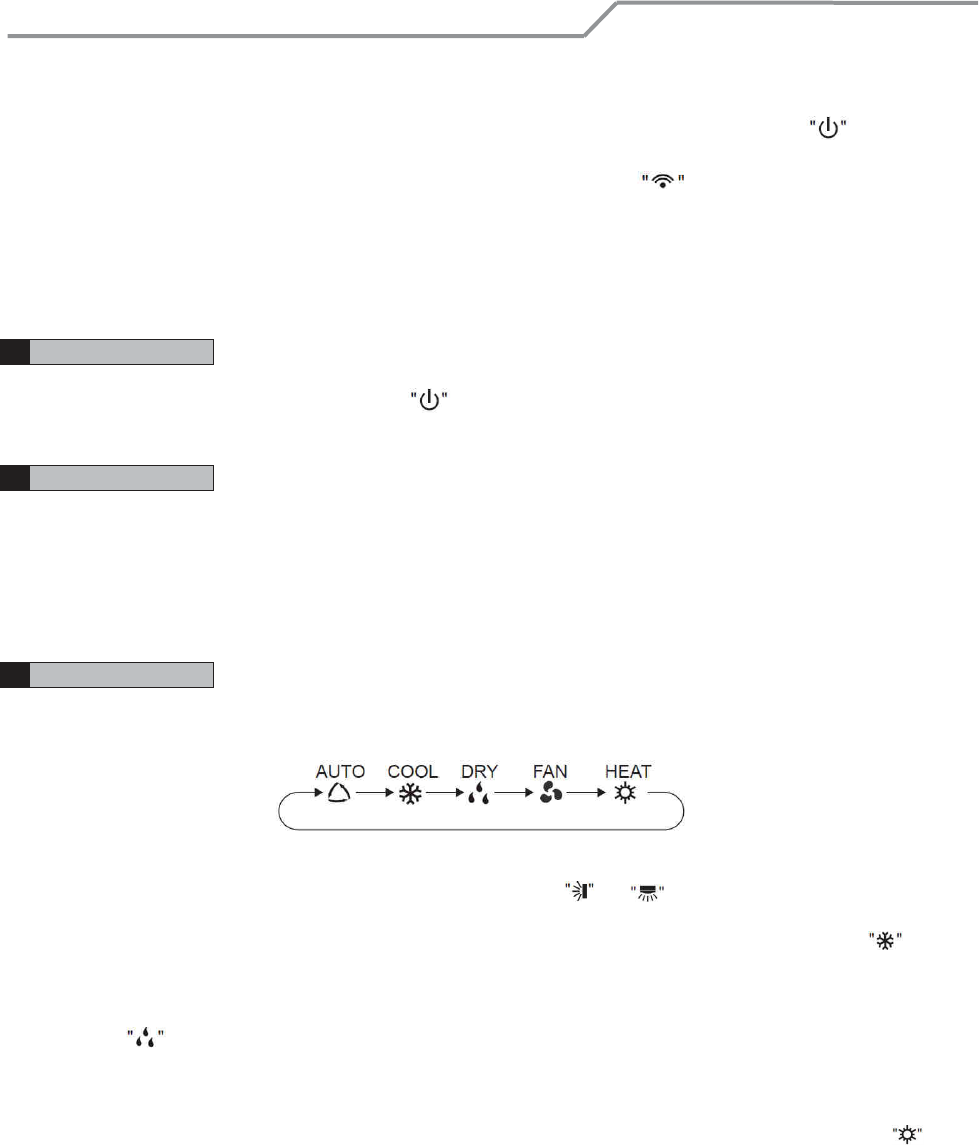
Druk op deze toets om de volgende keuze te maken.
• Bij keuze AUTO, zal het toestel automatisch werken afhankelijk van de ruimte temperatuur.
De ingestelde temperatuur is niet zichtbaar en wordt ook niet zichtbaar. Druk op de “FAN”
toets om de ventilatorsnelheid in te stellen. Druk op of om de uitblaas richting in te
stellen.
• Bij de keuze Cool, zal het toestel werken in de verkoelingsstand. De koel indicator op
het toestel is aan. Druk op “+”of “-” om de temperatuur in te stellen. Druk op de “FAN”
toets om de ventilatorsnelheid in te stellen.
• Bij de keuze Dry, zal het toestel werken in de ontvochtigingsstand op lage snelheid. De Dry
indicator op het toestel is aan. In deze stand kan de ventilatorsnelheid niet worden
ingesteld.
• Bij de keuze Fan, zal het toestel werken in de ventileren mode. De FAN indicator is aan. Alle
andere indicatoren zijn uitgeschakeld.
• Bij de keuze Heat, zal het toestel werken in de verwarmingsstand. De Heat indicator op
het toestel is aan. Druk op de “FAN” toets om de ventilatorsnelheid in te stellen. Druk op
“+”of “-” om de temperatuur in te stellen.
Opmerking:
Om een koude uitblaas te voorkomen tijdens het verwarmen, zal de ventilator met een
vertraging van 1- 5 minuten starten. (afhankelijk van de ruimte temperatuur)
De temperatuur kan worden ingesteld van 16° C ~ 30° C. de ventilator snelheid kon worden
ingesteld op: Auto, laag, midden en hoge snelheid.