Sw3 : ON eindweerstand is ingeschakeld, OFF eindweerstand is uitgeschakeld
Sw4 : Geen functie
Sw5 : Alleen op ON indien kabelafstand van monitor tot deurpaneel meer dan 80 meter bedraagt
C.L.PP.A.
C.L.PP.A.
JP2
JP1
JP2JP1
*
TEKNA V2Plus
Jp2 geplaatst, Jp1 verwijderd: Potentiaal vrij contact tussen aansluiting PA en PB
bij indrukken van de optietoets
Maximaal 40 mA, 12V AC/DC
Jp1 geplaatst, Jp2 verwijderd: Geen functie meer voor de aansluitingen PA en PB
Optietoets A1 activeert een SAR-2Plus busrelais indien aanwezig in de
installatie en geconfigureerd
PROGRAMMEREN TEKNA V2Plus:
* Fabrieks Instelling
Welk type buitendeurpaneel is geplaatst?
EL500/V2Plus (indien er een EL500/V2Plus is geplaatst):
Zet Sw2 van de EL500/V2Plus op „ON“ daarmee zal de groene LED op de EL500/V2Plus gaan
knipperen. Naar Stap 3.
Codepaneel (indien er een codepaneel is geplaatst):
Toets het „sleutel“ symbool in gevolgd door de code indien er een codepaneel is geplaatst.
Druk twee maal op de pijltoets omlaag voor de legenda en druk vervolgens op de beltoets „OK“, ga
naar „aanpassen“ en druk nogmaals op de beltoets, zoek nu het huisnummer op met de pijltoetsen.
Het huisnummer staat aan de rechterzijde en de code aan de linkerzijde, indien er alleen rechts een
huisnummer staat, dan is het huisnummer de code, schrijf de code op of onthoud deze.
Ga terug met de „C“ toets naar Instellingen. Naar Stap 3.
Monitor:
Druk de deuropenertoets in en houd deze ingedrukt...
Neem de hoorn van de haak.
Laat de deuropenertoets pas los wanneer het beeld opkomt.
Druk de gewenste beldrukker of code in die bij de monitor hoort. Per appartement of huisnummer dient 1
monitor als MASTER te worden geprogrammeerd. Bevestig de code door op het belsymbool te drukken.
- Voor instellen van een MASTER toestel (1e toestel in het appartement), plaats de hoorn terug.
- Voor instellen van een SLAVE toestel (2e toestel in het appartement), druk 1 maal op de
deuropenertoets en plaats vervolgens de hoorn terug.
Herhaal deze stappen voor alle ander toestellen die geprogrammeerd moeten worden.
Als de programmering klaar is sluit dan de programmering af door Sw2 van de EL500/V2Plus
weer op OFF te plaatsen en bij het codepaneel, druk twee maal op de „C“ toets.
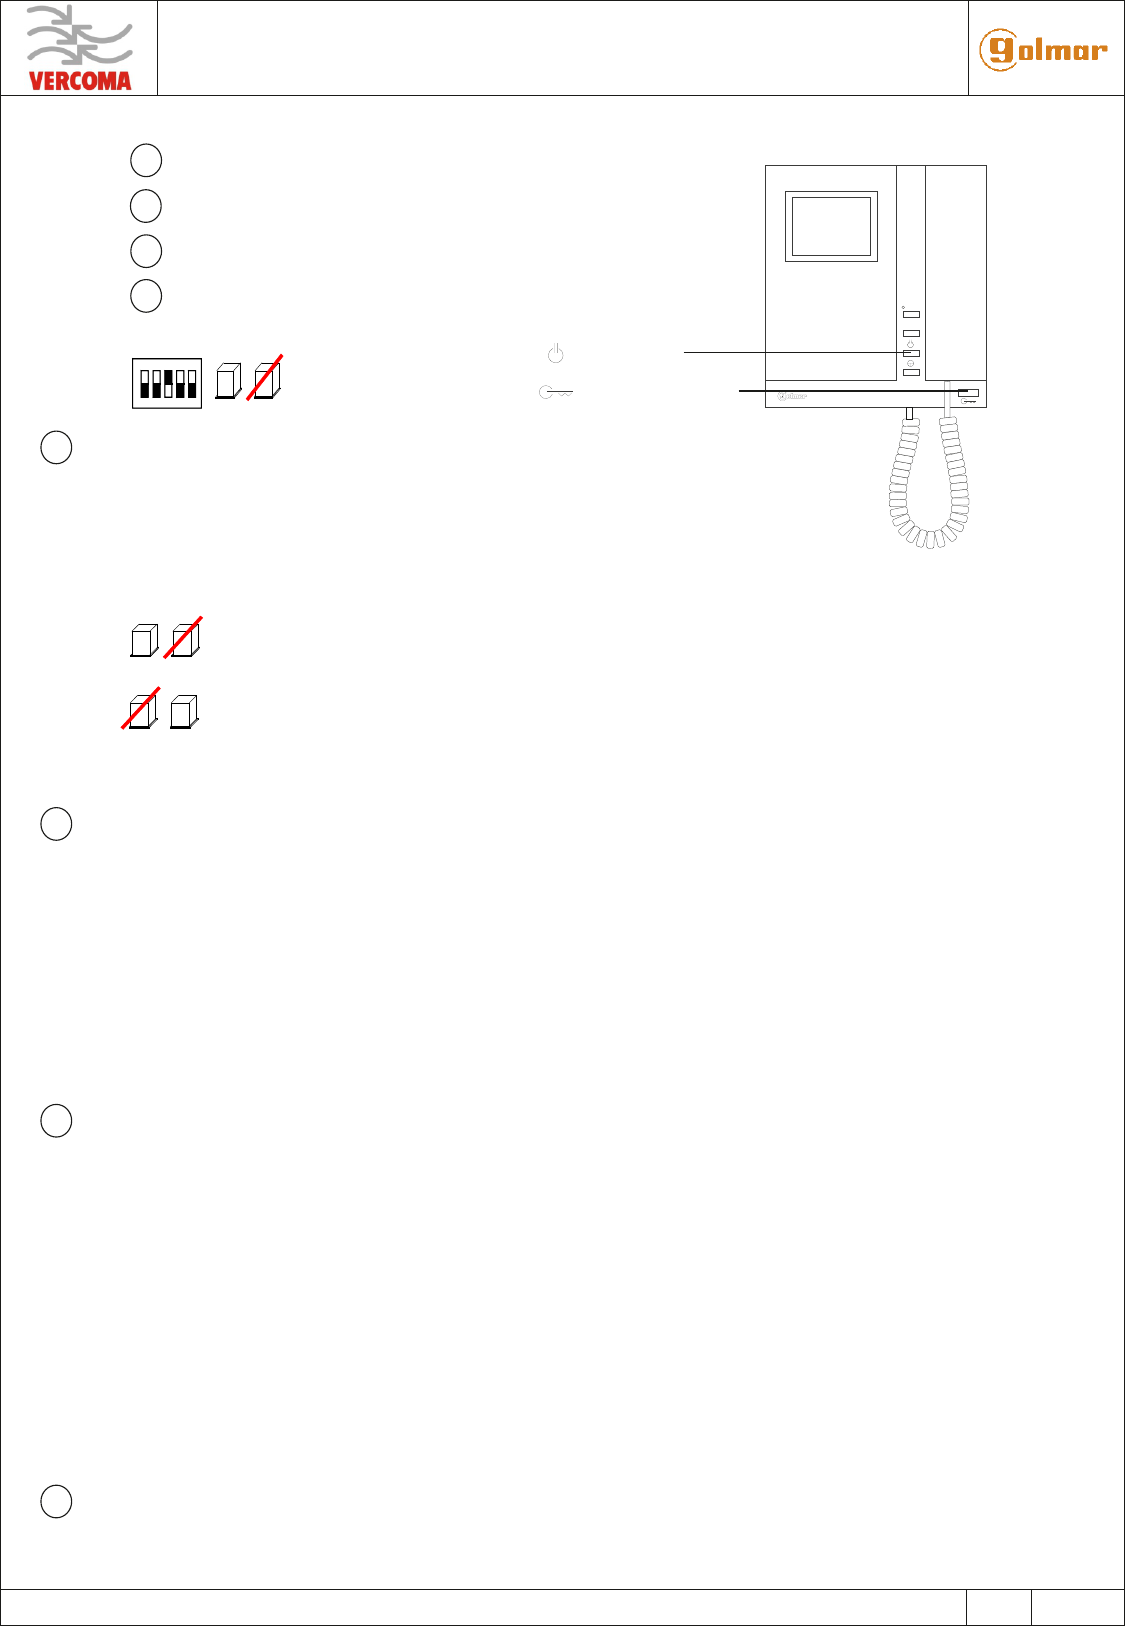
TEKNA V2Plus is voorzien van een ingebouwde eindweerstand:
Indien de BUS bekabeling niet doorgelust wordt maar vanaf een splitter komt of het betreft
de laatste monitor, zet dan Sw3 op „ON“ in alle andere gevallen zet Sw3 op „OFF“.
Geluid afregelen van de installatie:
Het geluidsniveau dient afgeregeld te worden naar de dichtstbijzijnde deurtelefoon of monitor.
Het deurpaneel bevat twee instel potentiometers waarmee het geluid afgeregeld wordt.
Optietoets
Deuropenertoets
1
STAP: Instellingen monitor controleren.
STAP: Beldrukkerpaneel of codepaneel?
STAP: Monitor programmeren.
STAP: Afregelen geluid nieuwe installatie.
2
3
4
1
2
3
4
Need help? Post your question in this forum.
Report abuse
Libble takes abuse of its services very seriously. We're committed to dealing with such abuse according to the laws in your country of residence. When you submit a report, we'll investigate it and take the appropriate action. We'll get back to you only if we require additional details or have more information to share.
Product:
Forumrules
To achieve meaningful questions, we apply the following rules:
First, read the manual;
Check if your question has been asked previously;
Try to ask your question as clearly as possible;
Did you already try to solve the problem? Please mention this;
Is your problem solved by a visitor then let him/her know in this forum;
To give a response to a question or answer, do not use this form but click on the button 'reply to this question';
Your question will be posted here and emailed to our subscribers. Therefore, avoid filling in personal details.
Register
Register getting emails for Golmar TEKNA V2 Plus at:
new questions and answers
new manuals
You will receive an email to register for one or both of the options.
Get your user manual by e-mail
Enter your email address to receive the manual of Golmar TEKNA V2 Plus in the language / languages: Dutch as an attachment in your email.
The manual is 1,43 mb in size.
You will receive the manual in your email within minutes. If you have not received an email, then probably have entered the wrong email address or your mailbox is too full. In addition, it may be that your ISP may have a maximum size for emails to receive.
If you have not received an email with the manual within fifteen minutes, it may be that you have a entered a wrong email address or that your ISP has set a maximum size to receive email that is smaller than the size of the manual.
The email address you have provided is not correct.
Please check the email address and correct it.
Your question is posted on this page
Would you like to receive an email when new answers and questions are posted? Please enter your email address.