The battery is supplied with a partial charge. Please charge it completely before use.
¤Charge the handset in the base for 8.5 hours.
Please note
The handset must only be placed in the designated base or charger.
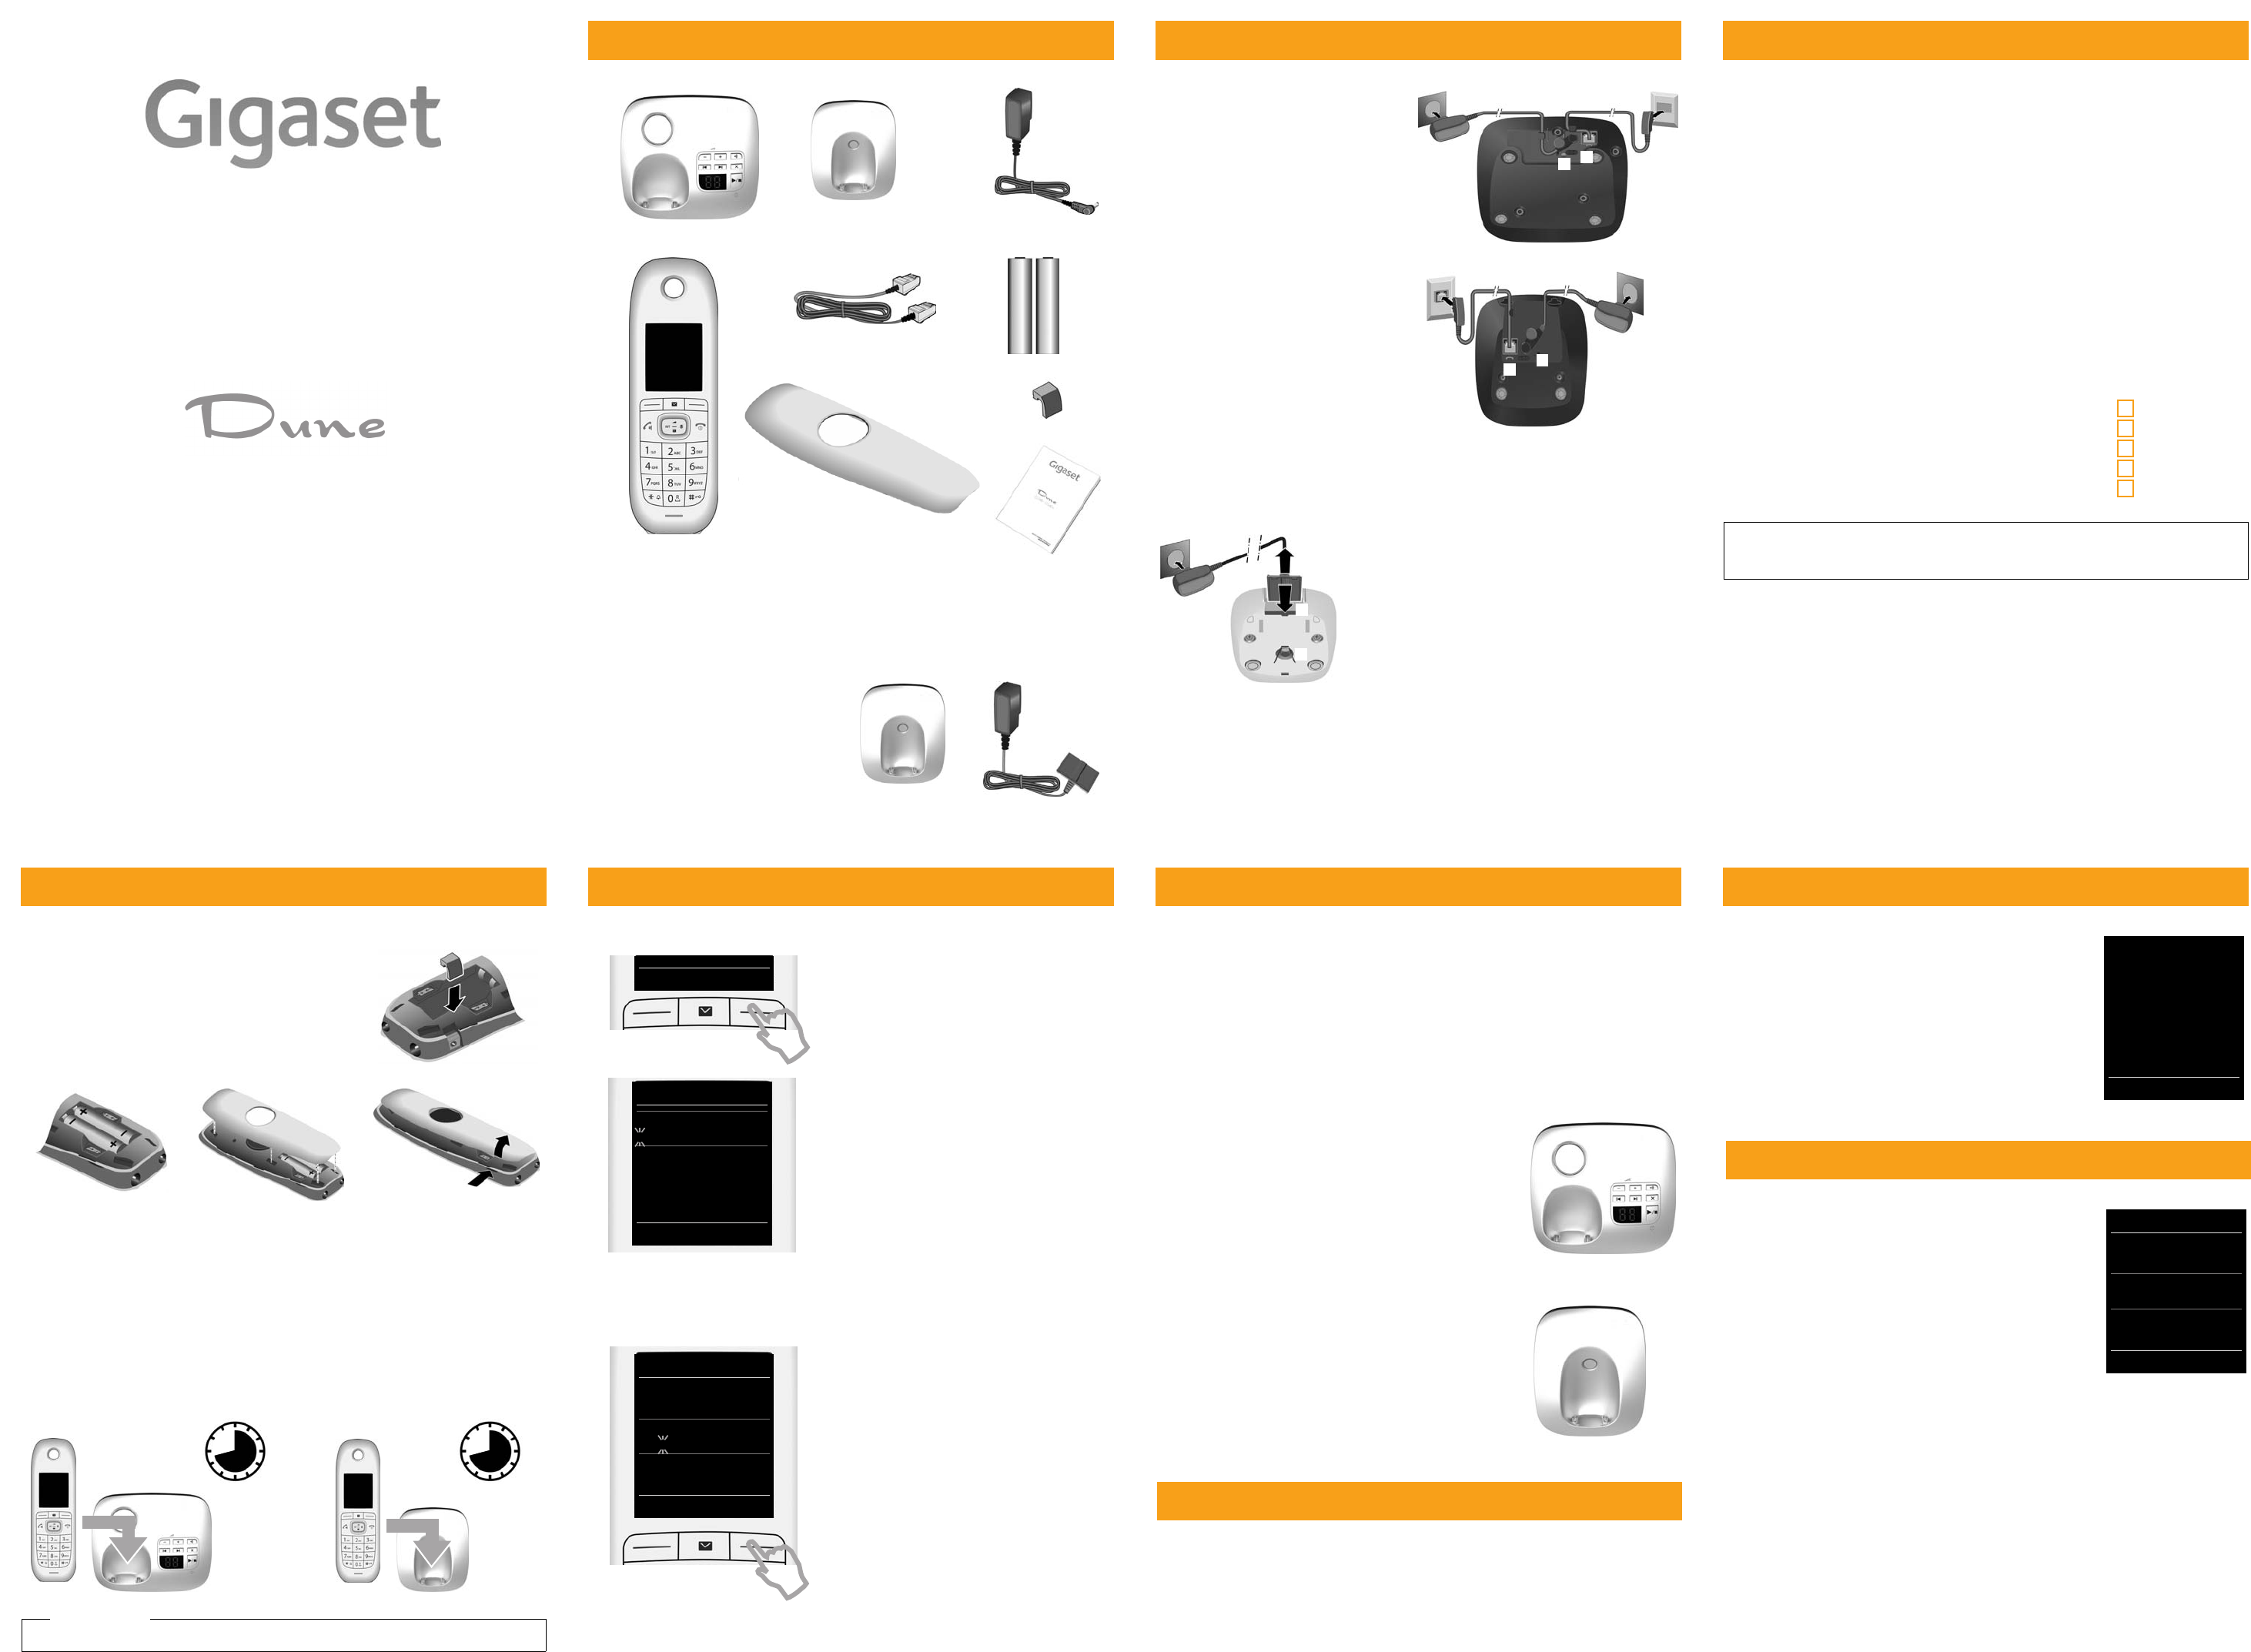
¤Insert the batteries with
the polarity in the right
direction (for correct +/-
direction, see diagram).
¤First orientate the battery
cover with the side tabs
fitting into the slots on
the inside of the casing.
¤Then press the cover until
it clicks into place.
If you have to open the bat-
tery cover:
¤Grip the side hollows and
slide the battery cover
diagonally upwards.
The display is protected by a plastic film. Please remove the protective film!
Inserting the rubber seal for the headset plug socket
Open the battery cover and insert the rubber seal into the groove.
Insert battery
8.5 h8.5 h
CL540A
CL540
Setting the date and time
Set the date/time so that the correct date and time can be assigned to incoming calls, and so
that you can use the alarm.
¤Press the key Time below the display screen to
open the input field.
(If you have already set the date/time, open the
input field via the menu:
v
¤Ï¤OK¤Date/Time¤OK)
The submenu Date/Time is shown on the display.
¤The active input position flashes.
Enter the day, month and year as an
8-digit number via the keypad,
e.g.
14102014
for 14.10.2014.
If you wish to change the input position,
pr
ess leftu or right v on the control key.
¤Press the down control key to switch to the
time input field.
¤Enter the hours and minutes in 4-digit format
via the keypad e.g., 0715 for
07:15 am.
Change the input position with the control key
if necessary.
¤Press the key Save below the display screen to
save the entry.
CallsTime
Date/Time
Date:
15.01.2013
Time:
00:00
BackSave
Date/Time
Date:
14.10.2013
Time:
07:15
BackSave
Handset registration
Handsets contained in the package have already been registered to the base.
If, however, a handset has not been registered (display "Please register handset" or "Place
handset in base"), you must register it to the base.
if your handset is flashing the text "No Base" then it can be that:
uYour base station is not switched on, please check if the power supply is connected
properly.
uThere is too much distance between the handset and the base.
If the handset has not been pre-registered or you want to register an additional handset
to your base station, use the registration procedure below.
uAutomatically registering the Gigaset CL540 handset
to base station:
¤Place the handset in the base.
If automatic registration does not work, the handset
will have to be registered manually.
uManually registering the handset:
¤On the base: Press and hold (min. 3 seconds) the
Registration/paging key 1.
¤On the CL540 handset, press the display key
Register.
Or:
v
¤Ï¤OK¤q Registration¤OK
¤Register Handset ¤OK
Display shows: Searching for a base in registration mode.
The connection to the base will be established; this may
take some time.
¤ Enter the system PIN if required (factory setting: 0000)
¤OK
You can register up to six handsets to your base. You can
also register other Gigaset handsets and handsets from
other devices with GAP functionality.
Dial Tone
The dial tone will only be heard when pressing the call button c for 2 seconds. A short press
will open the redial list.
CL540A
CL540
1
1
Message lists
Any messages you receive are saved in the message lists. An
advisory tone sounds as soon as a new entry appears on a list.
The Message key also flashes. Icons for message types and the
number of new messages are shown on the idle display.
New messages available:
uÃOn the answer machine (only CL540A)/
network mailbox
u™In the missed calls list
uoIn the missed alarms list
Open the message list by pressing the Message key f.
Answer machine
Activating/deactivating the answer machine
v
¤Ì¤OK¤qActivation (μ= activated) ¤Change
¤Activation:r On / Off
If activated:
¤Mode:
r Answer & record / Answer only / Alternating
–Answer & record: The caller can leave a message;
–Answer only: The caller only hears an announcement
and cannot leave a message;
–Alternating:
If activated, Record from:s / Record until: Enter the
length of time in which messages are recorded.
¤Save
¨Ã
£
07:15
INT 114 Oct
Ã
™
o
021008
CallsCalendar
Example
Answer Machine
Activation:
On
Mode:
<Alternating>
Record from:
08:00
‚
BackSave
Example
CL540 - CL540 A
Quick Start Guide
GIGASET HELPLINE: 084503 18190
GIGASET. INSPIRING CONVERSATION.
MADE IN GERMANY
Need help? Post your question in this forum.
Report abuse
Libble takes abuse of its services very seriously. We're committed to dealing with such abuse according to the laws in your country of residence. When you submit a report, we'll investigate it and take the appropriate action. We'll get back to you only if we require additional details or have more information to share.
Product:
Forumrules
To achieve meaningful questions, we apply the following rules:
First, read the manual;
Check if your question has been asked previously;
Try to ask your question as clearly as possible;
Did you already try to solve the problem? Please mention this;
Is your problem solved by a visitor then let him/her know in this forum;
To give a response to a question or answer, do not use this form but click on the button 'reply to this question';
Your question will be posted here and emailed to our subscribers. Therefore, avoid filling in personal details.
Register
Register getting emails for Gigaset CL540 Dune at:
new questions and answers
new manuals
You will receive an email to register for one or both of the options.
Get your user manual by e-mail
Enter your email address to receive the manual of Gigaset CL540 Dune in the language / languages: English as an attachment in your email.
The manual is 0,22 mb in size.
You will receive the manual in your email within minutes. If you have not received an email, then probably have entered the wrong email address or your mailbox is too full. In addition, it may be that your ISP may have a maximum size for emails to receive.
If you have not received an email with the manual within fifteen minutes, it may be that you have a entered a wrong email address or that your ISP has set a maximum size to receive email that is smaller than the size of the manual.
The email address you have provided is not correct.
Please check the email address and correct it.
Your question is posted on this page
Would you like to receive an email when new answers and questions are posted? Please enter your email address.