3580
8
Zoom out
Zoom in
Previous page
1/10
Next page
ENGLISH
Milk frother version:
1 Make espresso (in large cups) as described
above.
2 Depress steam switch (4) to 1”.
3 After 10 to 15 seconds or when the tempe-
rature ready-light (3) goes on, place the
suction pipe (C) into the cold milk container
and the cup containing the espresso under
the milk frother (24) .
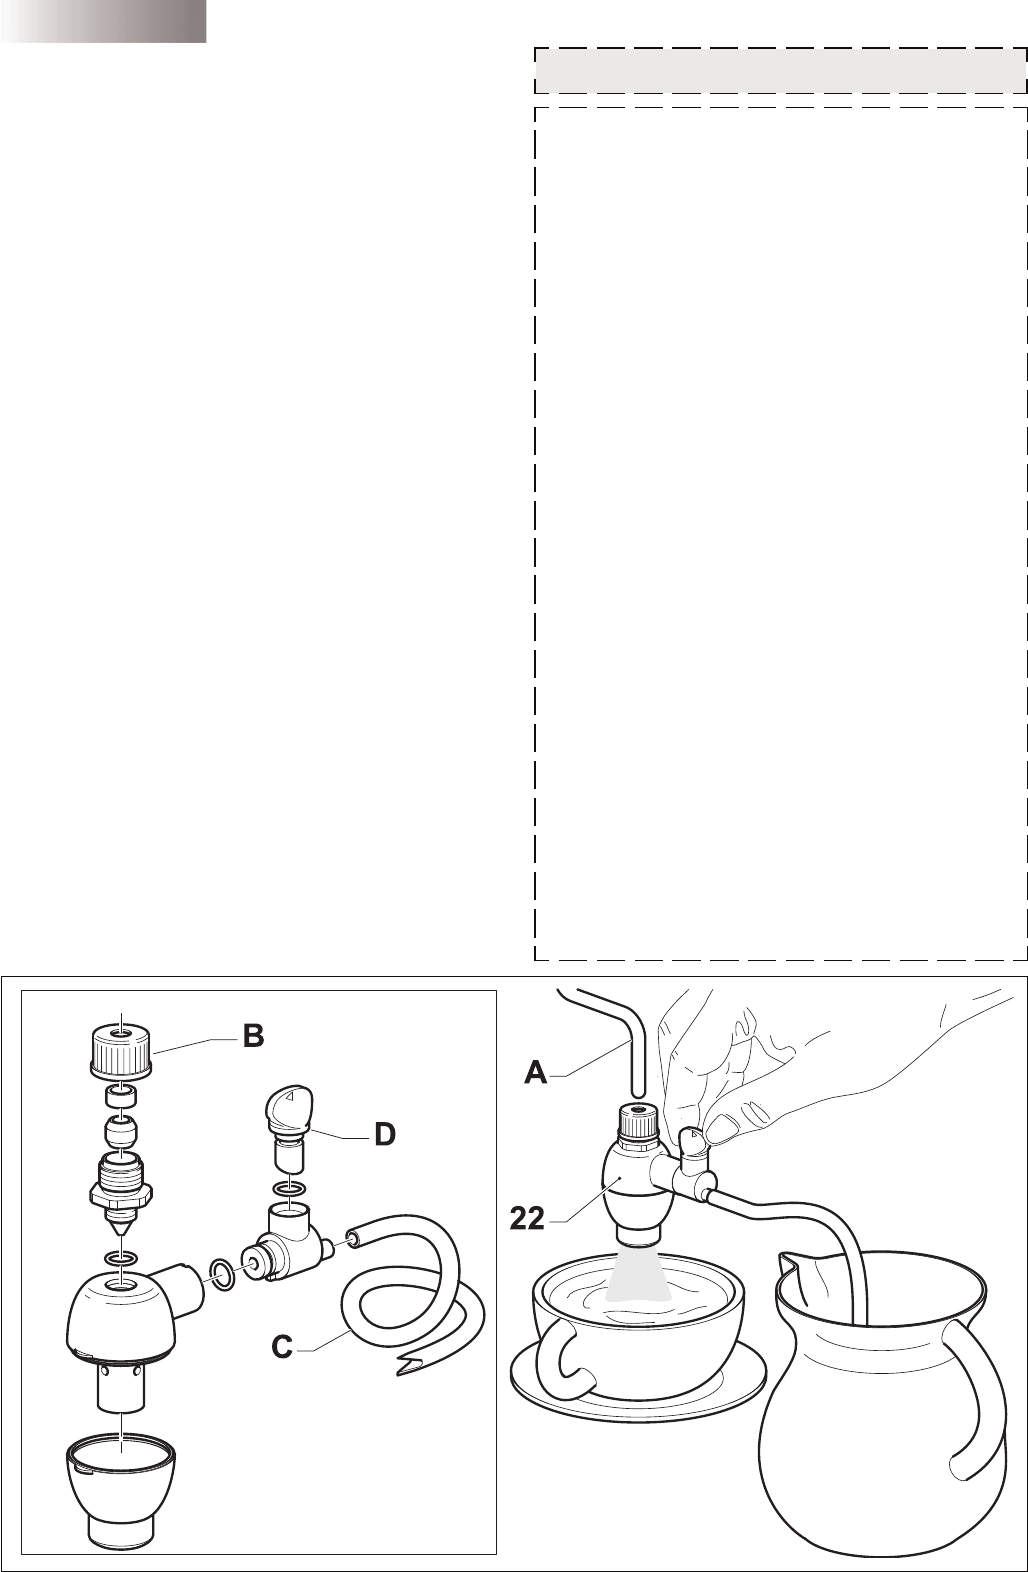
Milk frother (24)
The milk frother (24) is a special device that
allows an easy frothing by sucking milk
directly out from its container.
When preparing to make cappuccino, have
all the ingredients at hand as well as a
container of cold milk and cups that are larger
than those used for espresso.
Make sure that the milk frother (24) is correctly
mounted on the steam nozzle (A) by turning
the ring nut (B), and place the suction pipe (C)
into the cold milk container.
It is possible to adiust the amount of milk that
is sucked up by means of the bar (D). The
position that is shown in the picture indicates
the maximun suction, milk is lukewarm. By
turning the bar (D) 180°, the minimum suction
is set,and milk is warmer.
4 Slowly turn steam valve knob (7) counter
clockwise to release steam.
IMPORTANT.
The more you turn the knob,
the greater the steam pressure for frothing.
N.B.:
Dispensing should not exceed 60
seconds.
5 Move pitcher in circular motion keeping the
tip of steam nozzle just under surface of milk
as it begins to froth. Do not let milk come to
a boil since it will not froth.
6 When you have made enough froth,turn steam
knob clockwise to shut off steam and remove
pitcher. Put steam switch (4) to pos. 0”.
7 Spoon the froth onto the espresso in each
cup and gently pour the hot milk along the
side of the cup. Top each cup of cappucci-
no with a dash of cinnamon, cocoa and
nutmeg. Serve.
8 NOTE:
If you want to make more espresso
immediately after steaming milk, the machine
boiler must be refilled with water and tempe-
rature brought down to a brewing temperatu-
re. Otherwise, espresso may taste “burned.
To do this: place an empty cup on drip plate.
Do not insert filter holder. Turn hot water/
brew switch (4) to 1letting cup fill with
water. Turn brew switch 0”. You many now
proceed to make more espresso.
• 12 •
OPTIONAL
8


Need help? Post your question in this forum.

Forumrules


Report abuse

Libble takes abuse of its services very seriously. We're committed to dealing with such abuse according to the laws in your country of residence. When you submit a report, we'll investigate it and take the appropriate action. We'll get back to you only if we require additional details or have more information to share.

Product:

For example, Anti-Semitic content, racist content, or material that could result in a violent physical act.

For example, a credit card number, a personal identification number, or an unlisted home address. Note that email addresses and full names are not considered private information.

Forumrules

To achieve meaningful questions, we apply the following rules:

Register

Register getting emails for Gaggia Classic at:


You will receive an email to register for one or both of the options.


Get your user manual by e-mail

Enter your email address to receive the manual of Gaggia Classic in the language / languages: English as an attachment in your email.

The manual is 1,1 mb in size.


You will receive the manual in your email within minutes. If you have not received an email, then probably have entered the wrong email address or your mailbox is too full. In addition, it may be that your ISP may have a maximum size for emails to receive.

Others manual(s) of Gaggia Classic

Gaggia Classic User Manual - English, German, Dutch - 49 pages

Gaggia Classic User Manual - Dutch - 53 pages

Gaggia Classic User Manual - French, Italian, Portuguese, Spanish - 49 pages


The manual is sent by email. Check your email

If you have not received an email with the manual within fifteen minutes, it may be that you have a entered a wrong email address or that your ISP has set a maximum size to receive email that is smaller than the size of the manual.

The email address you have provided is not correct.

Please check the email address and correct it.

Your question is posted on this page

Would you like to receive an email when new answers and questions are posted? Please enter your email address.


Info