340836
7
Zoom out
Zoom in
Previous page
1/8
Next page
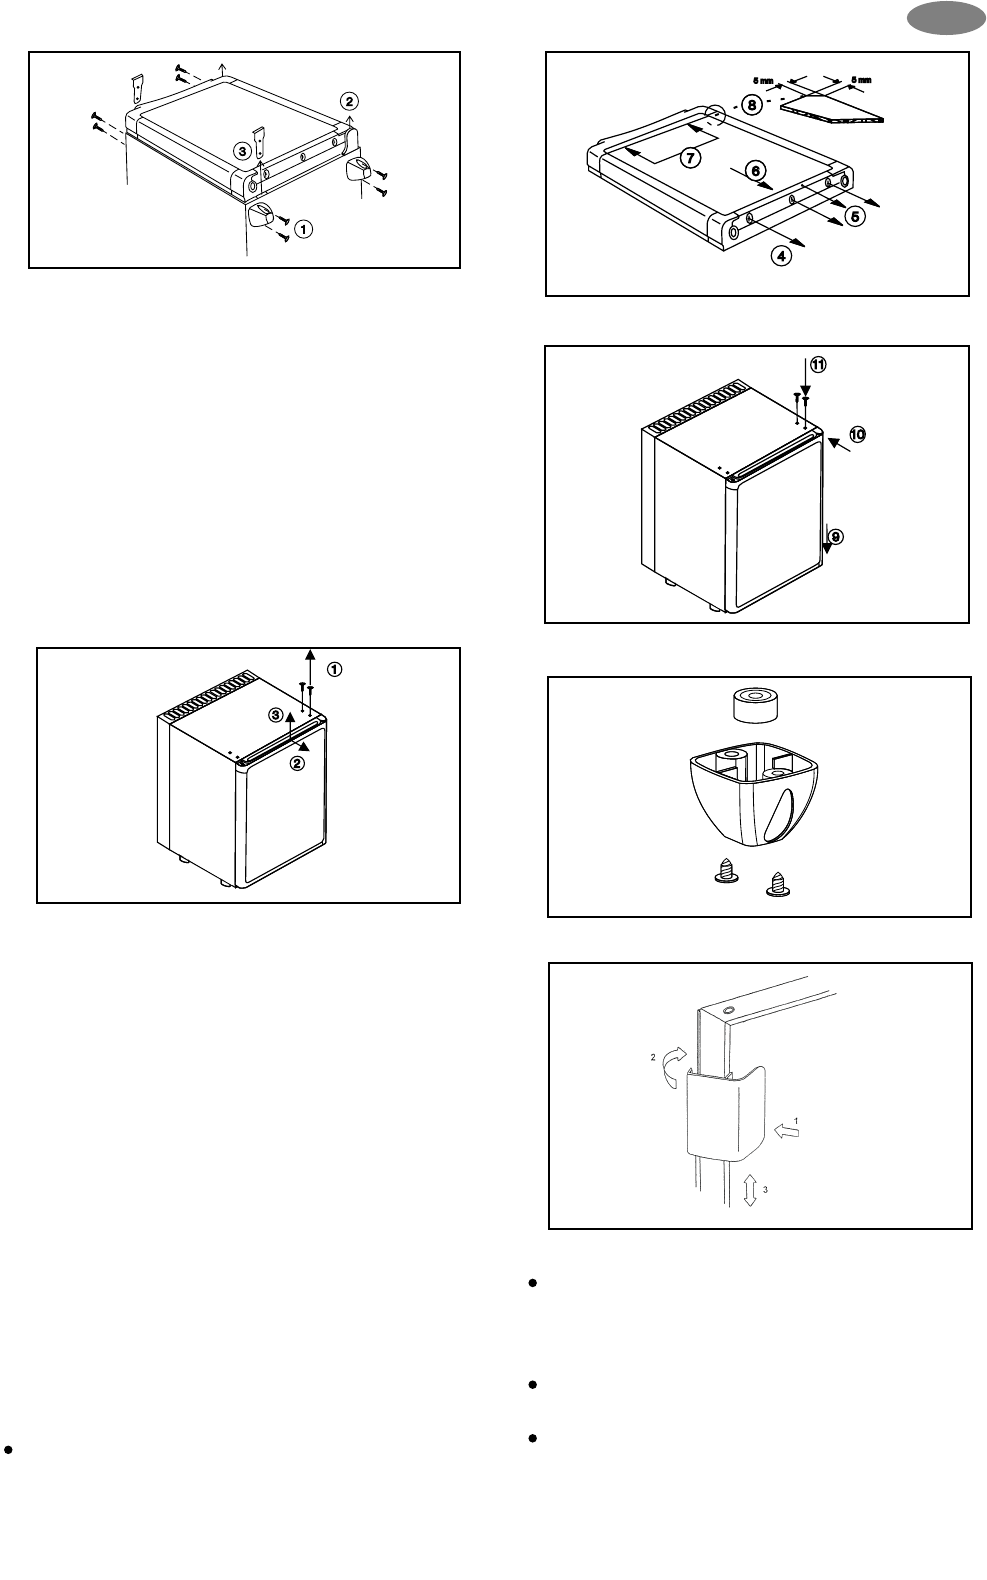
Verwijder de schroeven (4) en de steun van het
kader (5). Glijd het decoratieve paneel uit het
deurkader en vervang het door het nieuwe paneel
(7); de bovenste hoek van het paneel moet daarbij
exact parallel met de bovenste hoek van het kader
lopen. Het nieuwe paneel kan makkelijker worden
aangebracht in de bovenste hoek van het kader
als de twee hoeken met ongeveer 5x5 mm worden
afgerond (8). Plaats de steun van het kader terug
(5) en hecht het vast met de schroeven. Plaats de
deur in het onderste scharnier (9), klik het
bovenste scharnier vast in de opening en druk het
scharnier en de deur tegen de behuizing aan.
Bevestig de 2 schroeven (11).
12. Andere voetsteuntjes
aanbrengen
Voor de installatie van uw miniCool heeft u de
voetsteuntjes van 40 mm niet nodig. Nadat u ze
hebt verwijderd, kan u de steuntjes van 12 mm
aanbrengen die binnenin de voetsteuntjes van 40
mm zitten. Plaats de steuntjes van 12 mm in de
daartoe bestemde bevestigingspunten vooraan en
achteraan. De voetsteuntjes van 40 mm en de 4
overblijvende schroeven bewaart u best voor
eventueel later gebruik.
13. Assemblage van de
deurklink (afb. 11)
14. Klantenservice
Voor u de hulp van een service-monteur inroept,
kunt u zelf volgende eenvoudige tests uitvoeren:
Is er een stroomonderbreking? Controleer de
zekeringen.
Steekt de stekker stevig in het stopcontact en
is het actief? Controleer het stopcontact door
er een ander toestel, b.v. een tafellamp, op
aan te sluiten.
Is de thermostaat correct ingesteld (normaal
3 of 4)?
Was de deur misschien niet goed toe,
waardoor de temperatuur binnen te snel is
gaan stijgen?
37
Afbeelding 6.
Afbeelding 7.
Afbeelding.
Afbeelding 9.
Afbeelding 10.
Afbeelding 11.
NL
7


Need help? Post your question in this forum.

Forumrules


Report abuse

Libble takes abuse of its services very seriously. We're committed to dealing with such abuse according to the laws in your country of residence. When you submit a report, we'll investigate it and take the appropriate action. We'll get back to you only if we require additional details or have more information to share.

Product:

For example, Anti-Semitic content, racist content, or material that could result in a violent physical act.

For example, a credit card number, a personal identification number, or an unlisted home address. Note that email addresses and full names are not considered private information.

Forumrules

To achieve meaningful questions, we apply the following rules:

Register

Register getting emails for Electrolux ea 3080 at:


You will receive an email to register for one or both of the options.


Get your user manual by e-mail

Enter your email address to receive the manual of Electrolux ea 3080 in the language / languages: English, German, Dutch, Danish, French, Italian, Polish, Portuguese, Swedish, Spanish, Norwegian, Finnish as an attachment in your email.

The manual is 0,24 mb in size.


You will receive the manual in your email within minutes. If you have not received an email, then probably have entered the wrong email address or your mailbox is too full. In addition, it may be that your ISP may have a maximum size for emails to receive.

The manual is sent by email. Check your email

If you have not received an email with the manual within fifteen minutes, it may be that you have a entered a wrong email address or that your ISP has set a maximum size to receive email that is smaller than the size of the manual.

The email address you have provided is not correct.

Please check the email address and correct it.

Your question is posted on this page

Would you like to receive an email when new answers and questions are posted? Please enter your email address.


Info