Manual
1. Key feat
Full HD di
HDTV HDMI high defi
3.0” fine grade LTPS color LCD di
Slot for SD Memory card, s
Driver free for W
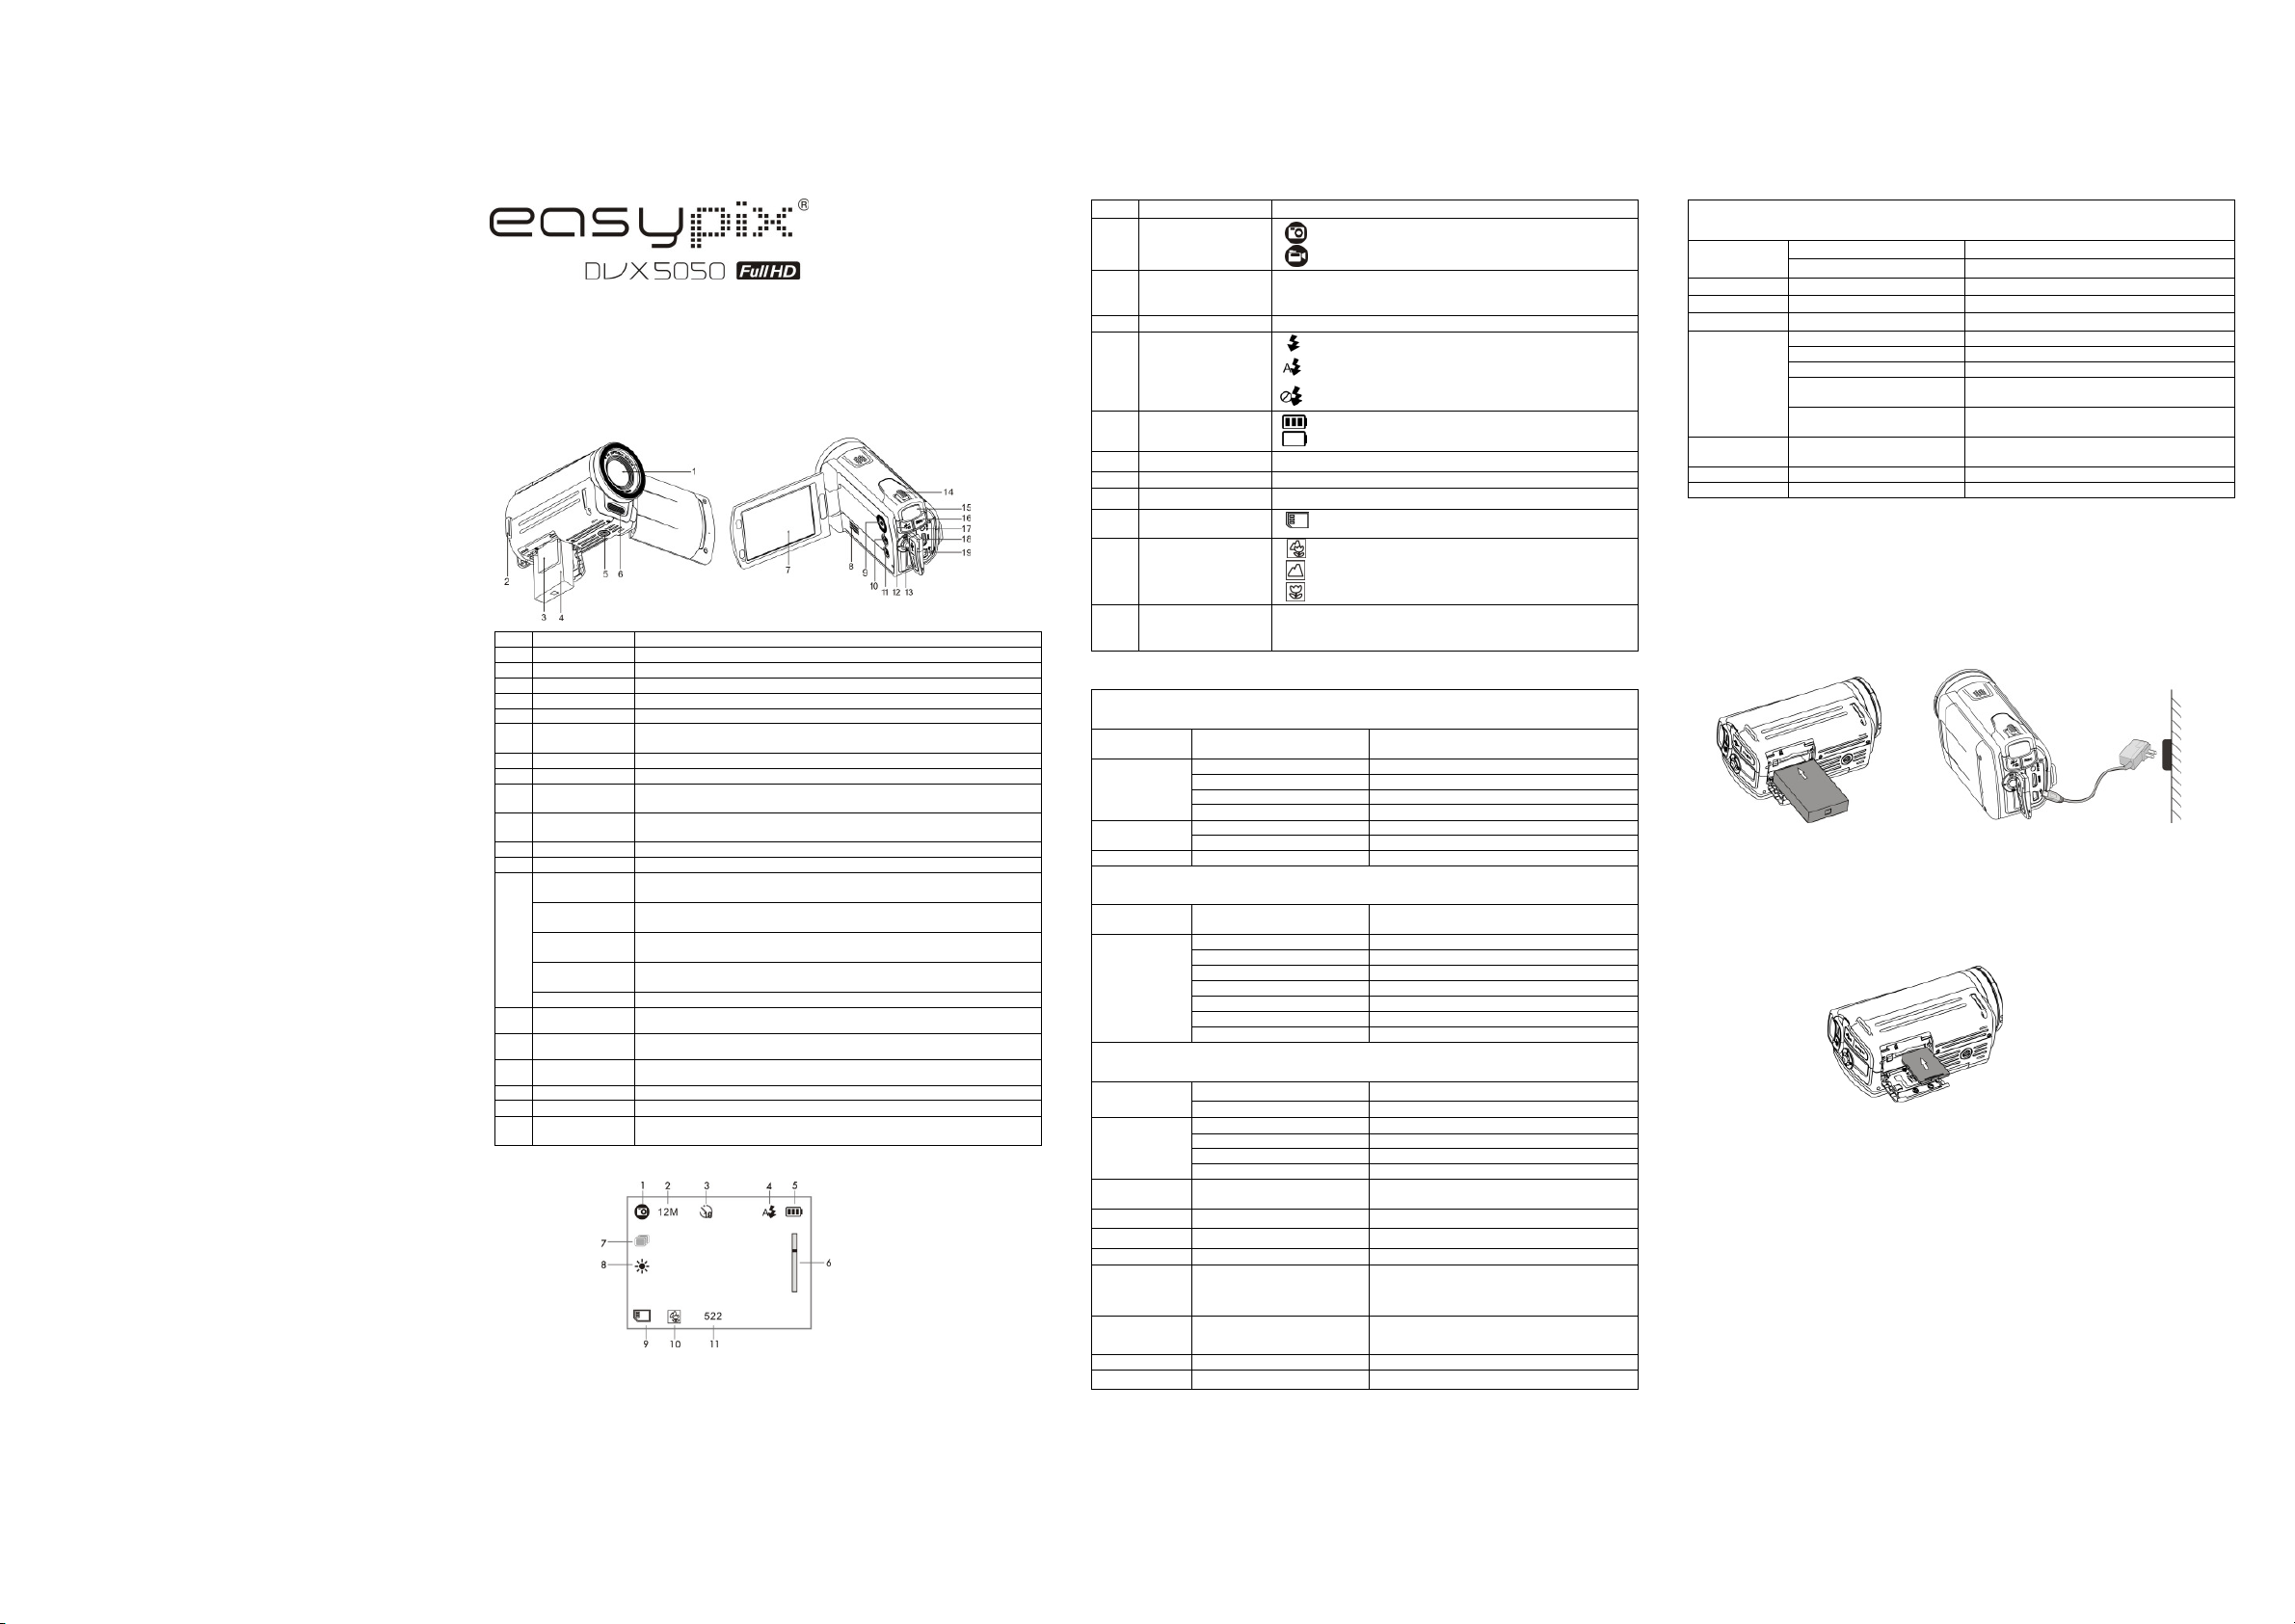
2. Functional
Lens Optical lens for Video & Pi
Strap Hook For fixing hand strap.
SD card slot For inserting SD Card.
Battery A 3.7V Li-ion rechargeable battery pro
Tripod socket For fixing the DV to tripod.
6 Flash Flash strobe activates w
The best flash distance is wi
LCD screen LCD shows images, vi
Speaker Speaker for video playback
9 Power Button Pressing and hold the power b
the button once to set LCD di
10 Playback button
press again switchi
Menu Press to Set PICTURE / VIDE
Mode Button Press this button to select mode: PICTU
13
UP / AF setting In MENU mode,
PHOTO mode, push the key UP to e
DO
ba
In MENU mode, push the key dow
or PHOTO mode, push the key D
LEFT / Flash In MENU mode, push the key l
mode, push the key LEFT
for flash options sel
RIGHT/ EV± In MENU mode, push the key ri
PHOTO mode, push the key RIGH
OK
button To confirm changes (OK) i
14
OUT duri
/ Setti
15 LED indicator
16 REC button
TV OUT socket Use supplied TV cabl
HDMI socket Use suppli
19 USB interface 1. For transferri
2. For connecting the AC Charger / c
3. Explanation of
Item Function Description
1 Recording mode
Photograph mode.
Video mode.
2 Selected resolution
Photo-3MP, 5MP, 8MP, 12M
Video- Full H
WVGAP30, VGA, QVGA
3 Self timer On / Off
4
Flash indicator
(PHOTO mode
only)
Flash wil
scene brightness
Auto Flash: The camera dete
should be activated or not.
No Flash : The flas
5 Battery indicator Battery i
Empty battery
6 Zoom indicator Shows zoom range
7 Capture Capture 1 / Capture 3
8 White balance White balance selecti
9 SD card indication T
PHOTO and VIDEO
10 AF setting mode
Full
Normal
Macro
11 Counter indicator
Shows available ti
Shows active recordi
Shows picture avail
4. Det
In photo mode, press the MENU b
mode.
Quality Super Fine(Default) / Fi
/Normal PHOTO quality
Size
3M pixel resol 2048 x 1536 pixels
5M pixel resol 2592 x 1944 pixels
8M pixel resol 3200
12M pixel resol 4000 x 3000 pixels
Self-timer On Self-timer sel
Off Turn off the self-timer
Capture Capture 1 / Capture 3 Single or 3 continues photos sel
In video mode, press the MENU
Quality Super Fine(Default)/ Fi
Normal VIDEO quality setti
Resolution
Full HD 1920×1080 up to 30fps
1080P30 1440x1080, up to 30fps
720P30 1280x720, up to 30fps
WVGAP60 848x480, up to 60fps
WVGAP30 848x480, up to 30fps
VGA 640x480, up to 30fps
QVGA 320x240, up to 30fps
In photo/video mode, press t
right, then press OK to enter camera ba
TV type NTSC American and Japanese TV format
PAL European TV format
Auto power off
Off Auto Power-Off off
1 min Auto power off in 1 min if no operati
3 min Auto power off in 3 min if no operati
5 min Auto power off in 5 min if no operati
Time setup Year / Month / Day / Hour /
Minute Setting the time on the image or vi
Volume 00 ~ 64 Setting the volume
Default Setting Yes / No Refresh the default setti
Format Yes / No Format the SD card
Language
/Italian/Spanish /
Portuguese / CHS / CHT/
Select display language
Stamp Off / Date/ Time /
Date & Time
Time or the date and time S
Beep Sound Off / Hi Setting the beep sound vol
FW Versi See the firmware versi
Effect
In photo/video mode, press t
right, then press OK to enter effect opti
Flicker 50Hz (Default) Set for European electri
60Hz Set for American electr
Contrast Standard / Hard / Soft Scene contrast setting optio
Sharpness Standard / Hard / Soft Sharpness setting
ISO Auto/100/200/400 Sensitivity select
White Balance
Auto Automatic white balance
Sunny Wh
Cloudy Wh
Fluorescent Wh
li
Incandescent Wh
li
EV Setting 0, +/-0.3 , +/-0.7, +/-1.0,
+/-1.3, +/-1.7, +/-2.0 Level of exposure
Metering Center / Average / Spot Metering setting
AF Setting Full / Normal AF setting mode
Note: The camera wi
5. Using the ca
5.1 Battery installation and charging ( included
The battery is not full
1. Rel
2. Install
Align battery termi
3. Cl
4. Ope
5. Turn the camera
6. A red LED i
5.2 Inserting a memor
You must insert SD Card (
Follow the instructi
1. Turn OFF t
2. Insert t
that the SD card is not in LOCK posi
Note: Do not force t
Align SD card positi
Note: The SD memory card m
See the following instructio
5.3 Formatting the SD memor
If your SD card i
see simple steps bel
1. In photo/vi
camera basic setup options.
2. Sel
pushing
the Direction Key DOW
and press OK.
Select YES by pushing the Di
3. Press OK to co
Note: During formatti
sure you save your valuable recor
Remember, all your records w
5.4 Setting the resolution
VIDEO recording mode
1. Press t, Sel
selection.
2. Sel
selection.
3. Sel
or DOW
Full HD (1920×1080), 1080P30(
WVGAP30 (848 x 480), VGA (640 x 480), QVGA(320 x 240)
then press OK to confirm setti