Include and Assemble the Aeon Labs Door / Window Sensor – Quick install Guide
www.e-domotica.com1
Include and Assemble the Aeon Labs Door / Window Sensor
This manual will help you to include and assemble the Aeon Labs Door / Window Sensor. After you have walked through this guide you
will be able to use the door sensor in a variety of scenes, scenarios and alarm settings.
1. Logging in to your e-Centre
Start your computer or notebook.
Open a browser, for example Chrome or Firefox.
Open the e-Centre webpage via http://ecentre. Or go to the IP address of
the e-Centre, for example http://192.168.1.100.
Log in with the standard PIN code 1234, or use your own PIN code.
2. Add the Aeon Labs Door Sensor to your e-Centre
If your home is fitted with several e-Domotica accessories (mains powered Z-
wave devices: it is recommended to include the door sensor at the place where
you will assemble it. Notice that you check the box named ‘Normal/High power’.
Also this only works when you already use a Z-Wave network.
At first we will include the Door Sensor to your e-Centre. Please follow the
steps below to proceed:
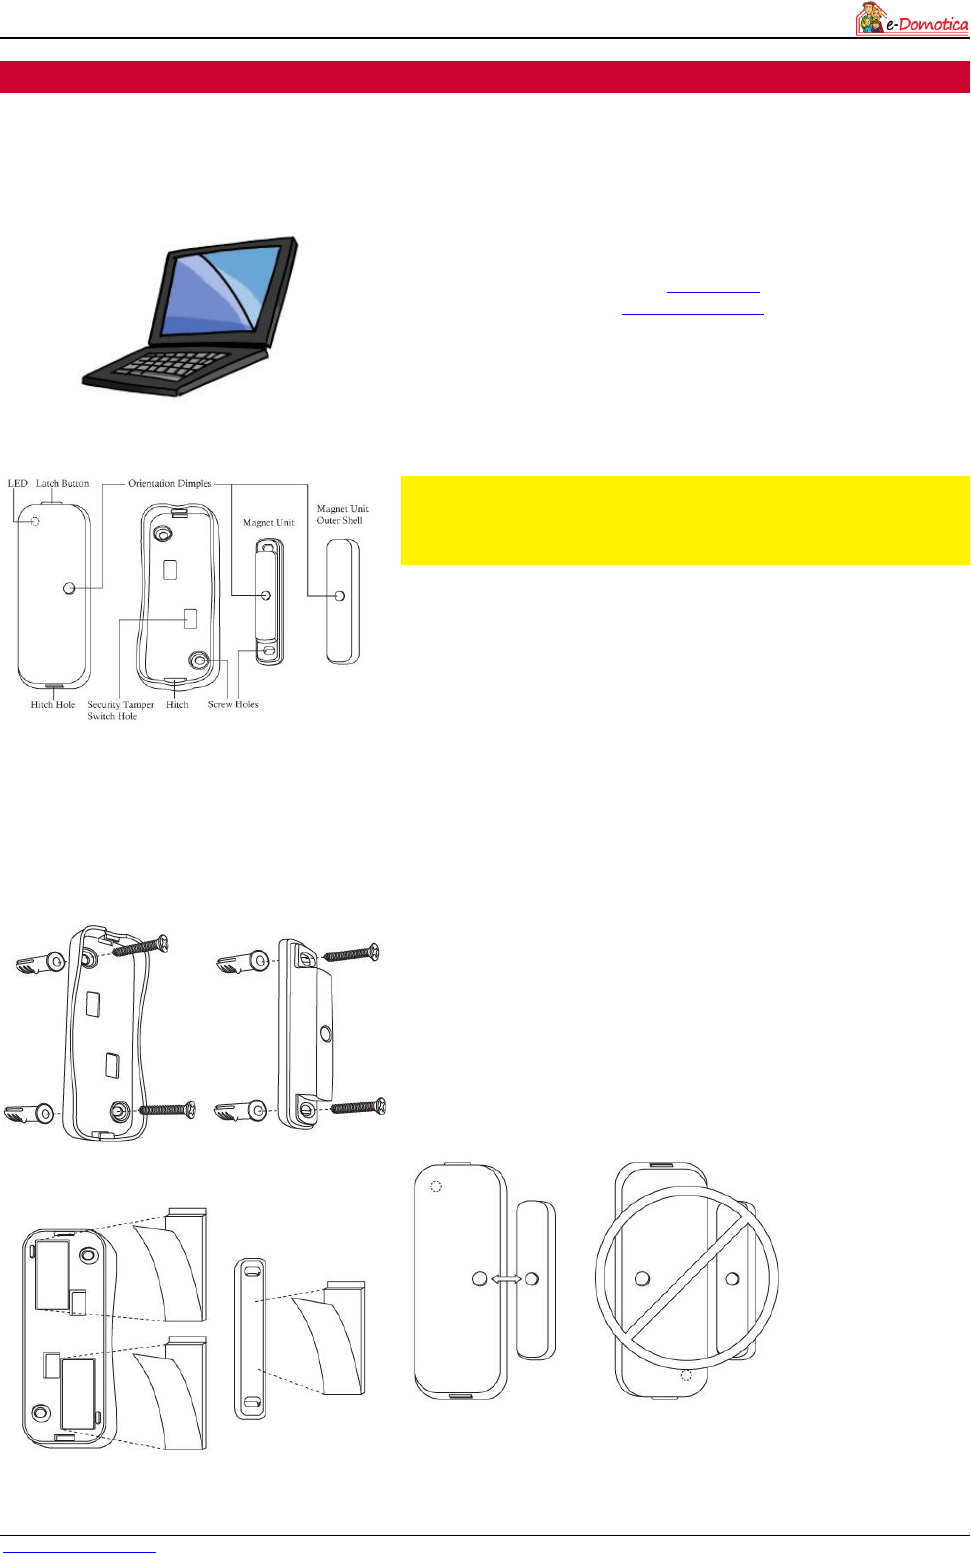
Remove the plastic between the batteries and the door sensor. You can
open the door sensor by pressing the Latch Button. In the picture on the
left you can find where the Latch Button is placed. When finished, don’t
close the door sensor
On the webpage go to ‘e-Domotica Products’
At the right down corner click ‘Include’
Press the Z-Wave button once. You can find the button next to the
batteries
Wait patiently while the e-Centre will include the door sensor. When
finished name the sensor, choose a location and assign an icon. Next click
‘Save’.
3. Assemble the door sensor
OR
Now that the door sensor is connected to the e-Centre, we can assemble it.
There are two possibilities to mount. You can screw or stick it. Although
screwing is recommended more, both possibilities are agreeable. If you decide
to screw it, the door sensor will be less delicate to be sabotaged.
In the picture on the left you will see how to assemble the door sensor in both
ways.
Please notice that the Orientation Dimples must be pointed to each other (see
picture below). Also it’s recommended to keep both the door sensor and the
magnet within a 2cm range.
Now the door sensor is ready to use. You can add the door sensor to a variety
of scenes, scenarios and alarm settings.
Visit our website for more manuals, instructions, examples and installation videos.
Need help? Post your question in this forum.
Report abuse
Libble takes abuse of its services very seriously. We're committed to dealing with such abuse according to the laws in your country of residence. When you submit a report, we'll investigate it and take the appropriate action. We'll get back to you only if we require additional details or have more information to share.
Product:
Forumrules
To achieve meaningful questions, we apply the following rules:
First, read the manual;
Check if your question has been asked previously;
Try to ask your question as clearly as possible;
Did you already try to solve the problem? Please mention this;
Is your problem solved by a visitor then let him/her know in this forum;
To give a response to a question or answer, do not use this form but click on the button 'reply to this question';
Your question will be posted here and emailed to our subscribers. Therefore, avoid filling in personal details.
Register
Register getting emails for e-Domotica Aeon Labs at:
new questions and answers
new manuals
You will receive an email to register for one or both of the options.
Get your user manual by e-mail
Enter your email address to receive the manual of e-Domotica Aeon Labs in the language / languages: English as an attachment in your email.
The manual is 0,13 mb in size.
You will receive the manual in your email within minutes. If you have not received an email, then probably have entered the wrong email address or your mailbox is too full. In addition, it may be that your ISP may have a maximum size for emails to receive.
If you have not received an email with the manual within fifteen minutes, it may be that you have a entered a wrong email address or that your ISP has set a maximum size to receive email that is smaller than the size of the manual.
The email address you have provided is not correct.
Please check the email address and correct it.
Your question is posted on this page
Would you like to receive an email when new answers and questions are posted? Please enter your email address.