9
UHR-EINSTELLUNG
0-9:EINGABE(STUNDE)
/ :KORREKT.MENU:ENDE
UHR-EINSTELLUNG
0-9:EINGABE(STUNDE)
/ :KORREKT.
OK:OK MENU:ENDE
ZEIT - - : - -
DATUM - - /- - /- - - -
ZEIT 11:41
DATUM 12/05/2003(MO)
Einstellen von Uhrzeit und Datum
1
2
Wenn die Seite „UHREINSTELLUNG“ nicht bereits auf dem
Bildschrim angezeigt wird, drücken Sie die Taste MENU.
Wählen Sie „GRUNDEINSTELLUNGEN“, indem Sie die
Taste PR- zweimal und anschließend die Taste OK einmal
drücken.
Wählen Sie das Menü „UHREINSTELLUNG“, und dann
drücken Sie die OK-Taste.
Sobald die Seite „UHREINSTELLUNG“ auf dem Bildschirm
angezeigt wird, können Sie die Taste oder drücken,
um zu der Position zu gelangen, die Sie ändern wollen.
Verwenden Sie die Zifferntaste 0 bis 9 auf der
Fernbedienung, um die richtig Uhrzeit und das richtige
Datum einzustellen.
Drücken Sie die Taste OK, um die Einstellungen zu
bestätigen, und anschließend die Taste MENU, um die
Einstellung abzuschließend.
8
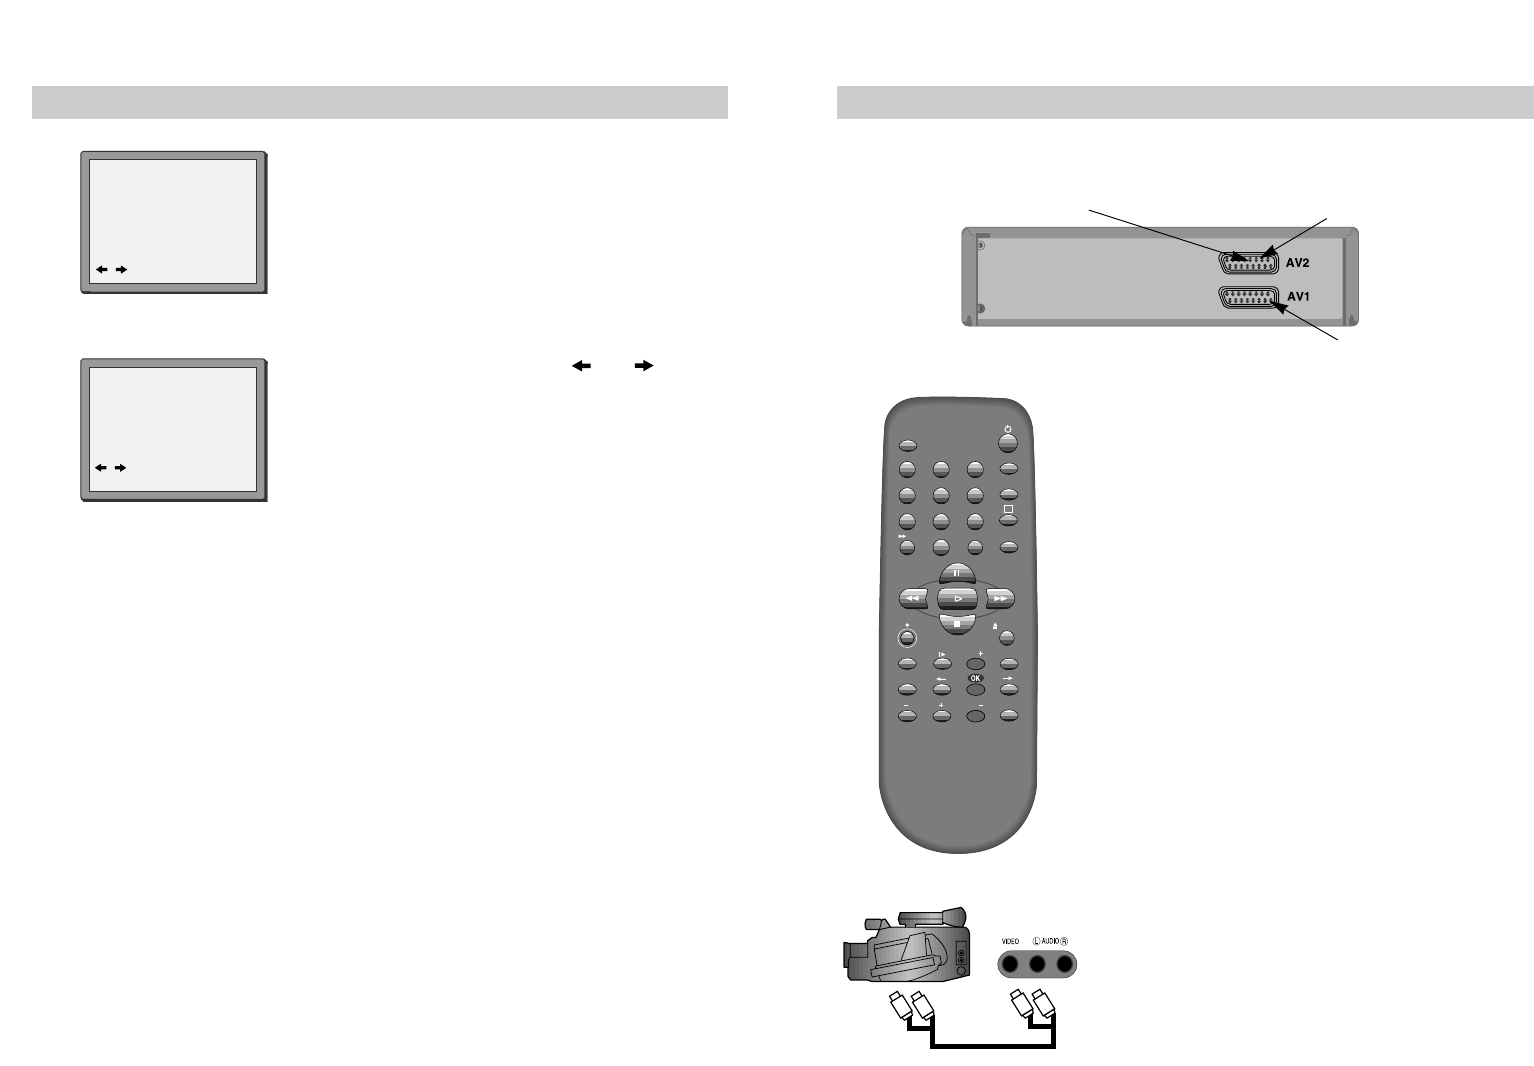
2-te SCART- Buchse
Wenn Ihr Videorecorder über eine zweite SCART-Buchse verfügt (siehe Bild unten), können Sie
zusätzlich ein anderes Gerät, wie auf den Seiten 4 und 5 beschrieben, anschliessen.
SCART 2
EINGANG NUR
EINGANG+AUSGANG
Wenn Sie ein anderes Gerät anschliessen, so entnehmen Sie
bitte weitere Informationen der Bedienunganleitung dieses
Gerätes. Die empfohlene Installation für diesen Videorecorder
sehen Sie auf S.4 Diagramm 3 dieser Bedienungsanleitung. Bei
Nutzung dieser Variante und wenn das zusätzliche Gerät
ausgeschaltet ist, können Sie den Videorecorder ganz normal
nutzen. Nur wenn das Zusatzgerät am AV2-Anschluß
eingeschaltet wird, so schaltet der Videorecorder automatisch
auf AV2 um und Sie können für die Programmumschaltung
nicht die PR+/PR--Tasten des VCR's nutzen. Sie können dann
nur mit den Programmtasten des Zusatzgerätes die Programme
umschalten(falls vorhanden).
Wenn Sie den Videorecorder wieder normal nutzen möchten,
so müssen Sie dazu das zusätzliche Gerät ausschalten.
Aufnehmen vom anderen Gerät.
Einfache Aufnahme kann erfolgen, wie auf Seite 19
beschrieben. Vergewissern Sie sich, dass die Geräte
eingeschaltet sind und der richtige Kanal eingestellt wurde.
Für die Timer-Aufnahme lesen Sie die Seite 21, dabei beachten
Sie, dass AV1 als Kanal für die Aufnahme gewählt wurde.
Manche Zusatzgeräte verfügen über einen eigenen Timer,
dieser muß dann auch entsprechend programmiert werden.
Wenn das Zusatzgerät keinen eigenen Timer besitzt, so muß es
für die Aufnahmezeit ständig eingeschaltet bleiben.
Front -AV-Eingang
Wenn Ihr Videorecorder über einen Front-AV-Eingang verfügt,
so können Sie Zusatzgeräte (z.B.Videokamera) daran
anschliessen. Wählen Sie AVF für die Bildwiedergabe vom
Front-AV-Eingang. Die Vorgehensweise für die Aufnahme von
diesem Eingang ist die gleiche, wie auf der Seite 5
beschrieben.