Digistat+ & Digistat+RF
R
Models:
30002 / RF601
Invensys Controls Europe
T
www.draytoncontrols.co.uk
Installation / User Guide 06490056001 (09/05)
User Guide
What is a room thermostat?
... An explanation for householders
A room thermost
and off as nece
switching on th
the thermostat
temperature has
T
the room heat u
depends on the
size of boiler
Neither does th
down. T
in the room bei
energy
The heating sy
has switched it
The way to set
lowest temperat
and then leave
is to set the r
– and then turn
comfortable wit
thermostat furt
energy and cost
If your heating
usually be only
house. But you
rooms by instal
individual radi
a temperature t
have TRV
that even the c
overheating in
Room
temperature, so
blocked by furn
table lamps may
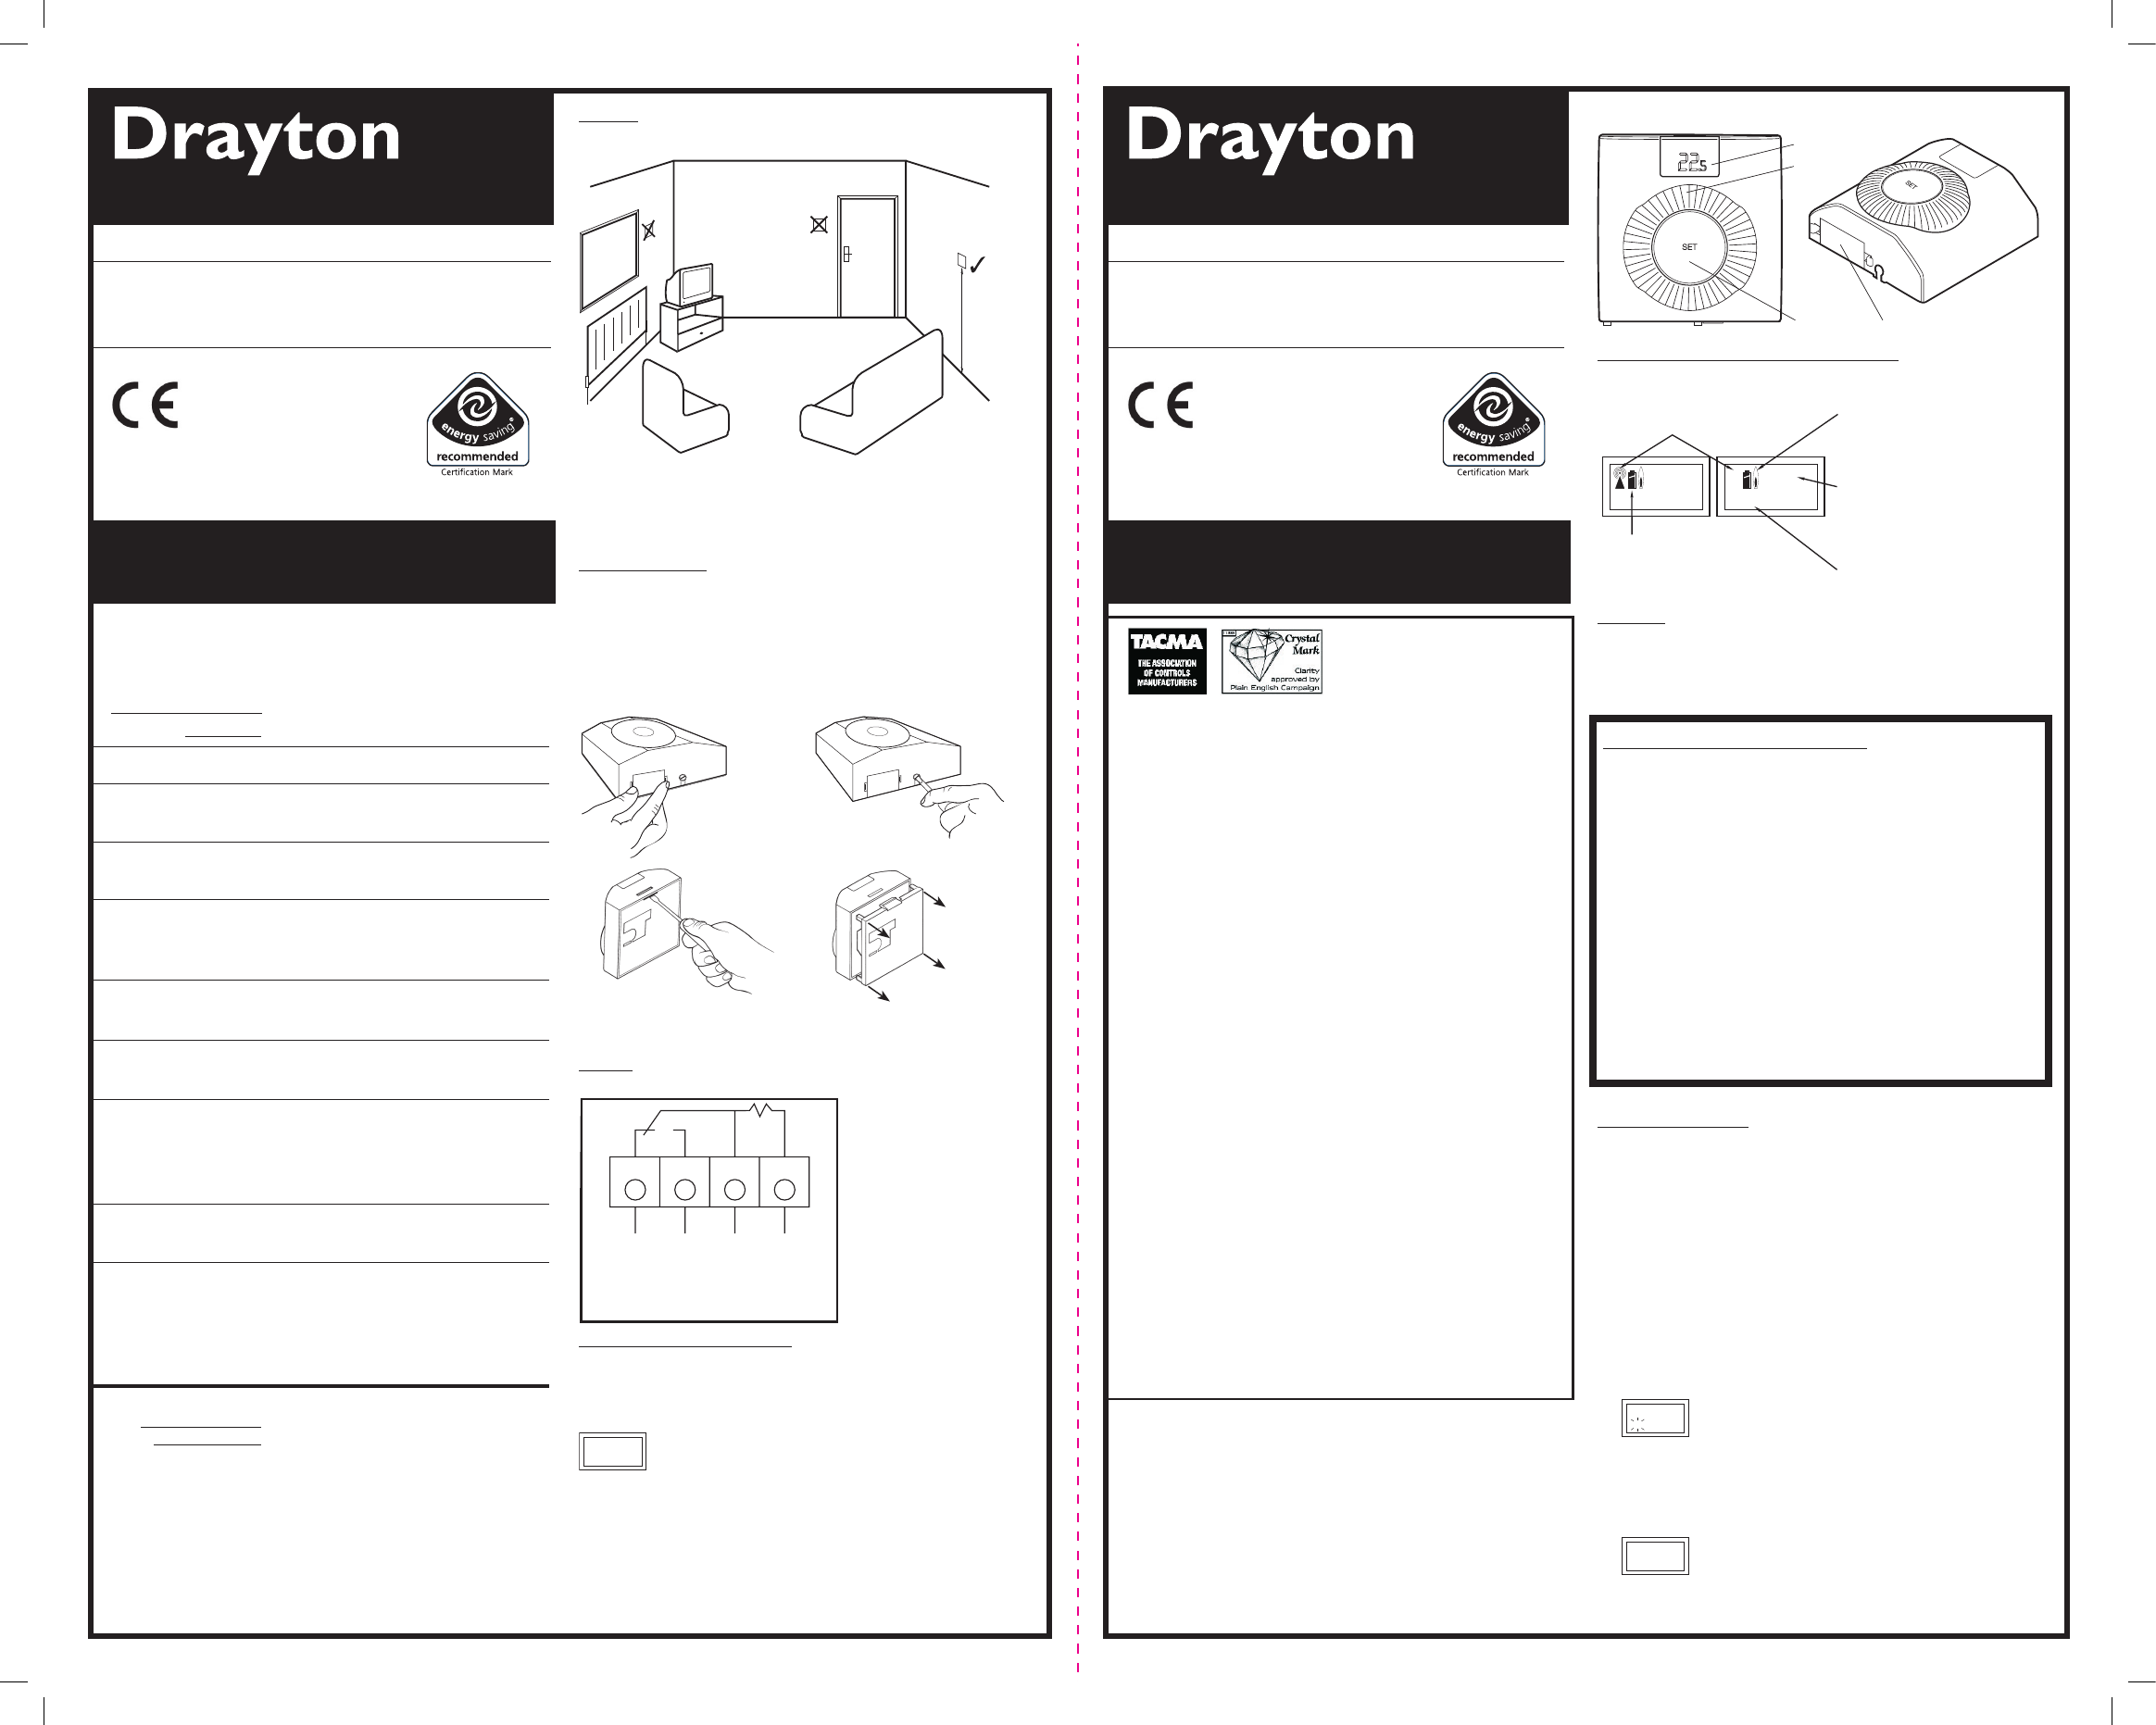
Y
LCD Display
Dial
Set button
Battery Compartment
Thermostat Display – Features & Characters
2 2
º
c
S E T
.
0
2
º
c
.
0
0
º
c
f
6 0
º
c
C
2 5
º
c
p
A demand for heat is
shown by a flame
symbol on the display
i.e.
calling for heat to bring
the room up to or
maintain it at the
desired temperature.
During normal
operation the display
shows the actual room
temperature.
When the desired
temperature is being
adjusted the word 'SET'
is shown on the
display
The display designates the model type selected,
Lo
w battery warning
is shown by a flashing
battery symbol on the
display
An RF Model is shown
by an antenna symbol
on the display
symbol denotes a
wired model).
2 1
º
c
.
5
º
c
F = Frost Thermostat,
Room Thermostat
FEA
This product has the following user adjustable settings
•
•
•
Advanced feature
Simple Setting or Operating
T
•
•
dial clockwise to increase or anti-clockwise to
the temperature setpoint as it is being adjusted
and ‘SET’ will be displayed. After a few seconds
the display will return
to normal operation and
will display the actual room
While adjusting the temperature during normal
operation, when you reach the maximum or
minimum possible setting the display will flash to
indicate you cannot adjust the product further
ADV
Adjusting the Setpoint using the Preset T
Change the temperature at the press of a button, for example, if
you are going out to the shops for an hour you can reduce the
temperature to save energy and then when you press the button
again on your return the setpoint will return to the previous level.
• T
press the
will go into Preset mode.
NB. This feature can be used to quickly adjust the temperature
setpoint to a setback temperature for economy operation if for
example, ‘Preset T
ºC’. Or alternatively to a comfort
setpoint if ‘Preset T
ºC’.
•
T
5
ºc
p
p I
H i
0
E S
E
I
E 2
E L
Y
C Y
F
i 0
ºc
i 5
ºc
3
ºc
2 4
ºc
9 0
ºc
6 0
ºc
4 0
ºc
3 0
ºc
2 0
ºc
7 0
ºc
L
p I
0 0
C Y
F
E S
E L
Y
S E
i 5
ºc
S E
2 2
ºc
‘SET’ will flash for approximately 5 seconds and during this time
the ‘Preset
•
The product will remain in the Preset mode. Once 5 seconds
have elapsed
stop flashing on the display as shown,
5
ºc
p
p I
H i
0
E S
E
I
E 2
E L
Y
C Y
F
i 0
ºc
i 5
ºc
3
ºc
2 4
ºc
9 0
ºc
6 0
ºc
4 0
ºc
3 0
ºc
2 0
ºc
7 0
ºc
L
p I
0 0
C Y
F
E S
E L
Y
S E
i 5
ºc
S E
2 2
ºc
06490056001 ISS E
06490056001 ISS E
T
Location
Room Thermostat
Care should be taken to mount the thermostat in a position which
is not subject to direct sunlight or draughts. Preferably it should be
mounted on an inside wall about 1.5m (5ft) above the floor in a
position where it can respond to room temperature but away from
the direct influence of radiators or other appliances giving off heat.
Before Installation
If you do not have the knowledge to install the thermostat safely then
you must arrange for a competent electrician to install it for you.
Wiring must conform to the current IEE regulations.
Prior to commencing the installation you must ensure the mains
supply is switched off
Remove battery
compartment
Loosen screw
Standard cable entry is from the rear
top or bottom, is to be used, or extra space for cabling is required,
use the optional Pattress box (sold separately).
WIRING
Room Thermostat (not RF models)
External
Sensor
O L
Not required for RF models
Off On COM N
FOR FIXED WIRING ONL
Heating
satisfied
or call for
cooling
Not
required
Call
for
heat'
Common
/switched
live from
Time Control
FAUL
If the display shows E1, the following faults could have occurred
1.
2.
range.
5
ºc
p
p I
H i
0
E S
E
I
E 2
E L
Y
C Y
F
i 0
ºc
i 5
ºc
3
ºc
2 4
ºc
9 0
ºc
6 0
ºc
4 0
ºc
3 0
ºc
2 0
ºc
7 0
ºc
L
p I
0 0
C Y
F
E S
E L
Y
S E
i 5
ºc
S E
2 2
ºc
Digistat+ & Digistat+RF
R
Models:
30002 / RF601
Invensys Controls Europe
T
www.draytoncontrols.co.uk
Installation / User Guide 06490056001 (09/05)
Installation Guide
T
D
RO
Power Supply: 2 x AA Size, 1.5V alkaline batteries
Switch T
Relay version: SPDT 2(1)A 12-240V AC(DC) V
Radio frequency:
RF version: 433 MHz
Radio Signal Range: 30m typically. The range may be affected by
(RF V the composition / density and number of
walls between the Digistat RF and SCR.
T 5 to 30ºC
Control + 0.5K @ 20ºC
Ambient T Operating
Storage –20
ºC to 55ºC
EN60730-1:2001; EN60730-
2-7:1992
73/23/EEC Low Voltage Directive
89/336/EEC EMC Directive
EN300220-1
Mounting: Suitable for surface or conduit box
mounting
Wiring:
Relay:
Designed for fixed wiring only, to comply
with current IEE regulations.
RF: No wiring required
SINGLE CHANNEL
RECEIVER (SCR)
Power Supply: 230V AC 50Hz
Switch T SPDT (voltage free) 2(1)A 230V AC or
23V AC (DC)
Wiring: Designed for fixed wiring only, to comply
with current IEE regulations.
433 MHz
Insert screwdriver
and unlatch
the clip
Pull back plate
straight off
When changing an existing
product and there is a
neutral wire present, use the
neutral (N) terminal on the
product.
06490056001 ISS E.indd 1 20/9/06 10:59:40