ED-GW-04
Voor rolluiken
NL
AUTOMATION PACK
2.1.A. Aansluiten op een gemotoriseerd rolluik (ED-SH-01)
3. Installeren van de module
4. Koppelen van de module aan de DiO Home Box
Installeer het accessoire overeenkomstig
de instructies in de handleiding. Via de
webinterface www.getdio.me gaan naar:
1) ‘toevoegen -> ruimte’ en voeg uw
verschillende ruimtes toe
2) ‘toevoegen -> accessoire’
volg de installatiestappen van de DiO
Home Box via de video’s op ons kanaal
Youtube.com/c/dio-connected-home
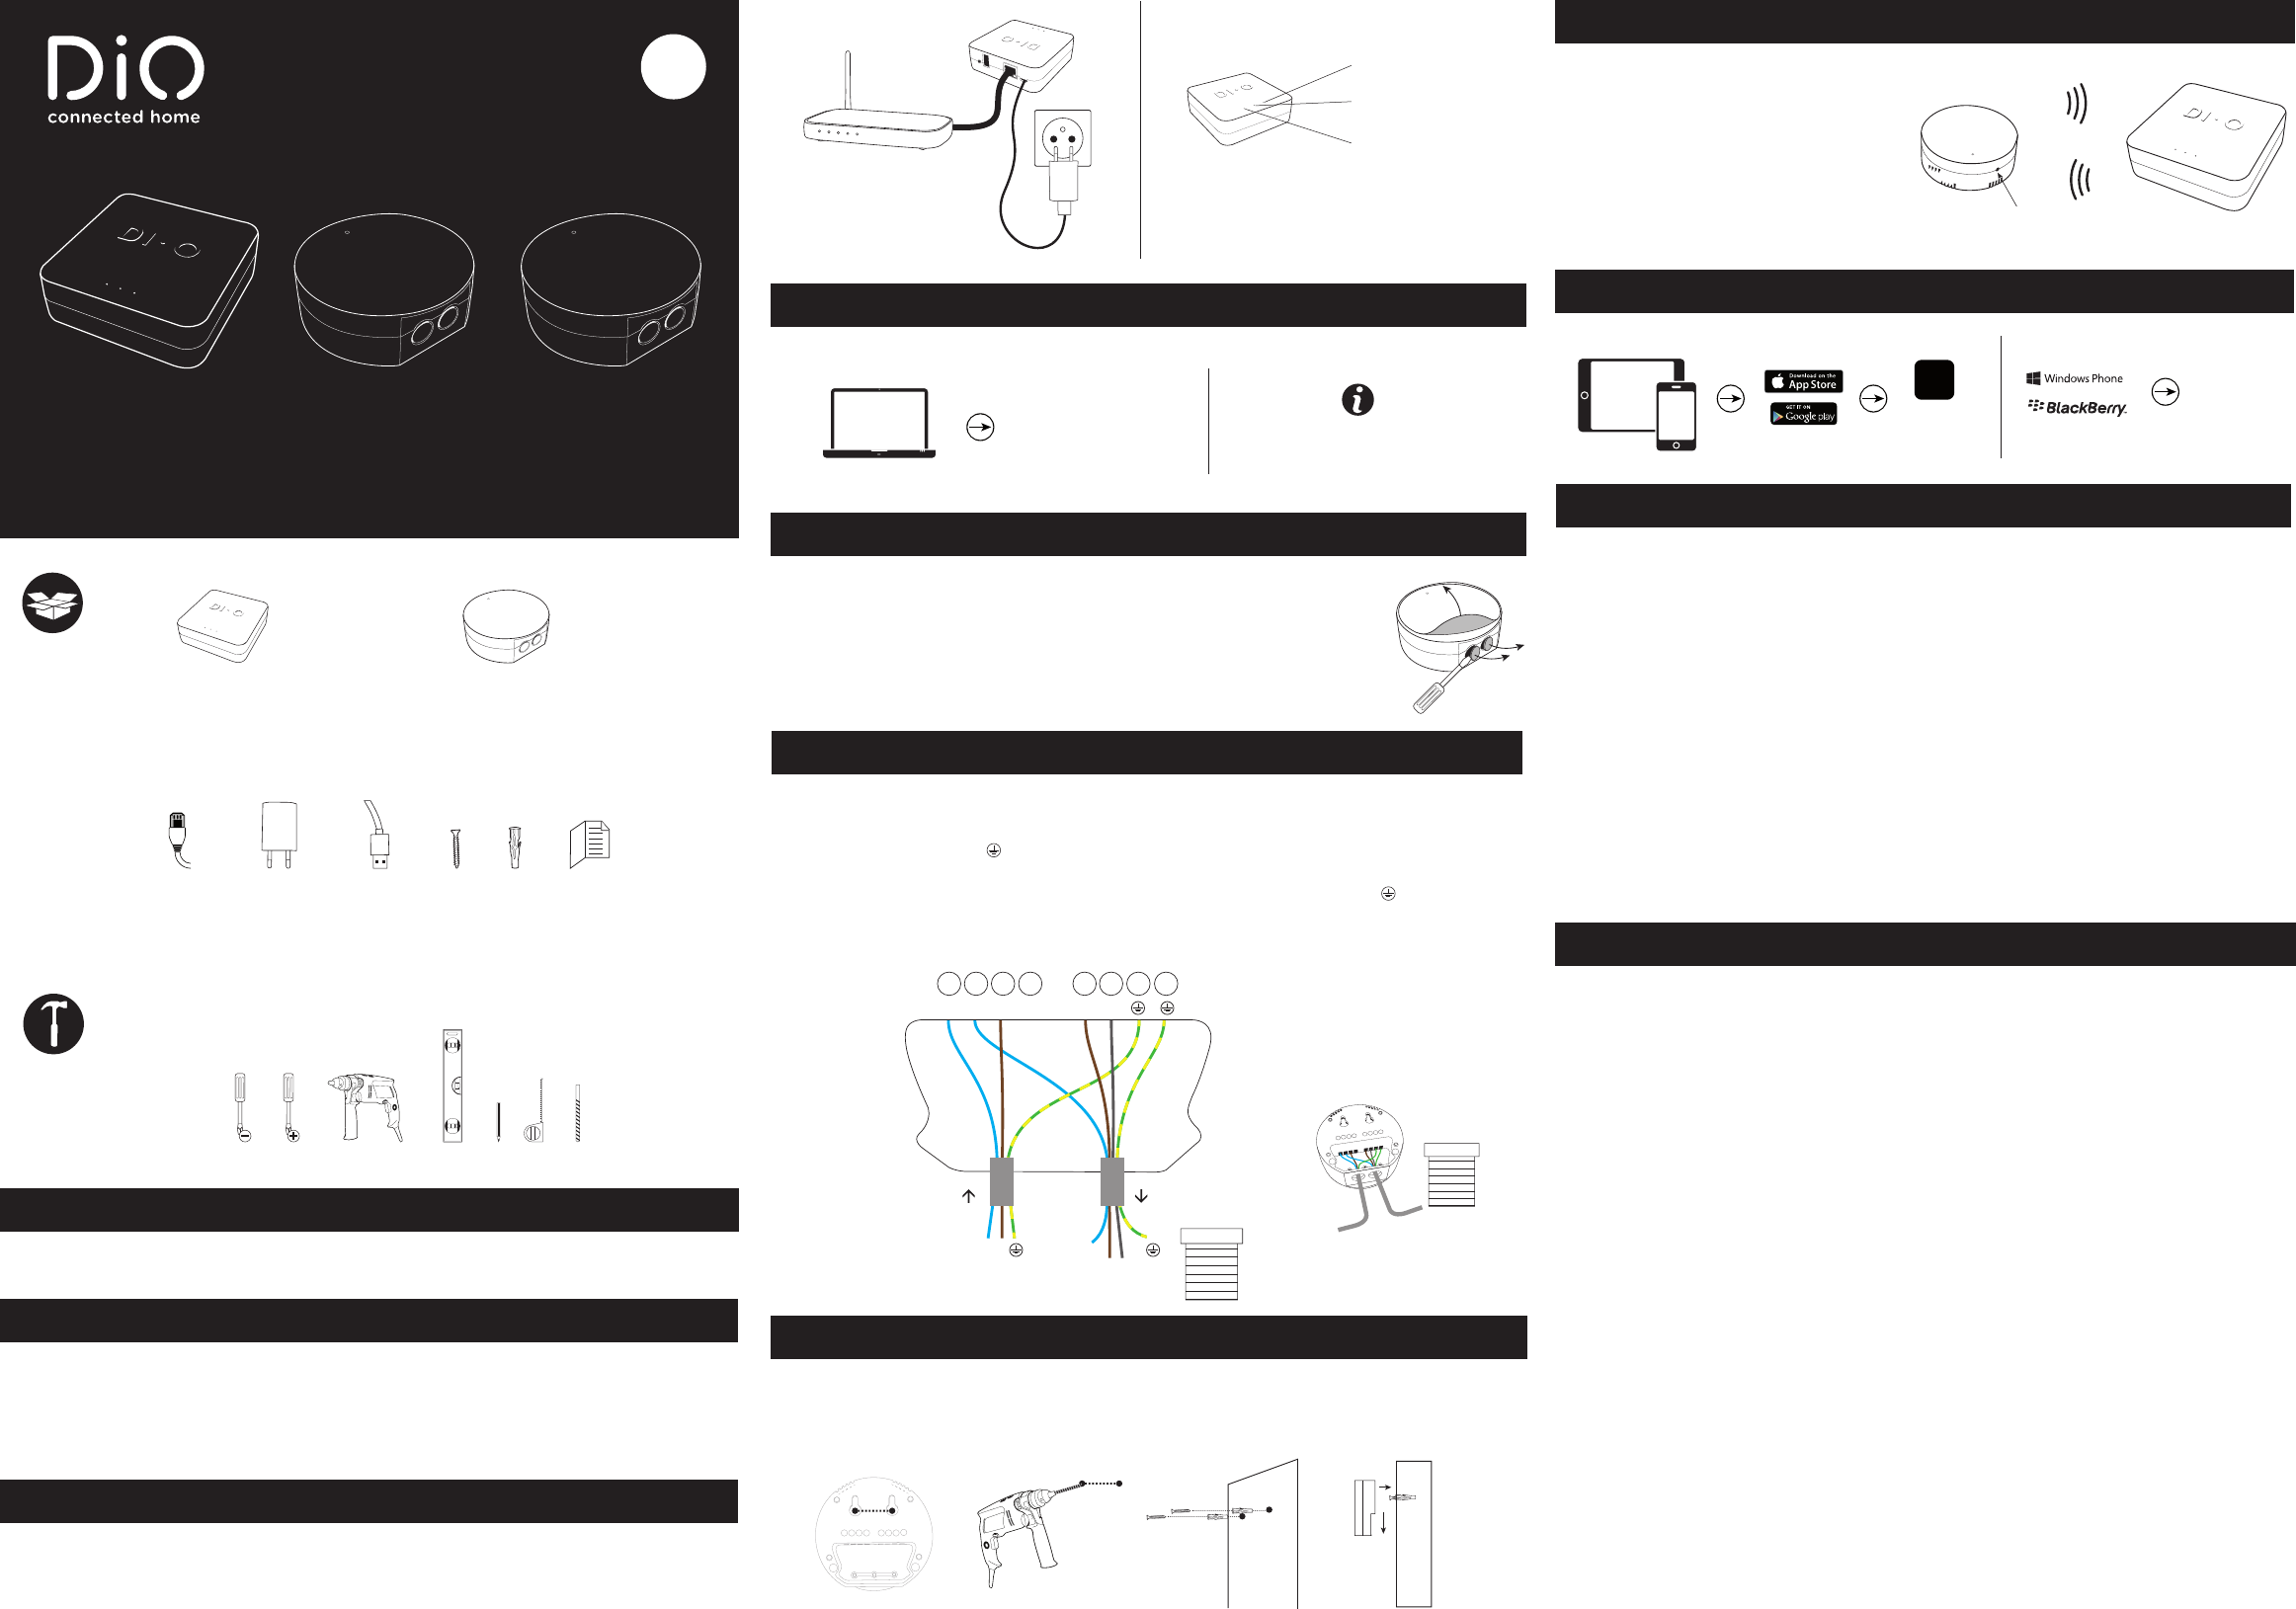
Bouton R
Bevestig de module aan de muur met de bijgeleverde schroeven en pluggen.
1
2
Sluit de module aan op het rolluik door de nuldraad (blauw) aan te sluiten op de klem N, de
fasedraad 'dicht/omlaag' (bruin) op klem 1 en 'open/omhoog' (zwart) op klem 2 en de aarddraad
(geel/groen) op de klem .
Sluit de module aan op het elektriciteitsnet door de nuldraad (blauw) aan te sluiten op de klem
N, de fasedraad (bruin) op de klem L en de aarddraad (geel/groen) op de klem .
Als de richting voor het openen en sluiten niet juist is, wissel dan de klemmen 1 en 2 om (afhan-
kelijk van hoe het rolluik gemonteerd is).
N
N
N
â
â
L
NL L 1 2
AC~230V
6. Geavanceerde functies
Resetten:
Druk om de module terug te zetten naar de fabrieksmodus gedurende 10 seconden op R. De
indicator knippert roze om te bevestigen.
Indicator:
U kunt de indicator standaard activeren of deactiveren door 2 keer op de knop R te drukken.
De indicator knippert 2 keer om de statuswijziging te bevestigen: rood = indicator
geactiveerd en blauw = indicator gedeactiveerd.
Signaalrepeater (meshing):
De functie is standaard gedeactiveerd om de reactietijd van de module te optimaliseren. Om
het draadloze bereik van uw accessoires uit te breiden, kunt u de functie activeren door
3 keer op R te drukken. De indicator knippert 3 keer rood om de activering te bevestigen.
Om de repeater te deactiveren, drukt u 4 keer op R. De indicator knippert 3 keer blauw om de
deactivering te bevestigen.
Activeer maximaal vijf ontvangers met 'meshing' per installatie.
7. Technische gegevens
Frequentie: 868,3 MHz + 433,92 MHz
Draadloos protocol: 868 by edisio + 433 by DiO
Zendbereik: 150 m (in open ruimte)
Voor gebruik binnenshuis (IP20); niet gebruiken in vochtige omgevingen.
Voeding: DC 5V/1A-transfo
Aantal:
gratis scenario's: 8
gratis ruimtes: 8
accessoires: 44
verwarmingszones: 4
camera's: 4
b x d x h: 89 x 89 x 28 mm
ED-GW-01
Frequentie en protocol: 868,3MHz by edisio by edisio
Zendbereik: 150 m (in open ruimte)
Max. 32 gekoppelde zenders
Voor gebruik binnenshuis (IP20); niet gebruiken in vochtige omgevingen.
Automatisch uitschakelen: na 120 seconden
Voeding: 230 V AC - 50 Hz
Max. 2 x 3 A (cos φ = 1) 2x 3A (cosφ=1)
b x h x d: 80 x 80 x 19 mm
ED-SH-01
5. Bedienen van uw installatie met de DiO-app
getdio.me
DiO Home
App
™
DiO
connected home
AC~230V
IN OUT
ED - GW - 01
1x1x
RJ45 DC 5V 1A USB
1x 1x
5m
ED - SH - 01
4x 4x
Home Box
Module voor rolluiken
1x
2x
Verwijder indien nodig de plastic bescherming.
!!Let op!!
Schakel de stroom uit vóór elke handeling.
Heeft u twijfels over uw installatie, neem dan contact op met een
elektricien.
2. Installeren van de module
1.1. Aanmelden en instellen van uw box
verbonden met het
elektriciteitsnet
verbonden met het netwerk
verbonden met de server
Activeren van uw garantie
Vul om uw garantie te activeren het online formulier in op www.getdio.com/warranty.
0. Installatievideo’s
Om de installatie van onze packs en oplossingen te vereenvoudigen, werken we met video’s
die u kan bekijken op ons kanaal: Youtube.com/c/dio-connected-home, onder playlists.
U kan ze ook terugvinden via de websitewww.getdio.comonder support.
Sluit uw Home Box aan op uw modem met de bijgeleverde RJ45-kabel.
Sluit vervolgens uw Home Box aan op het elektriciteitsnet met de bijgeleverde USB-kabel en
transfo.
1. Aansluiten van de Home Box
www.getdio.me
Youtube.com/c/dio-connected-home