9
CLEANING AND MAINTENANCE
Frequent cleaning prevents the formation of smoke and bad
odours during cooking. Do not let fat accumulate inside the ap-
pliance. Before any maintenance or cleaning operation, unplug
the oven and wait for it to cool down. Clean the door, the inside
walls and the enamel or painted surfaces of the oven with a soap
and water solution; dry thoroughly. To clean the aluminium sur-
faces on the inside of the oven, never use products that corrode
aluminium (detergents in spray cans) and never scrape the walls
with sharp objects. To clean the outside surface always use a
damp sponge. Avoid using abrasive products that may damage
the paintwork. Make sure water or liquid soap does not seep
into the slits on the top of the oven. Never immerse the ap-
pliance in water; never wash it under a jet of water. All
the accessories are washed like normal dishes, either by hand
or in the dishwasher.
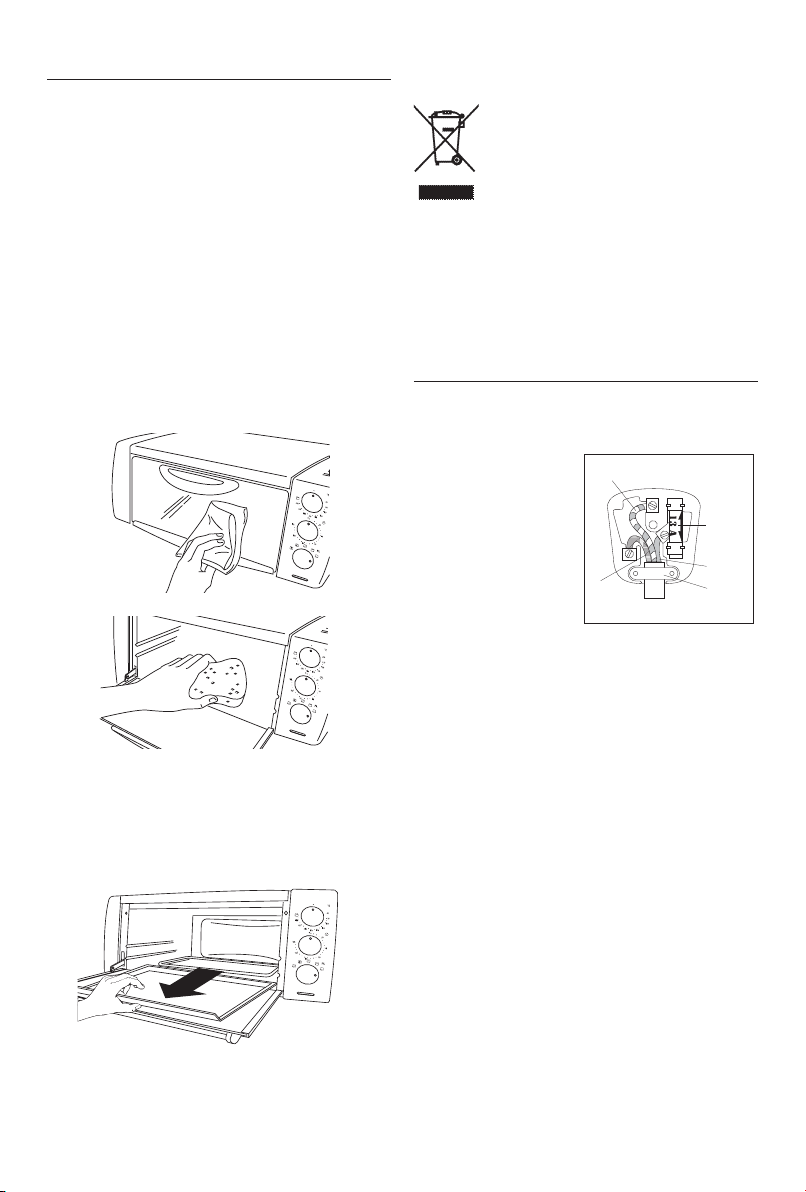
If the oven has a crumb tray:
Remove the tray from the bottom (figure to the side); wash it
by hand. If the dirt is hard to remove, rinse the tray in hot soapy
water and if necessary rub it gently, without scratching it.
Important information for correct disposal of the pro-
duct in accordance with EC Directive 2002/96/EC.
At the end of its working life, the product must not
be disposed of as urban waste. It must be taken to
a special local authority differentiated waste col-
lection centre or to a dealer providing this service.
Disposing of a household appliance separately
avoids possible negative consequences for the en-
vironment and health deriving from inappropriate disposal and
enables the constituent materials to be recovered to obtain si-
gnificant savings in energy and resources.As a reminder of the
need to dispose of household appliances separately, the product
is marked with a crossed-out wheeled dustbin.
FOR U.K. ONLY
Wiring instructions
This appliance must be earthed
Important: The wires in this lead are coloured in accordance with
the following codes:
Green and yellow: Earth
Blue: Neutral
Brown: Live
Connect the green/yellow wire
to the terminal in the plug
marked “E” (or by the earth
symbol) or coloured green or
coloured green and yellow.
Connect the brown wire to the terminal in the plug marked “L”
or coloured red.
Connect the blue wire to the terminal in the plug marked “N” or
coloured black.
A 13 amp fuse should be fitted when the appliance is connected
to a BS 1363 plug.
Seek professional advice if you are unsure of the correct proce-
dure for the above.
About your factory fitted plug (supplied with certain mod-
els only)
The lead is already fitted with a plug incorporating a 13 amp
fuse. If the plug does not fit your socket outlet, see next para-
graph. Should you need to replace the fuse in the plug supplied,
a 13 amp approved BS 1362 fuse must be used. (refer to wiring
instructions for use rating) If the plug supplied does not fit your
socket outlet, it should be removed from the mains lead and dis-
posed of safely. The flexible cord insulation should be stripped
back as appropriate and a suitable alternative plug fitted. The
replacement plug must be equipped with a 13 amp fuse.
Important: If the electrical cord of this appliance is damaged, it
must only be replaced by an authorised Service Dealer. The safety
of this appliance complies with the technical regulations and
standards in force.