37
Chapter 2 - Using the control and setting the modes
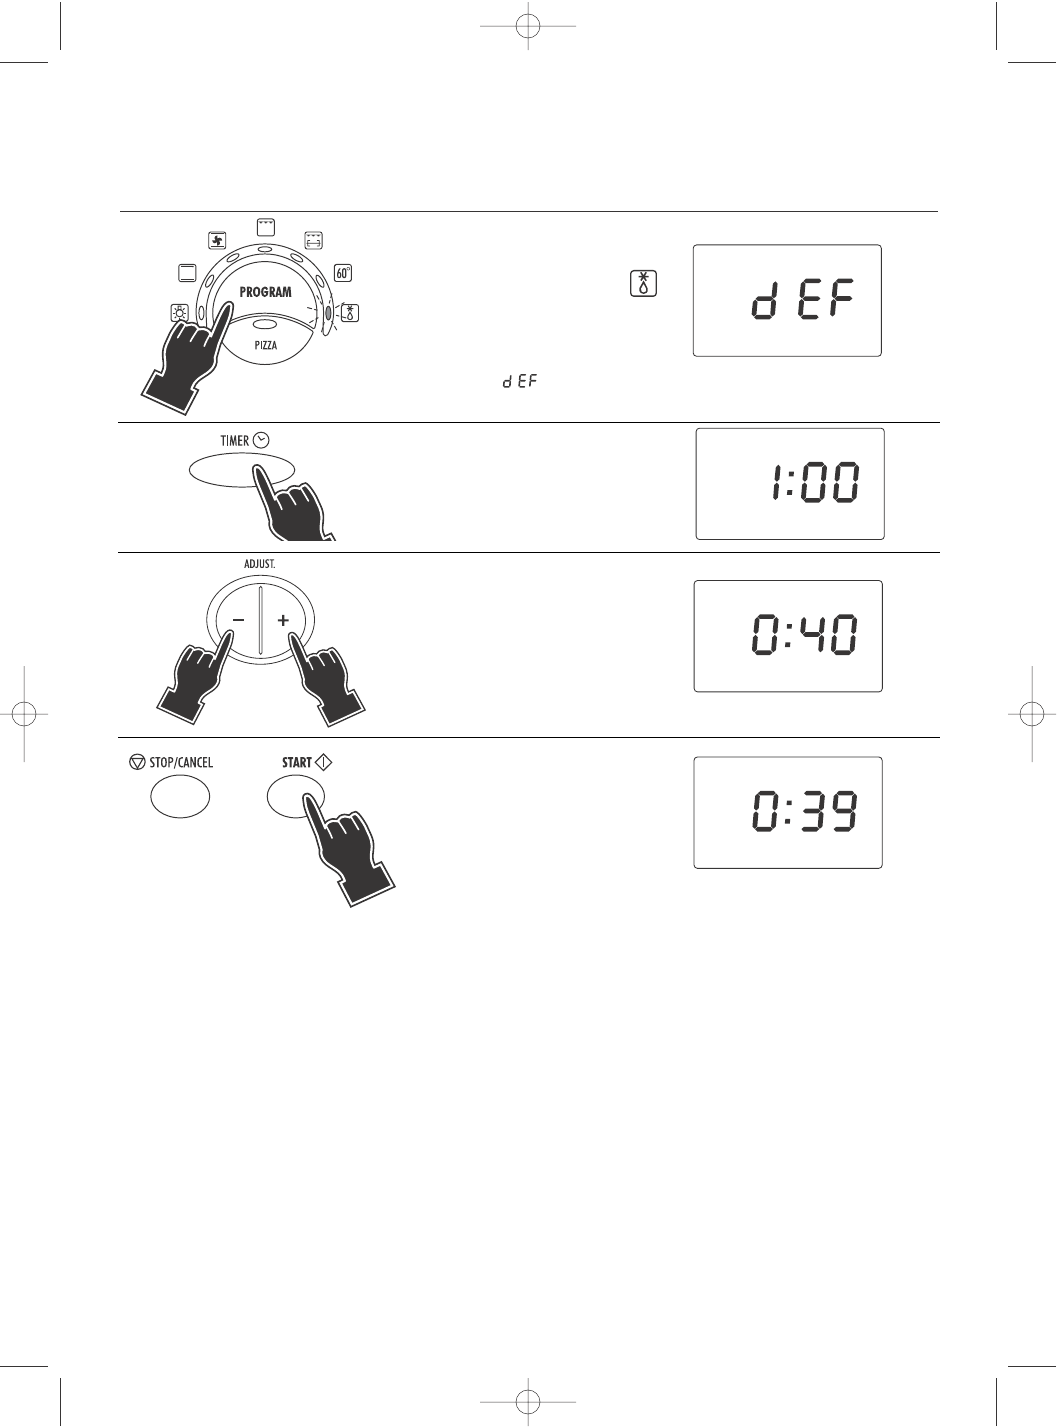
2.7 - DEFROSTING FUNCTION
1 Select the DEFROSTING func-
tion by pressing the PRO-
GRAM button (7) until the
indicator light (16) will be
illuminated.
The display will show the
message .
2 Press the TIMER button (9).
The display will show
1:00.
4
Press the START button (17).
As you press START, time select-
ed is reduced of 1 minute. The
oven will start the countdown.
At the end of the set time the
control will emit 4 beeps and
the display will return to stand-
by (showing the time of the
day, if previously set).
• If the defrosting time is not set, (skipping points 2 and 3) the display will show the countdown starting
from the default duration of
1:00 (1 hour).
• The set time can be modified during cooking by simply repeating points 2 and 3. The countdown will
automatically restart 3 seconds after the final setting.
• If the START button (17) is not pressed within 3 minutes from the previous setting, the control will return
to stand-by.
Put the frozen food directly on the WIRE RACK (
I) inserted in slot 2. Put the SHALLOW PAN (H) in slot 3 in
order to catch the water dropping from the load during the defrosting process (see page 25).
Portions and pieces of raw meat, poultry and fish, frozen soups, pastry, fruit or leftovers will thaw more
quickly on this setting than on a counter or in the refrigerator.
Thaw only pieces or portions small enough to thaw in an hour or less and do not let food come to room
temperature. Thawed food held too long or at a warm temperature can cause serious illenss.
Large amounts of food should be defrosted in a refrigerator.
DEFROSTING
Place the wire rack in guide no. 2 and the dripping pan in guide no. 3, as shown in the figure on page 25.
The food being defrosted should be placed directly on the wire rack. If this is not possible for practical rea-
sons (such as in the case of minced meat, which once defrosted may fall between the openings in the wire
rack), place the food on a dinner plate, and then place the plate on the wire rack (in this case, the dripping
pan is not required).
3 Set the time (max 3 hours) by
pressing the “-” (12) and “+”
(18) buttons. Keep the button
pressed for more than 2 sec-
onds to quickly scroll the time
up or down. For each press of
the button the time will
increase or decrease by one 1
minute.