FR
Enlever la légende en
“français” et l’appliquer à
l’interieur de la porte, suivant
les indications.
Mettre la machine à niveau
avec les pieds.
a) Tourner dans le sens des
aiguilles d’une montre
l’écrou de façon à
dévérouiller la vis du pied.
b) Tourner le pied et le faire
monter ou descendre
jusqu’à obtenir une parfaite
adhérence au sol.
c) Enfin bloquer le pied en
revissant l’écrou dans le sens
inverse des aiguilles d’une
montre et le faire adhérer au
fond de la machine.
Vérifier que le bouton
Marche/Arrêt (C) ne soit pas
enfoncé.
Vérifier que toutes les
manettes soient sur la
position “0” et que le hublot
soit fermé.
Brancher la prise.
Une fois l'appareil installé, la
prise électrique doit rester
accessible.
Appuyer sur la touche
Marche/Arrêt (C) pour
allumer la lampe-témoin de
fonctionnement courant
branché (N); si elle ne
s’allume pas se reporter à la
liste des recherches de
panne.
EN
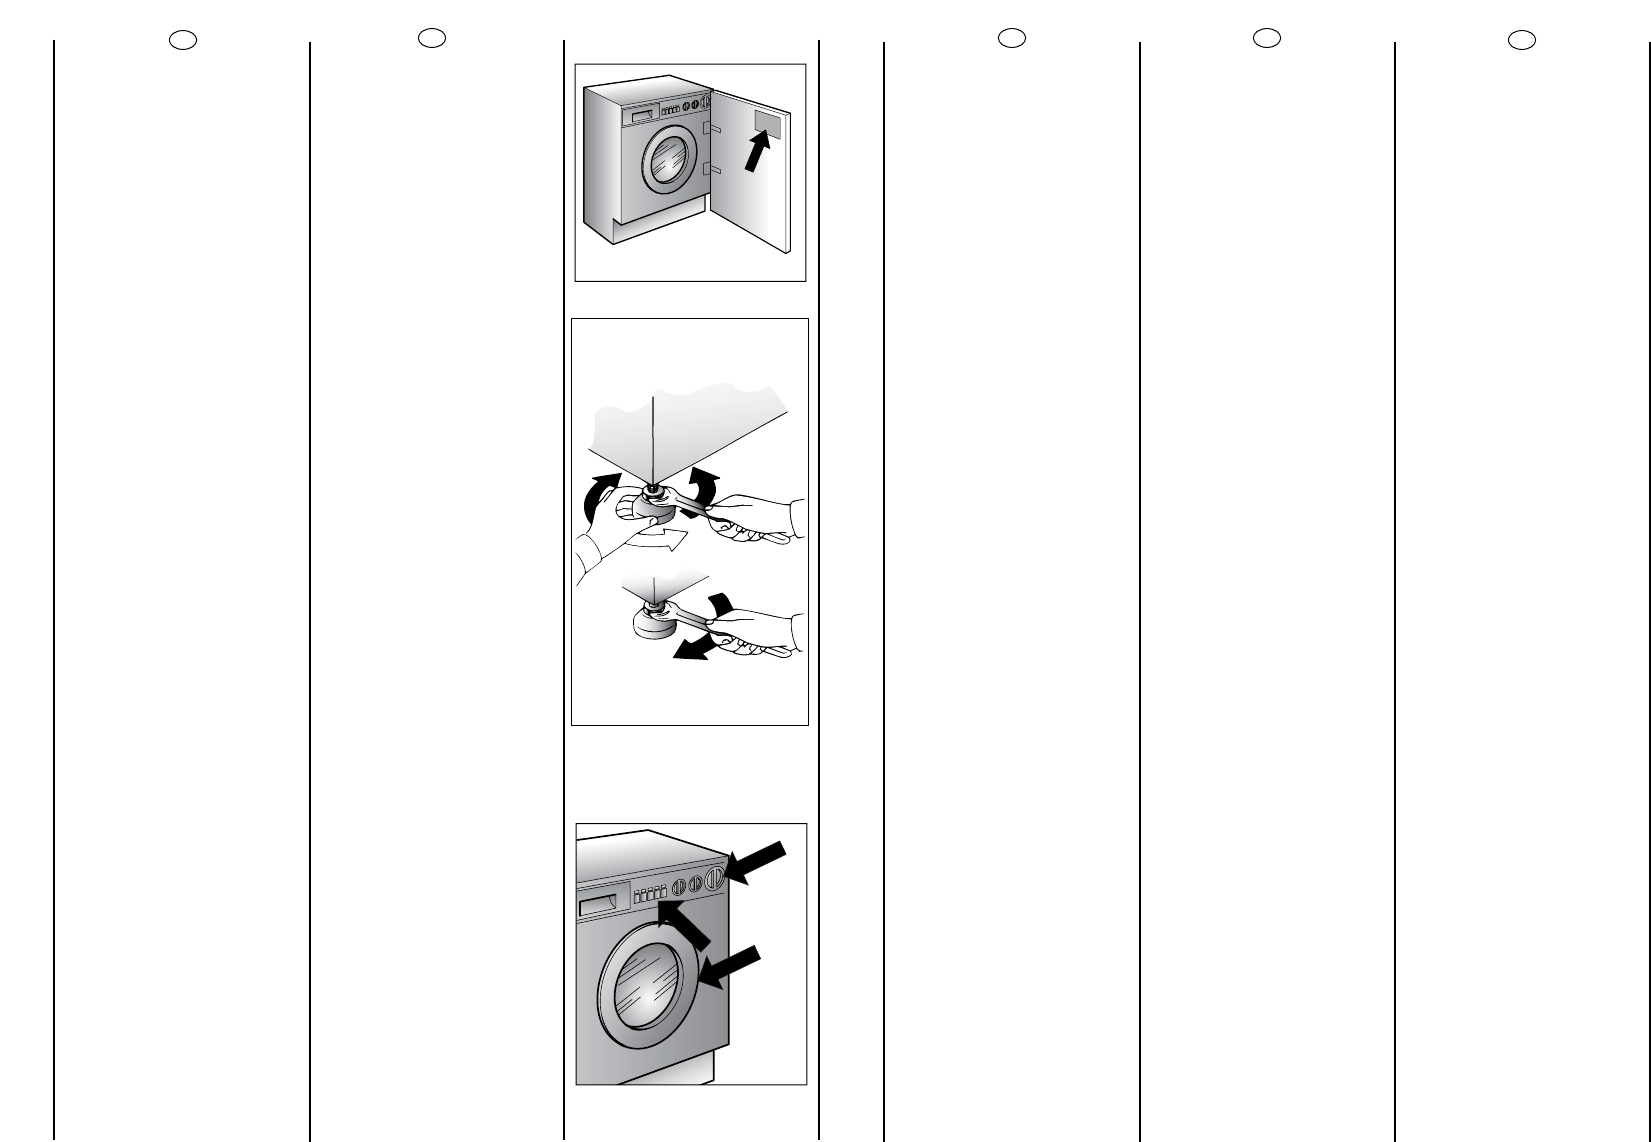
Remove the key in “English”
and apply to the inside of
the door as indicate.
Use the feet to level the
machine with the floor.
a) Turn the nut clockwise to
release the screw adjuster of
the foot.
b) Rotate foot to raise or
lower it until it stands firmly on
the ground.
c) Lock the foot in position
by turning the nut anti-
clockwise until it comes up
against the bottom of the
machine.
Ensure that the Off/On
button (C) is not pressed.
Ensure that all the knobs are
on the “0” position and that
the door is closed.
Insert the plug.
After installation, the
appliance must be
positioned so that the plug is
accessible.
Press the START (C) button.
The power on (N) light will
light up.
If this does not light up see
faults search.
21
ES
Quite la etiqueta en
“CASTELLANO” y péguela en
el interior de la puerta tal
como viene indicado.
Nivele la máquina con las
patas.
a) Girar la tuerca en el
sentido de las agujas del
reloj para desbloquear el
tornillo del pie.
b) Girar el pie y hacerlo
bajar o subir hasta
conseguir su perfecta
adherencia al suelo.
c) Bloquear el pie girando la
tuerca en el sentido
contrario a las agujas del
reloj hasta que se adhiera al
fondo de la lavadora.
Asegúrese de que el botón
Marcha/Paro (C) no esté
pulsado.
Asegúrese de que todos los
mandos estén en posición
“0” y que el ojo de buey
esté cerrado.
Enchúfela.
El aparato tiene que ser
colocado de forma que el
enchufe sea accesible una
vez instalado.
El aparato tiene que ser
colocado de forma que el
enchufe sea accesible una
vez instalado.
A continuación pulse el
botón START (C) se
encenderá el piloto de
funcionamiento “conexión
de corriente efectuada” (N)
si no se enciende vea “
causas de averías”
PT
Cole a tabela de programas
autocolante em “Portugues”
do lado interior da porta.
Nivele a máquina regulando
a altura dois pés.
a) Rode a porca no sentido
dos ponteiros do relógio
para soltar a rosca de
fixação do pé.
b) Rode a pé para o erguer
ou baixar até estar
firmemente assente no chão.
c) Fixe o pé nessa posição
rodando a porca no sentido
contrário co dos ponteiros
do relógio até embater no
fundo da máquina.
Assegure-se de que a tecla
de ligar/desligar (C) não
esteja premida.
Assegure-se de que todos os
botões da máquina estejam
colocados na posição “0” e
de que a porta da máquina
esteja fechada.
Ligue a máquina à corrente,
inserindo a ficha do
respectivo cabo de
alimentação na tomada.
Depois da instalação, os
acessórios devem estar
posicionados, pelo que a
tomada deve estar num
local acessível.
Pressione a tecla de
ligar/desligar (C).O
indicador luminoso de que a
máquina está ligada (N)
iluminar-se-á.Se,porém,este
indicador luminoso não se
acender deverá consultar o
capítulo “Eliminação de
Avarias”.
IT
Stacchi la legenda adesiva
in “ITALIANO” e la applichi
all’interno dell’anta.
Livelli la macchina con i
piedini anteriori.
a) Girare in senso orario il
dado per sbloccare la vite
del piedino.
b) Ruotare il piedino e farlo
scendere o salire fino ad
ottenere la perfetta
aderenza al suolo.
c) Bloccare infine il piedino
riavvitando il dado in senso
antiorario, fino a farlo
aderire al fondo della
lavatrice.
Si assicuri che il pulsante
Marcia/Arresto (C) non sia
premuto.
Si assicuri che tutte le
manopole siano in posizione
“0” e l’oblò sia chiuso.
Inserisca la spina.
L’ a pparecchio deve essere
posto in modo che la spina
sia accessibile ad
installazione avvenuta.
Quindi prema il tasto START
(C), si accenderà la spia di
funzionamento corrente
inserita (N), se non si
accende veda ricerca
guasti.