704487
15
Zoom out
Zoom in
Previous page
1/17
Next page
Note: we recommend you keep the screws to
immobilise the machine for future transit.
The Manufacturers will not be responsible for any
possible damage to the machine caused by not
following the rules relating to releasing the mechanism.
The user is responsible for all costs of installation.
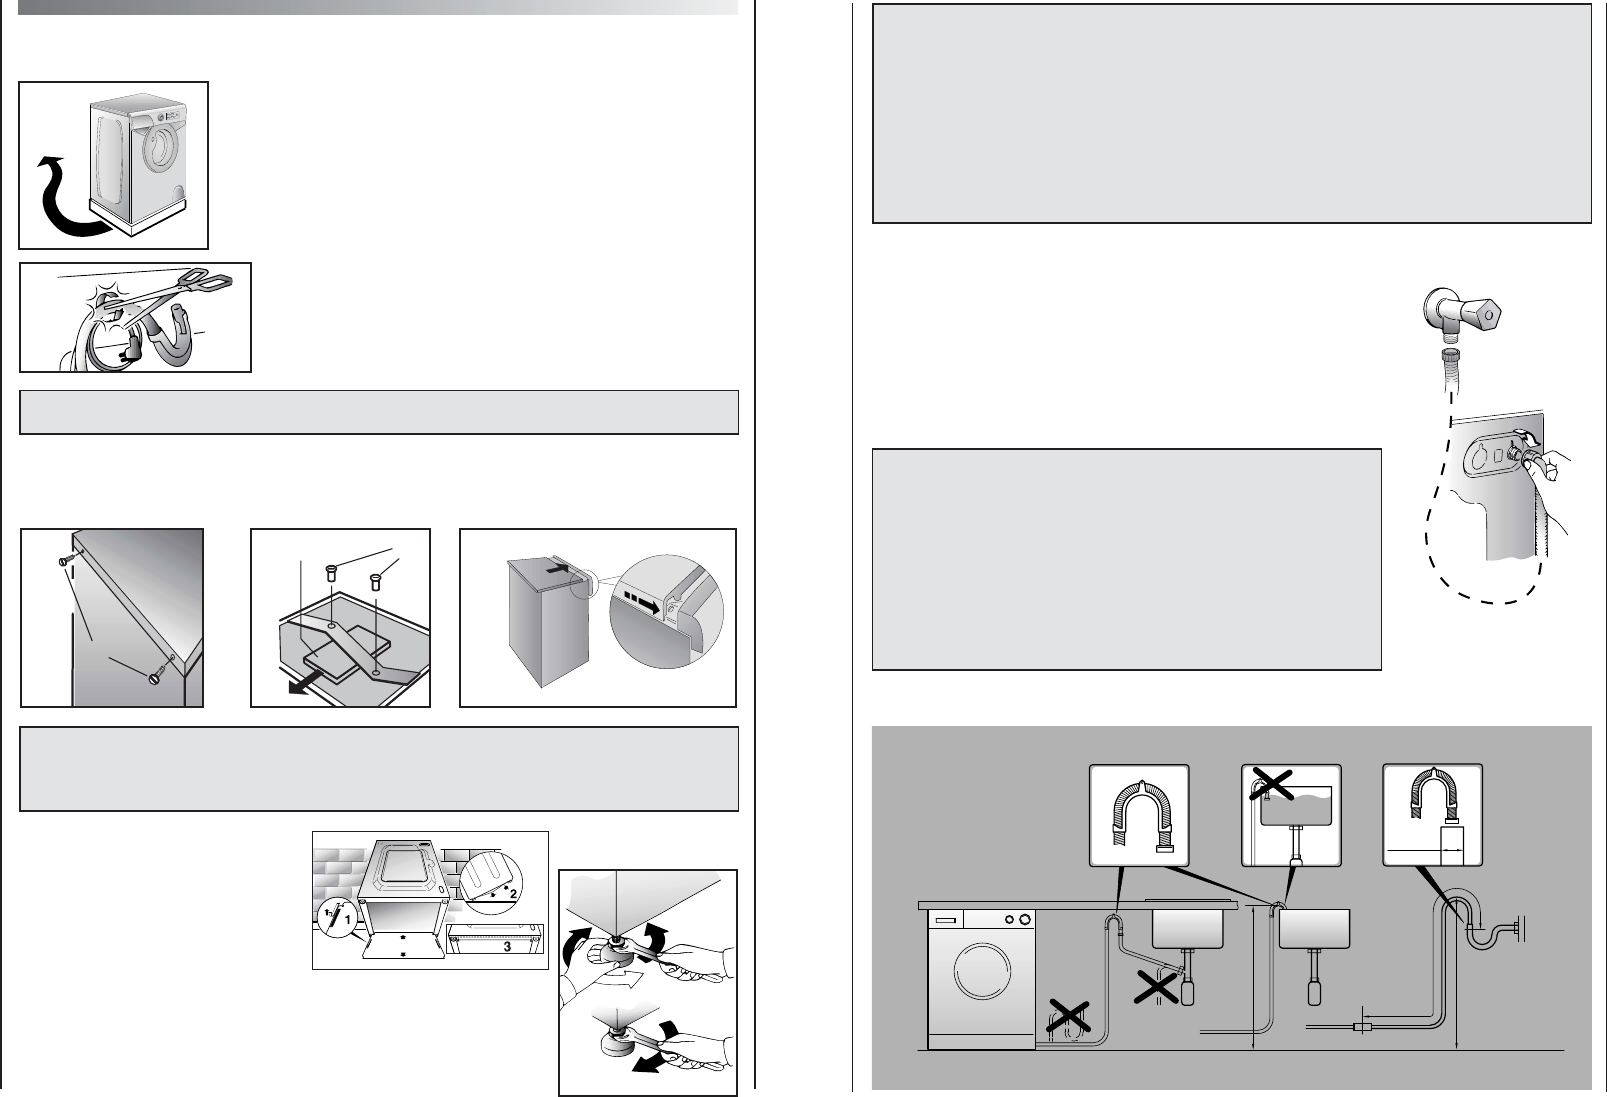
Water connection
The appliance must be connected to the water mains using new
hose-sets.
The old hose-sets should not be re-used.
The machine has an inlet hose with 3/4" B.S.P threaded end
connection to attach between the threaded connector on the
appliance and the cold water supply.
This machine only uses cold water, therefore
only one hose is needed to connect to the cold
water supply. Do not connect to the hot supply.
Cold fill is an energy efficient system. Only the
water required for the washing is heated.There
is no loss of heat in the pipeline from a hot
water tank or boiler to the machine.
29
min 50 cm
max 85 cm
+2,6 mt max
max 100 cm
min 4 cm
28
SETTING UP + INSTALLATION
Remove the polystyrene base and place the machine near
its permanent position (diagram 1).
Carefully cut through the hose retaining clip at the rear of
the appliance (diagram 2).
Unscrews the two top screws A and remove the cover,
sliding it off horizontally (diagram 3).
Remove the cardboard protection.
Unscrews the two tie braces B on the crosspiece (with an H.
19 spanner) and remove the polystyrene spacers under it
(diagram 4).
Please do not fit the 2 tie braces B again!
IMPORTANT: DO NOT REMOVE THE SPACERS ABOVE THE CROSSPIECE.
Replace the cover with the two screws A.
Please ensure when fitting the table top the locating pins are inserted correctly in their slots,
positioned on the side of the cabinet as shown in the diagram 5.
WARNING:
DO NOT LEAVE THE PACKAGING WITHIN REACH OF CHILDREN AS IT IS A
POTENTIAL SOURCE OF DANGER.
Apply the insulation sheet of
corrugated material to the base as
shown in the relevant diagram.
Level the machine by means of the
front feet.
a) Turn the nut clockwise to release
the screw adjuster on the foot.
b) Rotate the foot to raise or lower it until it stands firmly on the
ground.
c) Lock the foot in position by turning the nut anti-clockwise until it
comes up against the bottom of the machine.
A
B
C
1
2
B
C
345
15


Need help? Post your question in this forum.

Forumrules


Report abuse

Libble takes abuse of its services very seriously. We're committed to dealing with such abuse according to the laws in your country of residence. When you submit a report, we'll investigate it and take the appropriate action. We'll get back to you only if we require additional details or have more information to share.

Product:

For example, Anti-Semitic content, racist content, or material that could result in a violent physical act.

For example, a credit card number, a personal identification number, or an unlisted home address. Note that email addresses and full names are not considered private information.

Forumrules

To achieve meaningful questions, we apply the following rules:

Register

Register getting emails for Candy AQUA 100F-80 at:


You will receive an email to register for one or both of the options.


Get your user manual by e-mail

Enter your email address to receive the manual of Candy AQUA 100F-80 in the language / languages: English as an attachment in your email.

The manual is 1,36 mb in size.


You will receive the manual in your email within minutes. If you have not received an email, then probably have entered the wrong email address or your mailbox is too full. In addition, it may be that your ISP may have a maximum size for emails to receive.

Others manual(s) of Candy AQUA 100F-80

Candy AQUA 100F-80 User Manual - English, German - 37 pages

Candy AQUA 100F-80 User Manual - Dutch - 21 pages

Candy AQUA 100F-80 User Manual - French, Italian - 37 pages


The manual is sent by email. Check your email

If you have not received an email with the manual within fifteen minutes, it may be that you have a entered a wrong email address or that your ISP has set a maximum size to receive email that is smaller than the size of the manual.

The email address you have provided is not correct.

Please check the email address and correct it.

Your question is posted on this page

Would you like to receive an email when new answers and questions are posted? Please enter your email address.


Info