L30
L40
L60
L80
C=100, M=75, Y=0, K=100
C=10, M=100, Y=80, K=100
FR
FR
French
Nederlands
Italiano
Español
Português
Deutsch
English
NL
DE
IT
ES
PT
DE
GB
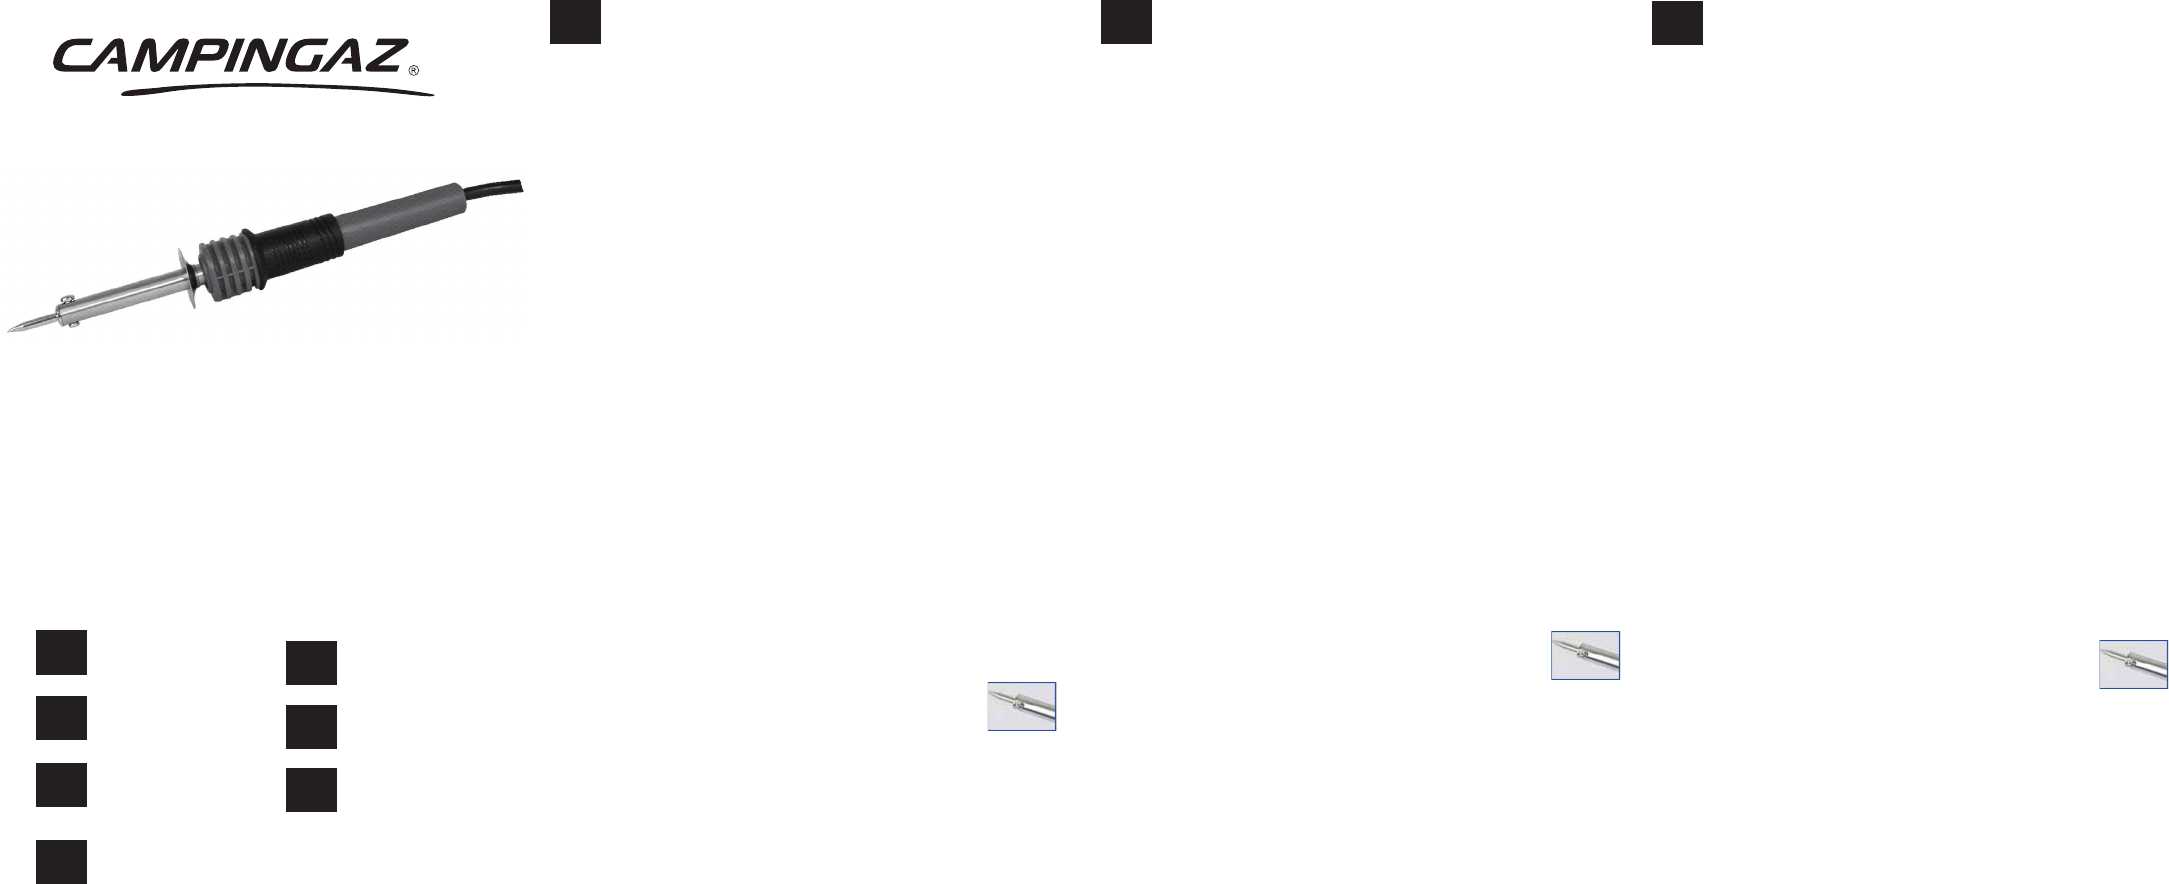
MODE D’EMPLOI
Ce fer est prévu pour fonctionner sur 230 V
de secteur
Pour un bon résultat, utiliser un l d’étain à âme décapante de qualité.
a) Brancher votre fer sur le secteur et attendre quelques minutes pour qu’il atteigne sa tempéra-
ture d’utilisation.
b) Etamer l’extrémité de la panne de votre fer en la frottant légèrement avec le l d’étain (ceci
est particulièrement important à la première utilisation du fer).
c) Il est important que les pièces soient propres et libres de toute matière grasse ou plastique.
d) Etamer chaque pièce à souder en appliquant le fer et en procédant comme en (b) jusqu’à ce
que le l d’étain fonde sur la pièce.
e) Rapprocher les pièces dans la position voulue (les parties étamées en contact sur la plus
grande surface possible), appliquer le fer sur les pièces jusqu’à fusion du l d’étain entre les
pièces.
f) Eloigner le fer et attendre quelques secondes que les pièces refroidissent.
Entretien : si après plusieurs utilisations, la panne devient difcile à étamer
une pierre ammoniacale ou avec une lime et l’étamer de nouveau en procédant comme en (b)
ci-dessus.
PRÉCAUTIONS D’UTILISA
a) Vérier que le voltage de la source d’alimentation électrique correspond à celui indiqué sur
l’appareil.
b)
enfoncée et vissée.
c) Connecter l’appareil à la source d’alimentation.
d) Ne retirer la panne qu’après avoir débranché et laissé refroidir le fer à souder
e)
f) Le cordon d’alimentation du fer à souder est un cordon de qualité spéciale. T
des surfaces chaudes qui pourraient l’endommager doit être éviter-
tion est endommagé, il doit être remplacé par le fabricant, son service après vente ou des
personnes de qualication similaire an d’éviter un danger
g) Ne jamais ouvrir ou chercher à réparer soi-même l’appareil.
A
Lire attentivement les instructions avant utilisation.
a) T
risques d’incendie.
b) Cet outil doit être placé sur son support lorsqu’il n’est pas utilisé.
T
c) Pour changer la panne, utiliser un tournevis cruciforme.
d) Cet appareil a été conçu pour souder des métaux usuels à l’étain, à l’exception du fer
l’aluminium et des surfaces chromées.
e) Cet appareil peut être utilisé par des enfants âgés d’au moins 8 ans et par des personnes
présentant des capacités physiques, sensorielles ou mentales réduites ou qui ont une
expérience et des connaissances réduites concernant l’utilisation de l’appareil, à condition
qu’ils soient sous supervision ou qu’ils aient été informés sur la manière d’utiliser le produit de
manière sûre et qu’ils aient conscience des dangers. Les enfants ne doivent pas jouer avec
l’appareil. Les opérations de nettoyage et d’entretien ne doivent pas être effectuées par des
enfants sans supervision.
*
L
déchets favorisera la réutilisation, le recyclage ou autres formes de valorisation des matériaux
recyclables contenus dans ces déchets. Mettre
l’appareil dans un centre de valorisation des déchets spécialement prévu à cet effet (déchetterie).
Renseignez-vous auprès des autorités locales.
Ne pas jeter dans la nature, ne pas incinérer : la présence
de certaines substances dangereuses dans les équipements électriques et électroniques peut être
nuisible à l’environnement et avoir des effets potentiels sur la santé humaine.
BEDIENUNGSANLEITUNG
Der Lötkolben ist für 230 V vorgesehen. Bei Nichtfunktionieren überprüfen Sie bitte Ihre Netzspan-
nung. Für ein gutes Ergebnis benützen Sie Lötzinndraht mit hochwertigem Flussmittel.
a) Lötkolben am Netz anschließen und einige Minuten warten, bis er die richtige T
erreicht hat.
b) V
bei der ersten Benützung des Lötkolbens).
c) Wichtig ist, dass die T
d) V
schmilzt.
e) Bringen Sie die T
größtmöglichen Fläche), halten Sie den Lötkolben an die T
den T
f) Lötkolben entfernen und einige Sekunden warten, bis die T
Wartung: wenn nach einiger Zeit die Lötspitze schwierig zu verzinnen wird, ist sie mit einem
Ammoniakstein oder einer Feile zu reinigen und neu zu verzinnen.
VORSICHTSMASSNAHMEN
a) Prüfen Sie, dass die Spannung der Stromversorgung den
b) Bevor Sie das Gerät anschließen, überprüfen Sie den ordnungsgemäßen Sitz der Lötspitze,
die richtig eingesetzt und festgeschraubt sein muss.
c) Gerät an Stromquelle anschließen.
d) Lötspitze erst abnehmen, wenn der Lötkolben ausgeschaltet und abgekühlt ist.
e) Nach Benützung muss der Lötkolben normal an der Luft abkühlen (nicht in Wasser tauchen).
f) Der Lötkolben hat ein Spezial-Anschlusskabel. Jeder Kontakt mit heißen Flächen, die es
beschädigen könnten, ist zu vermeiden. Ein beschädigtes
er
zu vermeiden.
g) Niemals das Gerät öffnen oder versuchen, es selbst zu reparieren.
ACHTUNG:
V
a) Immer die metallische -
fahr zu vermeiden.
b) Bei Nichtbenützung ist das Gerät auf seine
abkühlen lassen.
c) Zum Wechseln der Lötspitze ist ein Kreuzschlitzschraubendreher zu verwenden.
d) Das Gerät ist dafür bestimmt, übliche Metalle mit Zinn zu verlöten, außer Eisen,
und verchromten Flächen.
e) Dieses Gerät kann von Kindern über 8 Jahren und Personen mit eingeschränkten körperli-
chen, sinnlichen oder mentalen Fähigkeiten verwendet werden, wenn ihnen entsprechende
Hilfe oder
Gebrauch und die Gefahren beim Gebrauch verstehen. Kinder dürfen mit dem Gerät nicht
spielen. Reinigung und Wartung sollten nicht von Kindern ohne
*
nicht zum unsortierten Haushaltsabfall kommen. Das getrennte Sammeln der
Wiederverwendung, Recycling oder andere V
recyclierbaren Stoffe. Bringen Sie das Gerät in eine zu diesem Zweck vorgesehene -
tungsstelle (Deponie). Informieren Sie sich bei den örtlichen Stellen.
Entsorgen Sie das Gerät nicht in der freien Natur
den Elektro- und Elektronikteilen können umwelt- und gesundheitsschädlich sein.
THIS APPLIANCE IS NOT SUIT
INSTRUCTIONS FOR USE
This iron is designed to operate on 230 V
For best results, use a high-quality cored tin wire.
a) Connect your iron to the mains and wait a few minutes for it to reach its operating tempera-
ture.
b) T
particularly important when the iron is used for the rst time).
c) It is important that the parts are clean and free from grease or plastic.
d) T
melts on the object.
e) Bring the objects into position (the tinned objects should meet at the largest possible surface
area), use the iron on the objects until the tin wire melts between the them.
f) Remove the iron and wait a few seconds for the objects to cool.
Maintenance: if after several uses, the soldering bit becomes hard to be tinned, clean it with
ammonia or with a lime stone and tin again as in (b) above.
PRECAUTIONS FOR USE
a) Check that the voltage of the power source corresponds to that indicated on the appliance.
b) Before connecting the appliance check the soldering piece is properly connected, which must
be perfectly tted and screwed in.
c) Connect the appliance to the power supply
d) Do not remove the soldering piece before unplugging the soldering iron and allowing it to cool.
e)
f) The soldering iron’s power cord has a particular nish.
could damage it must be avoided. If the power cable is damaged, it must be replaced by the
manufacturer
g) Never open or attempt to repair the appliance yourself.
W
Read the instructions carefully before use.
a)
b) This tool must be placed in its stand when it is not used. -
ly on the metal stand.
c) T
d) This appliance has been designed for welding base tin metals, with the exception of iron,
aluminium and chrome surfaces.
e) This unit can be used by children aged 8 years and over
physical, sensory or mental capabilities or who have little experience and knowledge about
the use of the appliance, provided they are under supervision or have been informed about
how to use the product safely and they are aware of the associated dangers. Children should
not play with the appliance. Cleaning and maintenance should not be carried out by children
without supervision.
*
The appliance may not be discarded as unsorted municipal waste. The separate collection of this
waste will promote the reuse, recycling and other forms of repurposing of recyclable materials from
this waste. Leave the appliance in a waste treatment centre specically designed for this purpose
(recycling centre).
Enquire with your local authorities.
Do not throw away in the environment, do not incinerate: the presence of certain hazardous sub-
stances in electrical and electronic equipment can be harmful to the environment and potentially
affect human health.
GB
Made in China
4010053587 (ECN200571