497530
19
Zoom out
Zoom in
Previous page
1/40
Next page
Once finished the unit will display a screen similar to the one below reporting
which speakers were found and any that appear out of phase.
If any speakers appear unconnected or out of phase carefully check the
connections on the speaker and the back of the unit. Also check any bi-wiring
links that might be present on the speaker. For any out of phase speakers
check that the relevant + terminal of the 651R/751R goes to the + terminal
of that speaker and similarly the – terminal of the 651R/751R goes to the –
terminal of the speaker for that channel.
Note: Like all such systems there are some limitations. Speakers that exhibit
very strong phase angles or deliberately wire some drive units out of phase
can of course appear to the system as an out of phase speaker when
correctly connected. If a speaker is reported as out of phase but is correctly
wired it is ok to proceed to the next step.
If necessary press the I/O button to cancel and perform a retest or press
Enter to start the second part of the autosetup procedure as below.
Again a series of test signals will now be output from all of the connected
speaker terminals and Subwoofer. The 651R/751R uses these to measure
the levels crossovers and distances (and hence introduce the correct delays)
appropriate to your speakers and room characteristics.
For Audyssey & 2EQ the unit will ask you to make a second measurement
after having moved the microphone to the left boundary of the normal
listening area occupied by yourself and other listeners (for instance the left
hand end of your sofa). Then a further measurement after having moved the
microphone to the right boundary of the normal listening area. In both cases
the microphone should be approximately at your normal listening height.
651R/751Razur
19
ENGLISH
Audyssey 2EQ Room EQ
This is a more sophisticated version with a longer second stage that
measures the frequency response of all of your speakers three times at three
different points in the room and then calibrates and equalizes them to
optimise the sound for your actual listening environment (Room EQ). To
perform Audyssey Autosetup with no Room EQ simply select Audyssey
Autosetup from the menu. To perform Autosetup and Room EQ select
Audyssey Autosetup & 2EQ.
The process for both system is the same other than the extra sets of
measurements so we’ll describe the Audyssey & 2EQ case only below.
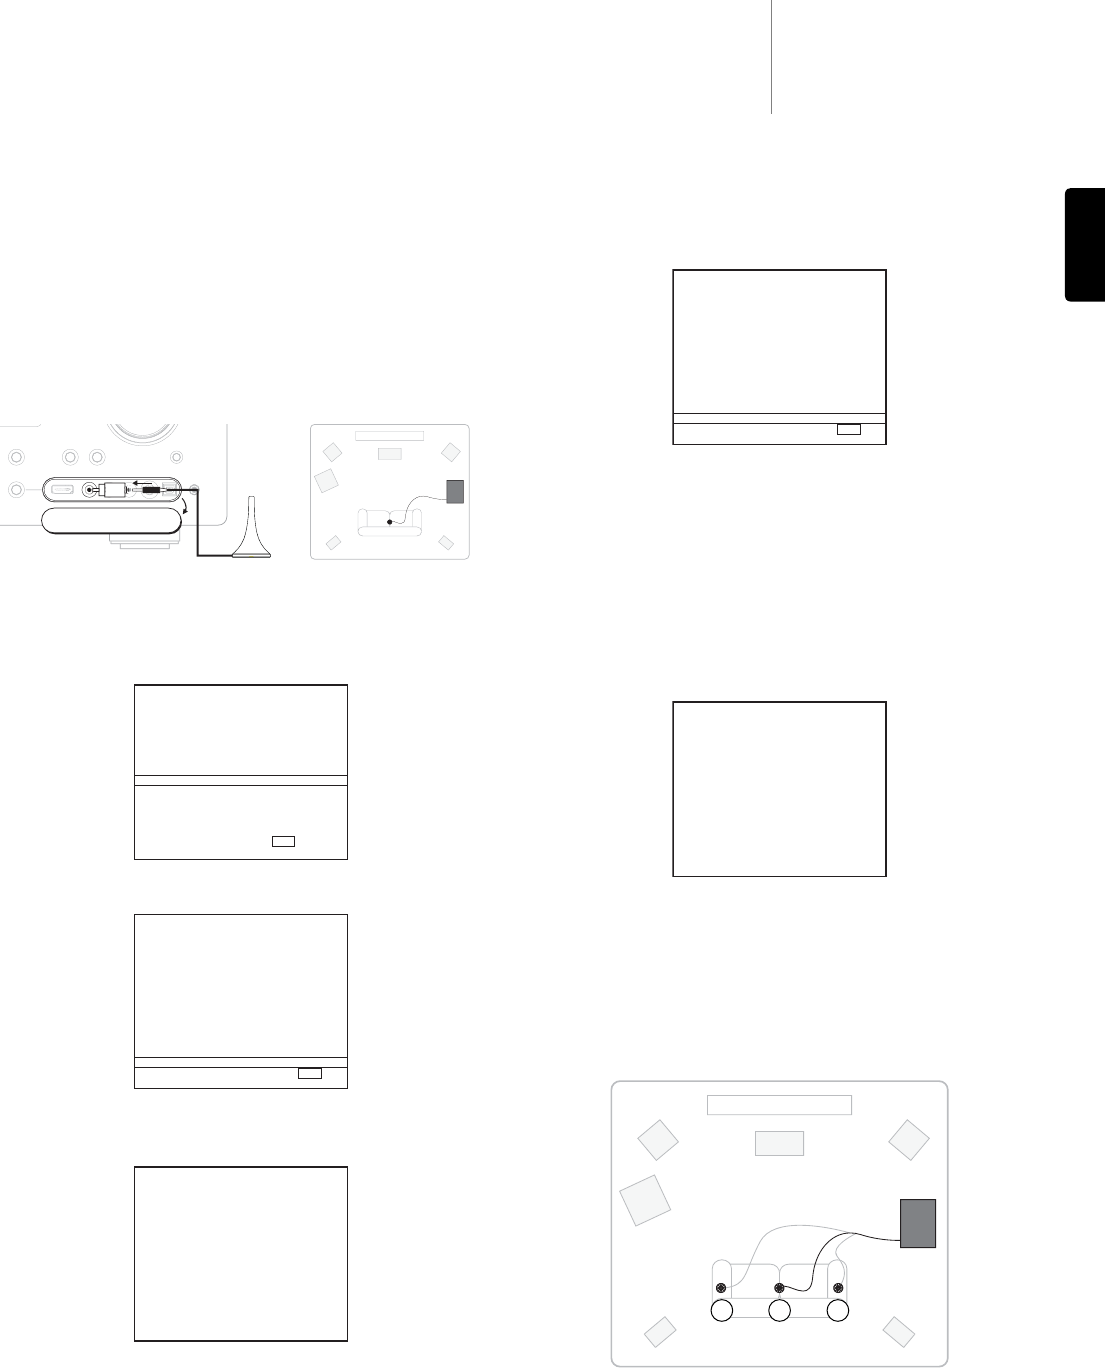
First, connect the supplied microphone to the front Left front panel audio
input on the front panel via the supplied adaptor and place it at your normal
listening position in the room.
Press the OSD button on the remote control to access the OSD and then
select the Speaker Setup Menu. Now select the Audyssey option you want.
Follow the on-screen instructions and press 'Enter' on the remote control
when ready to start the Audyssey Autosetup function.
Once activated the OSD will display the message below and the word
'Audyssey Auto Calibration' will also be displayed on the front panel of the
651R/751R to confirm.
A series of test signals will now be output from all of the connected speaker
terminals of the 651R/751R (including the Subwoofer output).
Audi
o
Vide
o
S
-Vide
o
Reco
r
de
r
2
Video
3
/
M
P3
7.1 Dir
ect
Analo
g
Ste
r
eo
Dir
ect
O
ptical
M
P3 In
H
DM
I
L
R
Mute
/
Inf
o
AudioL
Speaker Setup Menu
Speaker Configuration
Speaker Level Calibration
Speaker Distance
Speaker Crossover
Audyssey Autosetup
Audyssey Autosetup & 2EQ
Return I/O
Audyssey Autosetup Menu
Plug the microphone into
the left channel of Video
3 and place the microphone
at the main listening
position at listening
height.
Continue : [Enter]
Cancel/Return : I/O
Audyssey Autosetup Menu
The unit is now checking
which speakers are
connected, their phase,
crossover, level and
distance.
This will take several
minutes, please wait...
Left Speaker
Audyssey Autosetup Menu
Speakers Detected:
L :
C :
R :
RS :
RB :
LB :
LS :
SW :
Continue : [Enter]
Cancel/Return : I/O
Connected
Connected
Connected
Connected
Connected
Connected
Connected
Connected
Audyssey Autosetup Menu
Speaker Calculation:
The unit is now
calculating parameters for
your speakers.
Percent: 50%
2 1 3
19


Need help? Post your question in this forum.

Forumrules


Report abuse

Libble takes abuse of its services very seriously. We're committed to dealing with such abuse according to the laws in your country of residence. When you submit a report, we'll investigate it and take the appropriate action. We'll get back to you only if we require additional details or have more information to share.

Product:

For example, Anti-Semitic content, racist content, or material that could result in a violent physical act.

For example, a credit card number, a personal identification number, or an unlisted home address. Note that email addresses and full names are not considered private information.

Forumrules

To achieve meaningful questions, we apply the following rules:

Register

Register getting emails for Cambridge Audio Azur 751R at:


You will receive an email to register for one or both of the options.


Get your user manual by e-mail

Enter your email address to receive the manual of Cambridge Audio Azur 751R in the language / languages: English as an attachment in your email.

The manual is 16,61 mb in size.


You will receive the manual in your email within minutes. If you have not received an email, then probably have entered the wrong email address or your mailbox is too full. In addition, it may be that your ISP may have a maximum size for emails to receive.

Others manual(s) of Cambridge Audio Azur 751R

Cambridge Audio Azur 751R User Manual - German - 40 pages

Cambridge Audio Azur 751R User Manual - Dutch - 40 pages

Cambridge Audio Azur 751R User Manual - French - 40 pages

Cambridge Audio Azur 751R User Manual - Italian - 42 pages

Cambridge Audio Azur 751R User Manual - Polish - 40 pages

Cambridge Audio Azur 751R User Manual - Spanish - 40 pages


The manual is sent by email. Check your email

If you have not received an email with the manual within fifteen minutes, it may be that you have a entered a wrong email address or that your ISP has set a maximum size to receive email that is smaller than the size of the manual.

The email address you have provided is not correct.

Please check the email address and correct it.

Your question is posted on this page

Would you like to receive an email when new answers and questions are posted? Please enter your email address.


Info