656782
2
Zoom out
Zoom in
Previous page
1/2
Next page
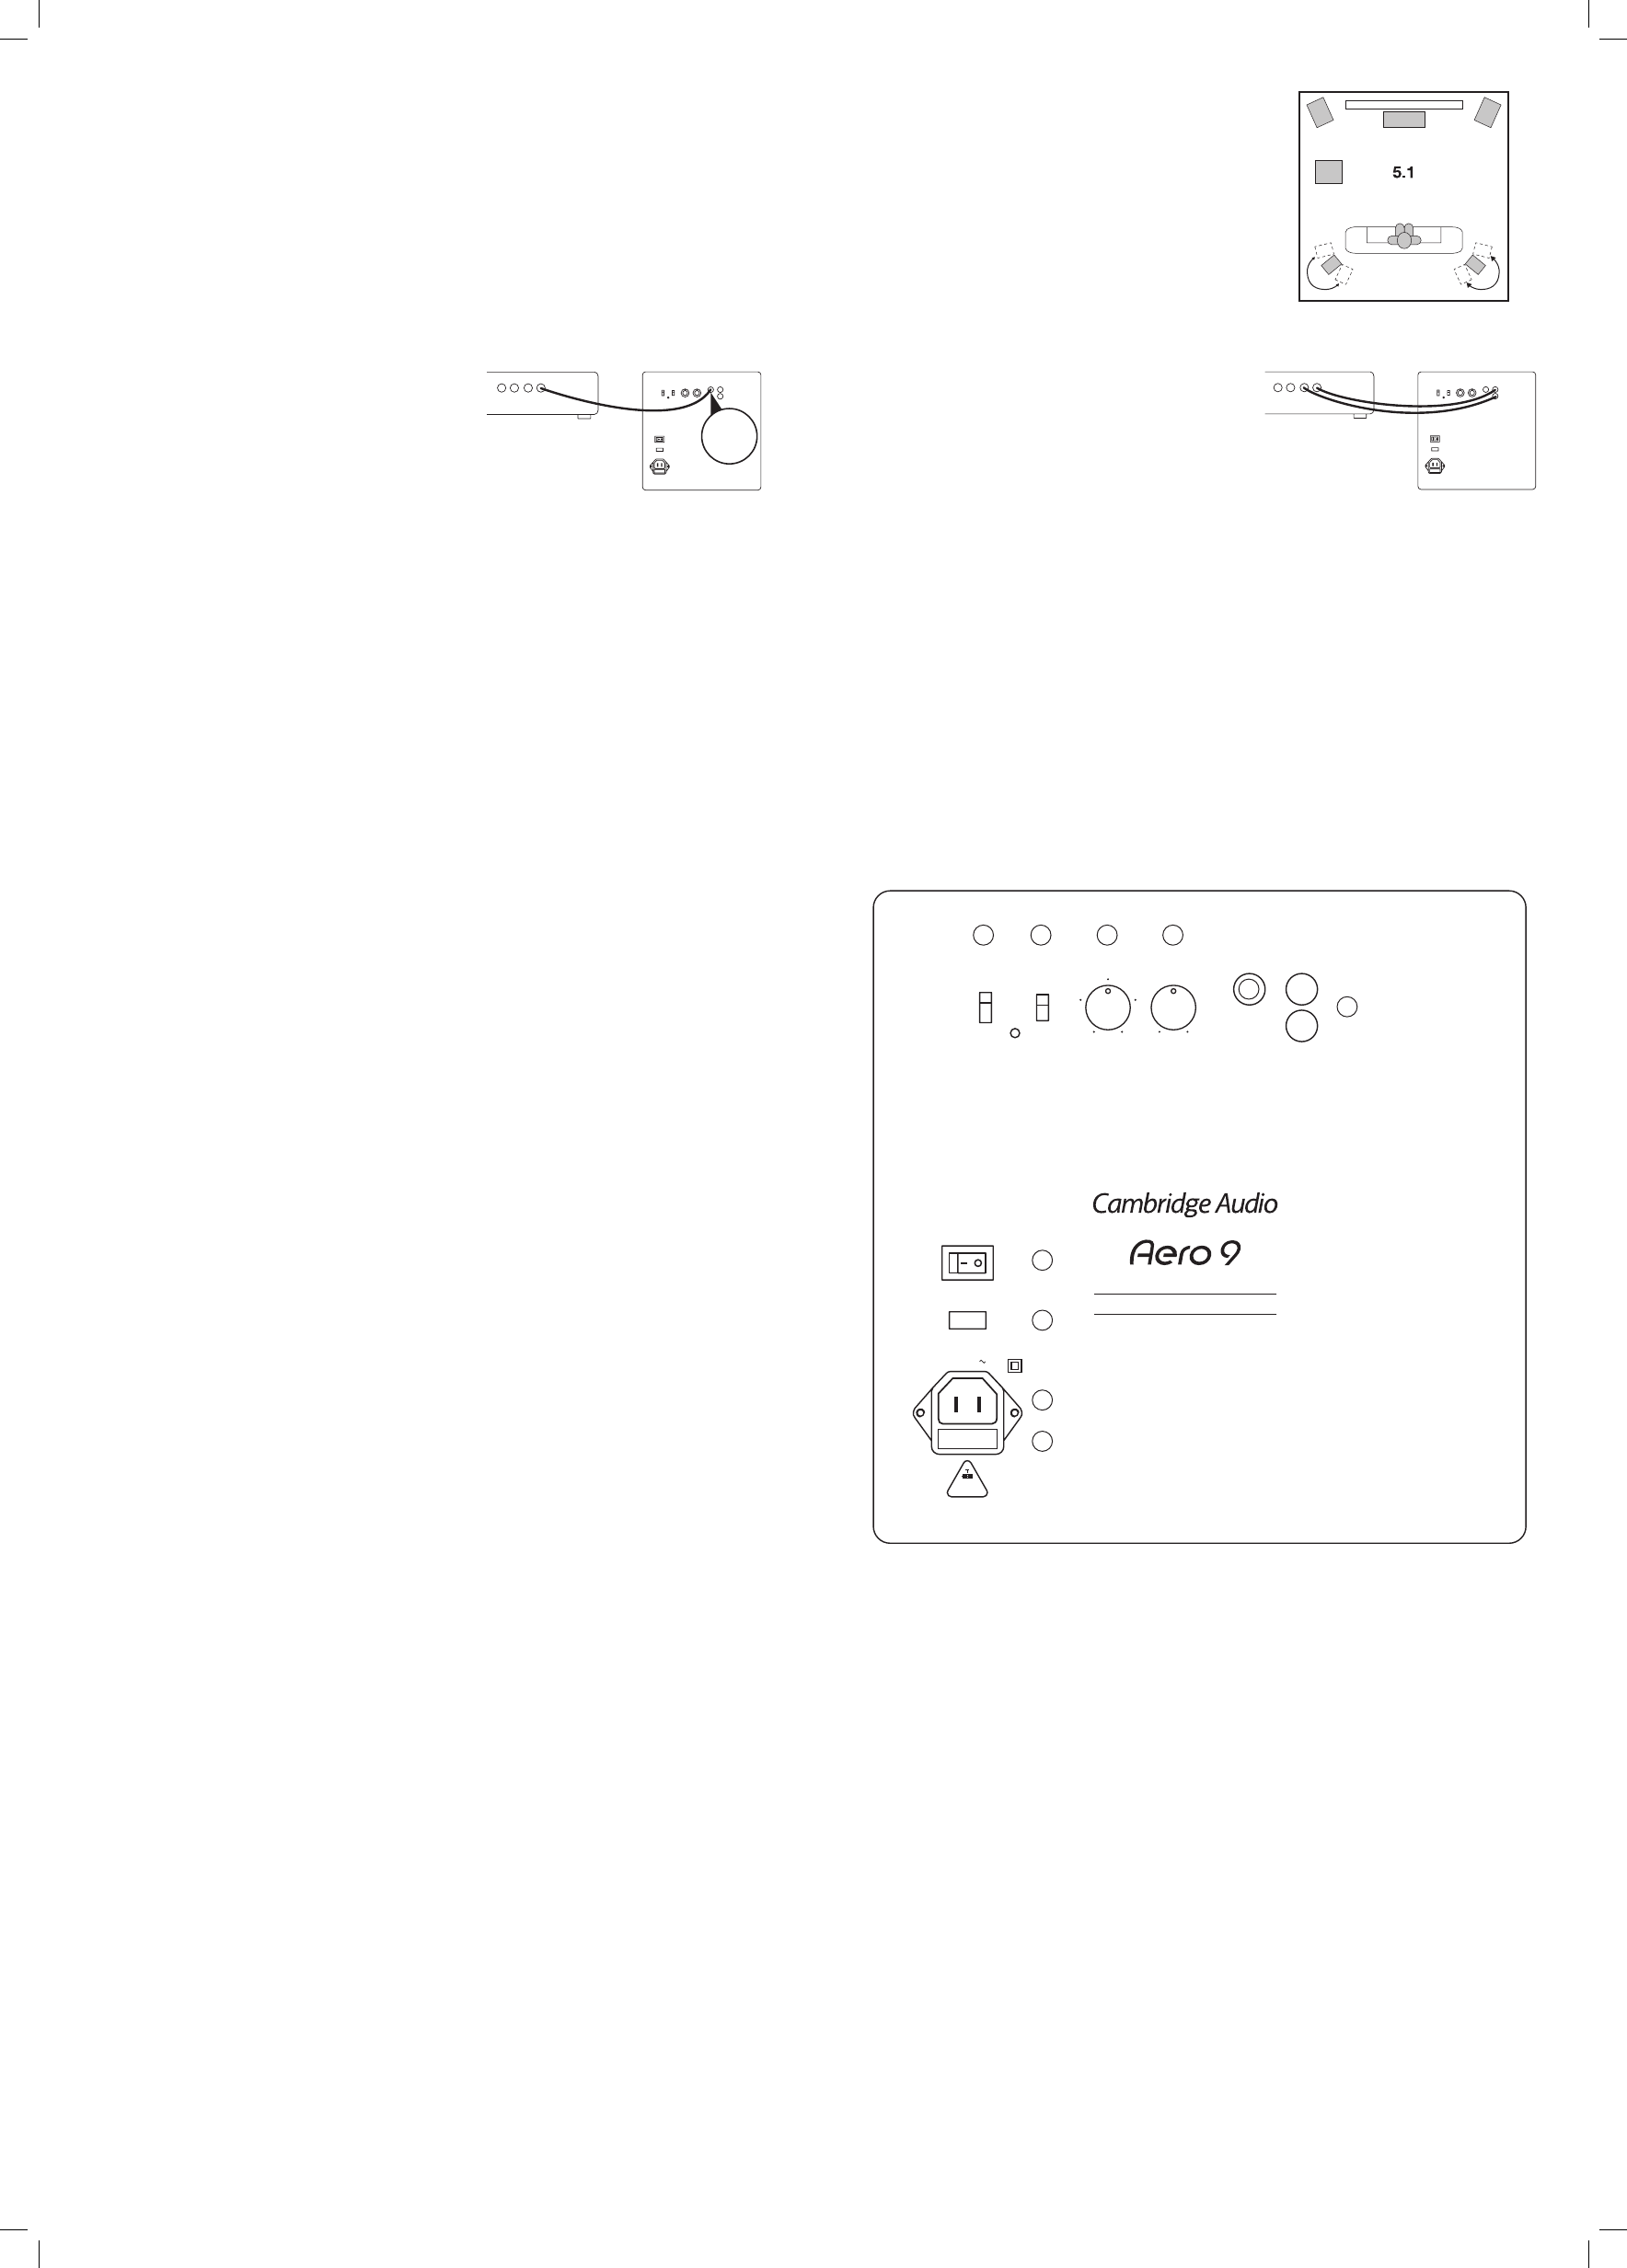
2.1 Before connecting, consider loudspeaker placement and all cabling requirements. Some typical setups are shown here:
2.1 Schließen Sie den Lautsprecher erst an, wenn Sie sich über seinen endgültigen Stellplatz und den Kabellängen sicher sind. Einige typische Kongurationen sind hier aufgezeigt:
2.1 Avant de réaliser les raccordements, étudiez les diverses possibilités d’installation des enceintes acoustiques et les exigences de câblage correspondantes. Les schémas suivants présentent plusieurs
congurations types:
2.1 Antes de realizar la conexión, planique la colocación de los altavoces y los requisitos de cableado. A continuación se muestran algunas conguraciones habituales:
2.1 Prima di effettuare le connessioni, considerare la disposizione dei diffusori e tutti i requisiti del cablaggio. Qui di seguito vengono illustrate alcune disposizioni tipiche:
2.1 Kijk, voor u begint met aansluiten, waar u de luidsprekers wilt plaatsen en wat u nodig hebt voor de bekabeling. Hieronder ziet u enkele kenmerkende installaties:
2.1 Före anslutning överväger du var högtalarna ska placeras och alla kabelkrav. Några typiska placeringar visas här:
2.1 До подключения продумайте расположение громкоговорителя и всех соединительных кабелей. Ниже показаны некоторые типовые варианты установки:
3. Connections / Anschlüsse / Raccordements / Conexiones / Collegamenti / Aansluitingen / Anslutningar / Подключения
2. Positioning / Positionierung / Installation / Colocación / Disposizione / Plaatsing / Placering / Выбор размещения
(No Standby)
Phase Frequency
Volume LFE Line Input
R
L
40Hz 200Hz
120Hz
80 160HzHz
MIN MAX
PWR
180°
0°
ATTENTION
AFIN D'ASSURER
UNE PRETECTION
PERMANENTE CONTRE
LES RISQUES D'INCENDIE,
REMPLACER UNIQUEMENT
PAR UN FUSIBLE
DE INDIQUE
CAUTION
FOR CONTINUED
PROTECTION
AGAINST FIRE
HAZARD,
REPLACE
ONLY WITH
SPECIFIED FUSE
Rated Power Consumption: 600W
Power AC
Power
On Off
Mains Voltage Selector Switch
115V/230V AC ~ 50/60Hz
230V~
FUSE T3.15AL 250V~
115V~
FUSE T6.3AL 250V~
Force On
Audio Detect
(Normal Use)
www.cambridge-audio.com
Subwoofer
500W output
Designed and engineered in London, England
4. Controls / Bedienelemente / Réglages / Controles / Regolazioni / Bediening / Styrningar / Органы управления
4.1 Auto feature will switch your subwoofer on and off automatically by signal detection.
4.1
Wird ein Signal erkannt, schaltet die automatische Aktivierungsfunktion den Subwoofer automatisch ein oder aus.
4.1
La fonctionnalité Auto allume et éteint automatiquement votre subwoofer par la détection du signal.
4.1
La función Auto encenderá y apagará automáticamente el subwoofer mediante detección de la señal.
4.1
La funzione Auto accende e spegne automaticamente il subwoofer al rilevamento del segnale.
4.1
De “Auto”-functie schakelt uw subwoofer automatisch aan en uit via signaalwaarneming.
4.1
Autofunktionen slår på och stänger av din subwoofer automatiskt med hjälp av signalavkänning.
4.1
Функция обнаружения звукового сигнала автоматически включает и отключает звук сабвуфера.
4.2 Set Phase for best system sound (0 = normal).
4.2
Stellen Sie die Phase für den optimalen Sound des Systems ein (0 = normal).
4.2
Réglez la phase pour obtenir le meilleur son (0 = normal).
4.2
Fije la fase para obtener el sonido de máxima calidad (0 = normal).
4.2
Regolare la fase (Phase) in modo da ottenere la migliore resa sonora del sistema (0 = normale).
4.2
Stel Phase in voor het beste systeemgeluid (0 = normaal).
4.2
Indstil Phase (fase) så du opnår den bedste lyd fra din opstilling (0 = normal)
4.2
Настройте фазировку для наилучшего качества звука (0 = нормально).
4.3 Adjust Frequency to integrate subwoofer with your system.
4.3
Stellen Sie die Übergangsfrequenz ein, um den Subwoofer in Ihr System zu integrieren.
4.3
Réglez la fréquence pour que le caisson de grave soit parfaitement intégré au système.
4.3
Haga el ajuste de frecuencia para integrar el subwoofer en el sistema.
4.3
Impostare la frequenza che consenta di ottenere la migliore integrazione possibile del subwoofer con il resto del
sistema.
4.3
Stel de frequentie af om de subwoofer te integreren met uw systeem.
4.3
Indstil Frequency (Frekvens) for at tilpasse subwooferen til frekvensniveauet for dit system.
4.3
Отрегулируйте частоту для полной интеграции сабвуфера в вашу систему.
4.4 Set Volume to balance subwoofer output with your system.
4.4
Gleichen Sie die Wiedergabe des Subwoofers mit dem Balanceregler am System ab.
4.4
Réglez le volume de façon à ce que la sortie du caisson de grave corresponde à celle de votre chaîne.
4.4
Fije el volumen para equilibrar la salida del subwoofer con el sistema.
4.4
Regolare il volume per equilibrare il livello d’uscita del subwoofer con il resto del sistema.
4.4
Stel het volume in om de uitvoer van de subwoofer af te stemmen op uw systeem.
4.4
Indstil Volume (Lydstyrke) for at justere subwooferens udgangseffekt, så den passer til udgangseffekten på dit system.
4.4
Настройте громкость для согласования выходного сигнала сабвуфера с вашей системой.
4.5
Mains power on / off.
4.5
Netz ein /aus.
4.5
Secteur électrique allumé / éteint.
4.5
Encendido/ apagado de la alimentación.
4.5
Pulsante d’accensione/ spegnimento.
4.5
Hoofdstroom aan/ uit.
4.5
Huvudströmbrytare på / av.
4.5
Электропитание включите / выключите
4.6 Mains voltage selector switch
Switches the mains voltage between 115V and 230V. For use by installer/dealer only.
4.6
Spannungsauswahlschalter
Hier können Sie zwischen 115 V und 230 V wählen. Lassen Sie diese Einstellung vom Installateur bzw. vom Händler
vornehmen.
4.6
Sélecteur de tension d’alimentation
Permet de basculer la tension d’alimentation entre 115 V et 230 V. Utilisation réservée à l’installateur/au revendeur
uniquement.
4.6
Interruptor selector de tensión
Cambia la tensión de alimentación entre 115 V y 230 V. Para su uso exclusivamente por el instalador/distribuidor.
4.6 Selettore della tensione di rete
Utilizzato per commutare la tensione di rete tra 115 V e 230 V. Destinato esclusivamente all’uso da parte dell’installatore/
rivenditore.
4.6 Selectieschakelaar voor voedingsspanning
Schakelt de voedingsspanning tussen 115V en 230V. Alleen bij installatie of onderhoud/reparatie door leverancier.
4.6 Huvudströmbrytare
Växlar nätspänning mellan 115V och 230V. Används endast av installatör/återförsäljare.
4.6 Переключатель сетевого напряжения
Этот переключатель служит для переключение сетевого напряжения питания: 115 В и 230 В. Он предназначен для
использования только специалистом по установке или продавцом
4.7 AC power socket.
4.7
Netzbuchse.
4.7
Prise d’alimentation courant AC.
4.7
Toma de alimentación CA.
4.7
Presa di alimentazione CA.
4.7
AC-voedingsaansluiting.
4.7
Vekselstrømsstik.
4.7
Гнездо питания переменного тока.
3.1 LFE (Low Frequency Effects)
single phono cable can be connected here from a home cinema
receiver’s LFE/subwoofer output.
3.1 LFE-Eingang (Low Frequency Effects - Niederfrequenz-Effekte)
Anschluss für ein einzelnes Phonokabel vom LFE-Ausgang des
Receivers eines Home Cinema Systems/des Subwoofers.
3.1 Entrée effet basses fréquences (LFE)
raccordement d’un câble Cinch simple à la sortie LFE/caisson de
grave d’un intégré audio-vidéo.
3.1
Entrada LFE (Efectos de bajas frecuencias)
aquí puede conectar un cable de audio que provenga de la salida LFE/subwoofer de un sistema receptor de.
3.1 Entrata LFE (effetti di basse frequenze)
si può qui connettere un cavo singolo di interconnesione audio, proveniente dall’uscita LFE/Subwoofer di un ricevitore
A/V Surround.
3.1
LFE-ingang (Low Frequency Effects)
Hier kan één phono-kabel worden aangesloten voor het LFE-/subwooferuitgangssignaal van een AV Receiver.
3.1
LFE-ingång (låg frekvenseffekt)
en enda phonokabel kan anslutas här från en hembiomottagares LFE/subwooferutgång.
3.1
Вход ‘LFE’ (Low Frequency Effects = низкочастотные эффекты (НЧЭ))
сюда может быть подсоединен одиночный звуковой кабель с выхода приемника домашнего кинотеатра ‘LFE’ (НЧЭ)/
сабвуфера.
3.2 If using with a 2-channel hi- system, connect pre-out to Line Input.
3.2
Wenn Sie den Subwoofer mit einem 2-kanaligen HiFi-System verwenden,
verbinden Sie den PRE OUT-Ausgang mit dem LINE-Eingang.
3.2
Si vous utilisez une chaîne hi- 2 canaux, raccordez la sortie pre-ampli au
connecteur d’entrée de ligne.
3.2
Si lo utiliza con un sistema de alta delidad de 2 canales, conecte pre-out a
Line Input.
3.2
In caso invece di utilizzo di un sistema hi- a 2 canali, collegare la pre-out
all’ingresso Line.
3.2
Sluit bij een tweekanaals hisysteem 2-channel hi- system pre-out aan op
Lijningang (Line Input).
3.2
Hvis der anvendes et 2-kanals hi- system, skal pre-out tilsluttes til Linieudgang
(Line Input).
3.2
При использовании с 2-канальной hi- системой подключите выход
предварительного усилителя к линейному входу.
LFE
4.1 4.2 4.3 4.4
3.1
3.2
4.5
4.6
4.7
4.8
4.8
For continued protection against re hazard, replace only with specied fuse:
230V AC ~ 60/50Hz = T3.15AL 250V
115V AC ~ 60/50Hz = T6.3AL 250V
4.8
Zur Vermeidung von Bränden nur durch vorgeschriebene Sicherung ersetzen:
230V AC ~ 60/50Hz = T3.15AL 250V
115V AC ~ 60/50Hz = T6.3AL 250V
4.8
Pour garantir une protection continue contre les risques d’incendie, merci de remplacer uniquement avec les types de
fusibles indiqués:
230V AC ~ 60/50Hz = T3.15AL 250V
115V AC ~ 60/50Hz = T6.3AL 250V
4.8
Para una continua protección contra daños de incendio, reemplace sólo con el fusible especicado:
230V AC ~ 60/50Hz = T3.15AL 250V
115V AC ~ 60/50Hz = T6.3AL 250V
4.8
Per una costante protezione dal rischio di incendio, si prega di sostituire solamente con il fusibile indicato:
230V AC ~ 60/50Hz = T3.15AL 250V
115V AC ~ 60/50Hz = T6.3AL 250V
4.8
Vervang de zekering alleen door een zekering van het opgegeven type, zodat het toestel blijvend beveiligd is tegen het
risico van brand:
230V AC ~ 60/50Hz = T3.15AL 250V
115V AC ~ 60/50Hz = T6.3AL 250V
4.8
For fortsat beskyttelse mod brandfare må sikringer kun udskiftes med specicerede sikringer:
230V AC ~ 60/50Hz = T3.15AL 250V
115V AC ~ 60/50Hz = T6.3AL 250V
4.8
Для длительной защиты от возгорания плавкие предохранители необходимо заменять только на такие как:
230V AC ~ 60/50Hz = T3.15AL 250V
115V AC ~ 60/50Hz = T6.3AL 250V
2


Need help? Post your question in this forum.

Forumrules


Report abuse

Libble takes abuse of its services very seriously. We're committed to dealing with such abuse according to the laws in your country of residence. When you submit a report, we'll investigate it and take the appropriate action. We'll get back to you only if we require additional details or have more information to share.

Product:

For example, Anti-Semitic content, racist content, or material that could result in a violent physical act.

For example, a credit card number, a personal identification number, or an unlisted home address. Note that email addresses and full names are not considered private information.

Forumrules

To achieve meaningful questions, we apply the following rules:

Register

Register getting emails for Cambridge Audio Aero 9 at:


You will receive an email to register for one or both of the options.


Get your user manual by e-mail

Enter your email address to receive the manual of Cambridge Audio Aero 9 in the language / languages: All languages as an attachment in your email.

The manual is 0,54 mb in size.


You will receive the manual in your email within minutes. If you have not received an email, then probably have entered the wrong email address or your mailbox is too full. In addition, it may be that your ISP may have a maximum size for emails to receive.

The manual is sent by email. Check your email

If you have not received an email with the manual within fifteen minutes, it may be that you have a entered a wrong email address or that your ISP has set a maximum size to receive email that is smaller than the size of the manual.

The email address you have provided is not correct.

Please check the email address and correct it.

Your question is posted on this page

Would you like to receive an email when new answers and questions are posted? Please enter your email address.


Info