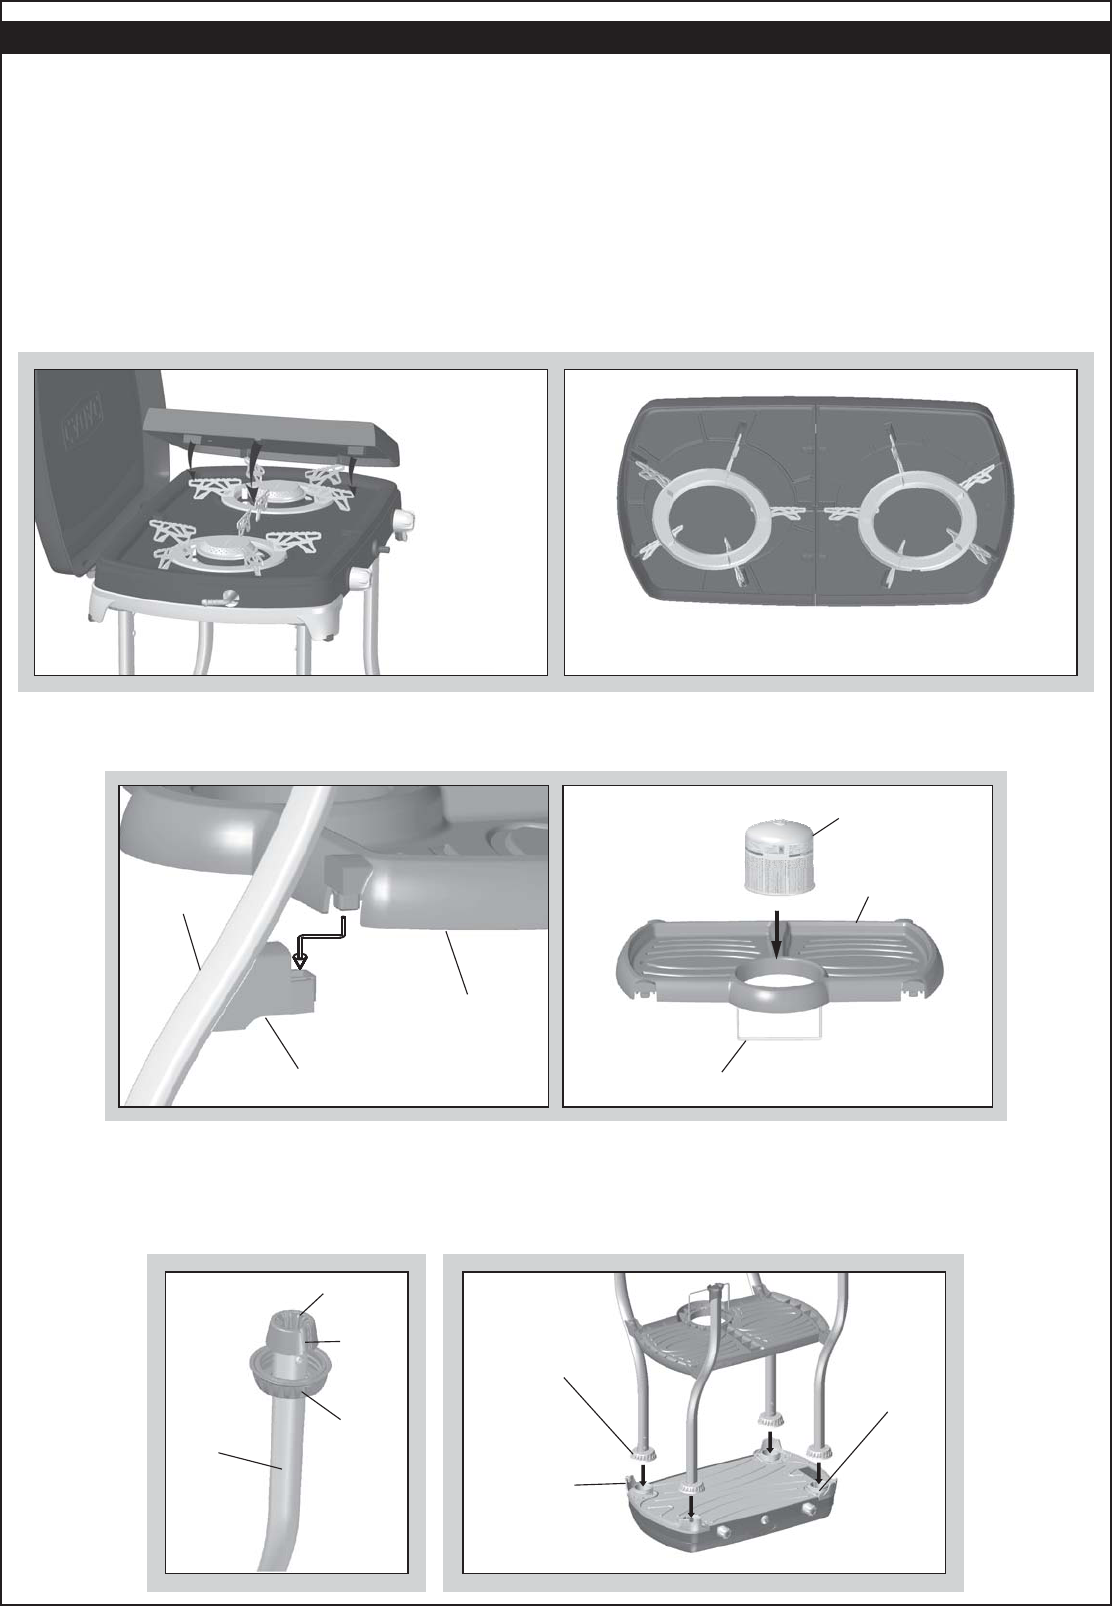
The hose length should not be less than 800mm and should not exceed 1.5m in length, check the expiry date on the hose and replace when
necessary.
Do not twist or pinch the hose. Ensure that it is routed away from the stove body so as to prevent deterioration / damage to the hose caused by heat.
Fit the one end of the low-pressure hose onto the regulator nozzle and the other end onto the stove nozzle, by pushing it on firmly until fully seated
against the back shoulder on the nozzle and clamp the hose with a hose clamp at both ends of the hose.
Ensure that the connections are secure and do not allow gas to leak.
Ensure that the appliance valves are in the OFF position by turning the knobs fully clockwise to the stop.
Fit the pot stands to the stove body by aligning the tags underneath the pot stand with the corresponding slots on the stove body. Take note that the pot
stand only fits in one way. Make sure that the notch on the pot stand ring is aligned with the dimple on the stove body.
Fit the grill plate to the body by first aligning the outer two (2) lugs with the corresponding pot stands.
Lower the grill plate onto the pot stand ensuring that all the location lugs align with the pot stands.
Make sure that the grill plate is properly fitted before using it.
The pot stands and grill plates can be used in any configuration, (i.e. two pot stands, two grills or one pot stand and one grill).
To assemble the utility tray to the legs, Clip all four fixing bosses on the utility tray into the Tray Clips on the legs.
NOTE: The hose and regulator are not supplied. For details contact your local stockist.
To assemble the long legs, remove the grill plates and pot stands. Turn the stove upside down, placing the closed lid on a clean surface.
After turning the stove upside down you will see four screw threads on the plastic feet.
Insert the leg bracket into the tapered hole on the screw thread, ensure that the slot in the leg bracket aligns with the key in the screw thread tapered hole.
Secure the legs by screwing the securing ring on the leg onto the screw thread until the securing ring is tightened.
Screw the securing ring clockwise to lock and anti-clockwise to loosen.
To remove the utility tray, reverse this
procedure.
The hole in the utility tray is to hold the disposable cartridge. Ensure that the wire bracket is fitted and in position before fitting a cartridge.
Libble takes abuse of its services very seriously. We're committed to dealing with such abuse according to the laws in your country of residence. When you submit a report, we'll investigate it and take the appropriate action. We'll get back to you only if we require additional details or have more information to share.
Product:
Forumrules
To achieve meaningful questions, we apply the following rules:
First, read the manual;
Check if your question has been asked previously;
Try to ask your question as clearly as possible;
Did you already try to solve the problem? Please mention this;
Is your problem solved by a visitor then let him/her know in this forum;
To give a response to a question or answer, do not use this form but click on the button 'reply to this question';
Your question will be posted here and emailed to our subscribers. Therefore, avoid filling in personal details.
You will receive an email to register for one or both of the options.
Get your user manual by e-mail
Enter your email address to receive the manual of Cadac 182F - 2 COOK Supreme in the language / languages: English as an attachment in your email.
The manual is 1,64 mb in size.
You will receive the manual in your email within minutes. If you have not received an email, then probably have entered the wrong email address or your mailbox is too full. In addition, it may be that your ISP may have a maximum size for emails to receive.
If you have not received an email with the manual within fifteen minutes, it may be that you have a entered a wrong email address or that your ISP has set a maximum size to receive email that is smaller than the size of the manual.
The email address you have provided is not correct.
Please check the email address and correct it.
Your question is posted on this page
Would you like to receive an email when new answers and questions are posted? Please enter your email address.