New Settings
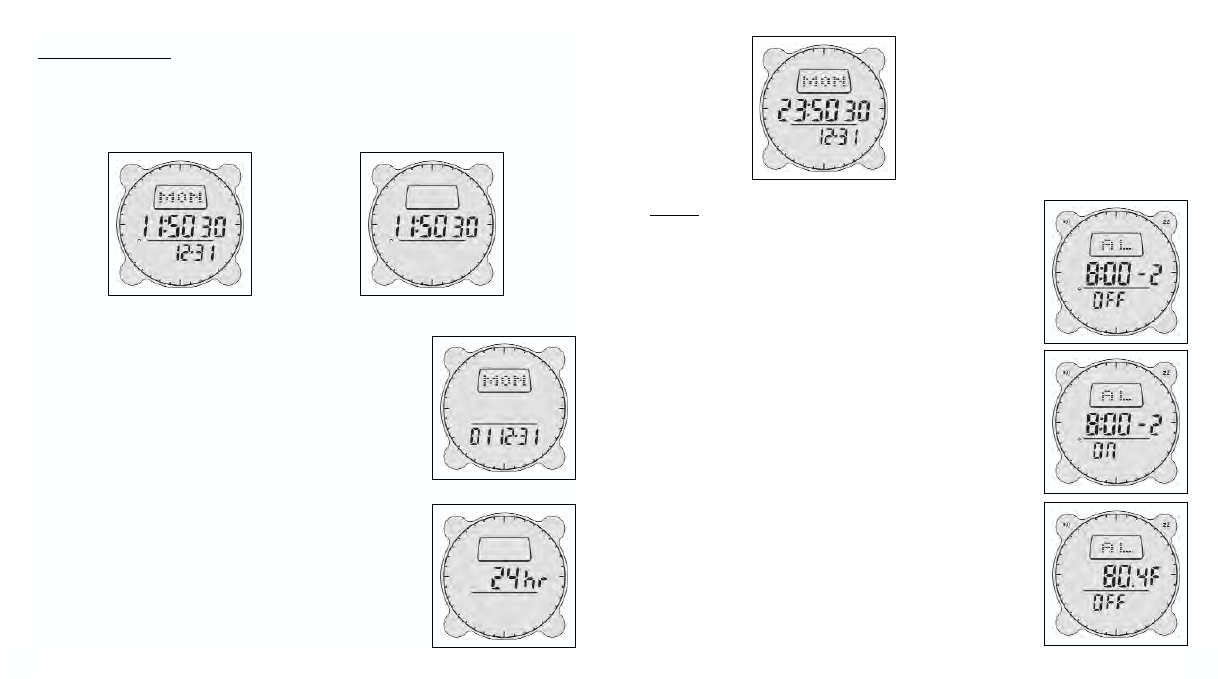
ALARM
Alarm Setting Mode
Press MODE button until Alarm Mode is displayed. The alarm
consists of 5 alarms, 3 for Time 1 for Altitude, and 1 for
Temperature. Press
COMP/+ or BARO/- button to scroll through
the different alarms. Press and hold down
ADJ for 3 seconds until
the minute blinks, press
COMP/+ or BARO/- button to adjust to
desired values. Press
MODE button for next setting. Press ADJ
button at any time to save changes and exit. The alarm is activated
automatically after adjustments have been made. To stop the alarm
from beeping, PRESS ANY BUTTON.
The alarm can also be turned on or off by going to the relevant alarm
and pressing the
ALTI button to activate alarm function, press again
to activate Snooze function, and press again to de-activate alarm.
Temperature Alarm
Sets the alarm to sound when the temperature measurement reaches
the programmed level. In the Alarm Mode, the Temperature alarm
uses the same measurement units (ºC or F) that were last set in the
Temperature Mode. To change this you must first change the
temperature units in the Barometer Mode. Pressing the
COMP/+ or
BARO/- once changes the temperature in tenths of a degree.
Holding the button down changes the temperature in increments of
1 degree.
SETTING THE TIME
Default Time Mode / Time Settings
Press MODE button until Time Mode is displayed. Press and hold down ADJ for 3 seconds. Press
COMP/+ or BARO/- button until desired value appears, and then press MODE button for next
setting. Press
ADJ button at any time to save changes and exit. When this is done, seconds will
be reset to 00. A small "A" or "P" will be to the lower left of the hours to denote AM or PM.
Date Settings
When setting the date, the year is also displayed. Press MODE
button until Time Mode is displayed. Press and hold down ADJ for
3 seconds. Press
MODE button and scroll to desired setting to
change. Press
COMP/+ or BARO/- button until desired value
appears, and then press
MODE button for next setting. Press ADJ
button at any time to save changes and exit.
For 24/12 hour setting press
MODE button until Time Mode is
displayed. Press and hold down
ADJ for 3 seconds. Press MODE
button and scroll through settings until 24/12 hour setting appears,
then press
COMP/+ or BARO/- button to enter desired setting.
Press
ADJ button at any time to save changes and exit.
5
4