This feature is for
compatible switchboard
users only.
Setting up
Plan the location
Situate your Converse 125 close
enough to a phone socket so that
the line cord will reach.
Your Converse 125 can be
wall-mounted. See ‘Wall-mounting’.
1 Plug your Converse 125
into the telephone socket
2 Check the dialling mode
Use the dialling mode switch on the
underside of your Converse 125.
Your Converse 125 should be
pre-set to TB which gives you Tone
dialling. This ensures the phone
will work with all modern digital
exchanges.
If your phone does not work, try
setting the dialling mode to P or T.
Your Converse 125 is now ready
for use.
Making and ending calls
To make a call
Lift the handset off the base and
wait for the dial tone.
Dial the telephone number.
To end a call
Replace the handset on the base.
To receive a call
When the telephone rings the call
indicator light will also flash to
indicate that there is an incoming
call. Simply pick up the handset.
Last number redial
Your Converse 125 stores the
last number called which enables
quick and easy redialling.
A redial number can be no longer
than 31 digits.
To redial the last number
Lift the handset.
Press the Redial button.
The last number you called
is redialled.
Secrecy
When on a call you can talk to
someone in the same room without
your caller hearing.
To switch secrecy on and off
During a call, press and
release the Secrecy button.
The Secrecy light will come
on to show that secrecy is
on.
You can now talk to someone
in the room without your
caller hearing you.
Press and release the Secrecy
button again to return to
your caller.
To adjust the ringer volume
There are 3 volume settings
to choose from HI, LOW
or OFF.
Use the Ringer Volume
switch on the underside of
your Converse 125 to
select either HIGH, LOW
or OFF.
The Call indicator light
will flash regardless of the
ringer setting chosen.
To adjust the ringer tone
The ringer tone can be set
to High(R2) or Low(R1).
Use the Ringer Tone
switch on the underside of
your Converse 125 to
select either High(R2) or
Low(R1).
Recall button
The Recall button is for use
with switchboard services
e.g. to transfer calls and
some BT Select Services.
Message Waiting Indicator
When you have voice mail
messages waiting the
Message Waiting indicator
will flash at regular constant
intervals.
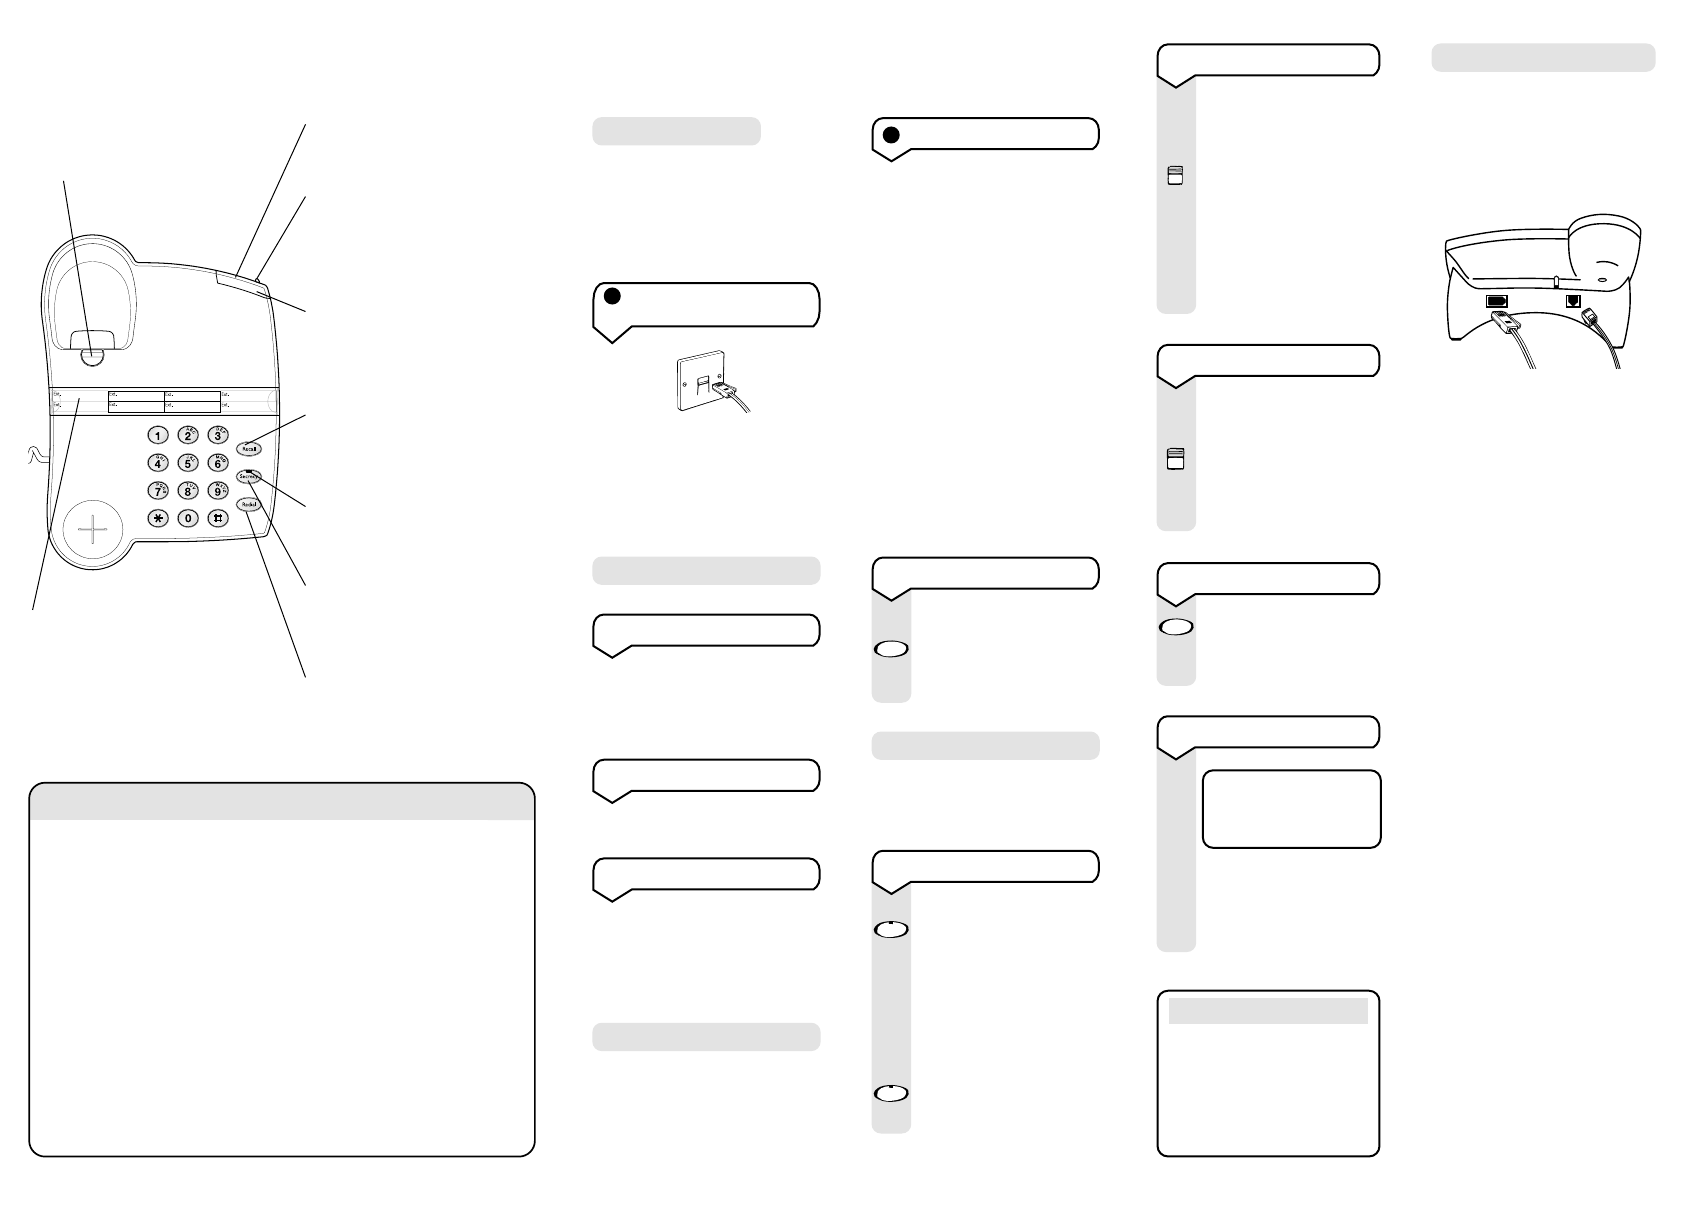
Using the telephone
At a glance
Handset hook
Rotates to hold handset in
place when wall mounted.
BT Converse 125 ~ Issue 2 ~ 2nd Edition ~ 23rd July ’03 ~ 5528 BT Converse 125 ~ Issue 2 ~ 2nd Edition ~ 23rd July ’03 ~ 5528 BT Converse 125 ~ Issue 2 ~ 2nd Edition ~ 23rd July ’03 ~ 5528
Telephone number label
Slide the phone extension
number label out from under
the plastic cover to write your
phone numbers on.
Call indicator light
Flashes when you have an
incoming call.
Handset park
When the phone is wall mounted
you can hang the handset here if
you need to leave the phone
during a call.
Message Waiting indicator
(for compatible switchboard
users only)
Flashes when there is voice mail.
Recall
For use with a switchboard/PBX
e.g. to transfer calls and some BT
Calling Features.
Secrecy light
Comes on when you
are using the secrecy function.
Secrecy
Lets you talk to someone in the
same room without the person
you are calling hearing.
Redial
Redials the last number called.
Help
No dial tone
Is the line cord plugged into the
telephone socket? See ‘Setting up’.
Nothing happens when you dial
Check that the dialling mode
switch is set to the correct
position. See ‘Setting up’.
The handset does not ring
Is the ringer volume set to OFF?
See ‘To adjust the ringer volume’.
You may have too many phones,
fax machines and/or answering
machines plugged in which might
be overloading the sockets. (See
‘Technical information’, back page.)
Safety information
General
Simply clean your Converse 125
with a damp (not wet) cloth, or
an anti-static wipe. Never use
household polish as this may
damage the product. Never use
a dry cloth as this may cause
static shock.
Do not open the Converse 125.
This could expose you to high
voltages or other risks.
Environmental
Do not expose to direct sunlight.
We recommend that you do not
place the product on antique/
veneered wood to avoid damage.
Do not stand your product on
carpets or other surfaces which
generate fibres, or place it in
locations preventing free flow
of air over its surfaces.
Do not submerge any part of your
product in water and do not use it
in damp or humid conditions, such
as in bathrooms.
Do not expose your product to fire,
explosive or other hazardous
conditions.
Telephone number labels
Use the telephone number label
to keep a note of phone or
extension numbers which you
use frequently.
Slide the label out from underneath
the plastic cover to write on it.