1 2 3 4 5
6
Emptyin
Empty cafter each dryin
1. Pull out con
2. Pour out con
3. Always pus
If
.cco fla
What to do if...
Cleaning
Clean the flafter e
1. Open the
2. Pull out a
3. Remove th
If the fluff f
thoroughly.
4. Close and re
Switching
Turn the prOff .
Do not leave
Removing
Your
for 30 minutes
(60 or 120 minuSc Re func
... and
Never
Inform
Inspec
dryer
Sortin
Remove al
Check for
The drum m
See programm
See also sep
(depending
You
Congratulati- You
domesti
The co
consump
Every dr
that it fun
Should
to help.
Disposal in an
Dispose of
This applia
guideline
2002/96/EG on w
equipmen
The guidel
and rec
For furth
and ser
Int
Prep
installation, s
Selectin
Drying
Con
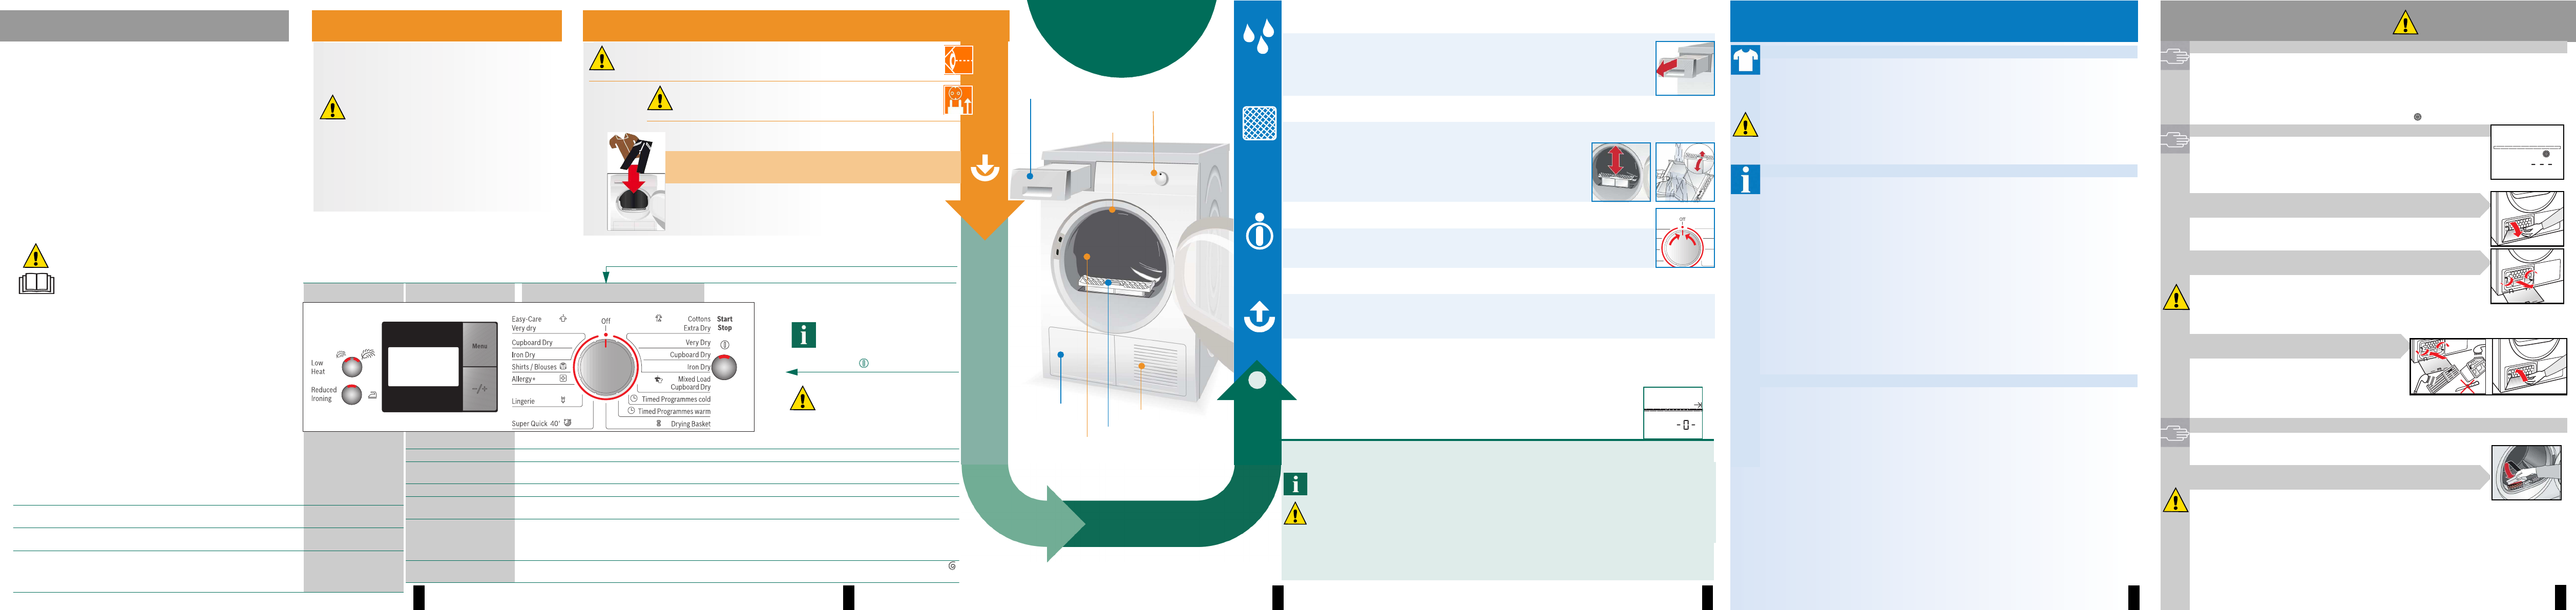
Control p
ʋ for do
ʋ only t
was
Do not leave ch
Keep pet
The dryer can
and older, b
sensory
insufficien
supervised
a respon
Selec
Pres S
Make sure
Hold
C
mains
Drying
Informati
Lab
Follow th
( Drying
'cDryinga aVV Low Heat .
)cDo not m
Observea Page 11 !
Do not tum
– Impe
– Delicatea they
– Laundr
Dr
– To ensur
– Always
(e.g. h
– Close zips
Tie fab
– Do not oa r
Allow
– Do not dry woolens in the dryer, onla PaWoollens finish
Progra
– Do not ira
the rema
– The da
Fine adjua Page 1/2 .
– Machia
do notExtra progra
– Starca starch le
adverse
– Use th
washin
– Use tha th
Environ
– Befoa the higher the
speed
laundry.
– Put in, ba
progra Page 7 .
– Make
– Do not o
– Keep thea Page 6 “ .
Drum
All buttons
need to
Only op
the fluf
Air inle
Fluff
Drum i
(depending
Mai
flap
Progonce lig
Interrur
The drying
The program
Ne
D
1. Open d
2. Load or re
3. If requ
4. Press the Start /Stop button. Th
Rea
Energy-s instructions befo
ope
Obse
C Page
ʋ Prep 2
ʋ S . 2
ʋ Dry 3/4
ʋ Inform . . . . . . . . .
ʋ Car . . . . . . . . . 6
ʋ Prog . . . . . . . . . 7
ʋ Ins 8
ʋ Fros . 8
ʋ Tec . . . . . . . . . . . . 9
ʋ Op . . . . . . . . 9
ʋ W . 10
ʋ S 11
Reduc' , for a lo
e.g. acr
ˎ VV ÷
Low H
Reduc
programm
ˎ S
Reduce
Ind
Drying, I
St
Icc\
Cleaa Pag.
Empty
Ser
4
.
ˎ Menu
For selec
ˎ -/+ For ch
Electr
timer
End of tha 2h
you can
1 -2
3
Signa
There
0, 1
#
App
(depending o
Provide
(press anMe button
On-
9 Fine ad
of the
The d
LCot, Easy-/ Mixeand Su a
presett
the settin
0, 1
Spin s
The s
for more pr
600²
Additio
Display pa
Programme sele
Car
Dr
– W
– Do
– Re
– Du
This doe
Clean t
or if
4 flashes afte
Air
When
behind
– Allow
– Residu
undern
1. Unl
2. Open
3. Tur
4. Pul
Do n
Cle
obje
5. Cleap a
All
6.
C
7. Re
with
8. Tur
9. C
Mo
The dry
mea
ope
1. Op
which h
Do n
Only when