IP Camera (IPC-S1)
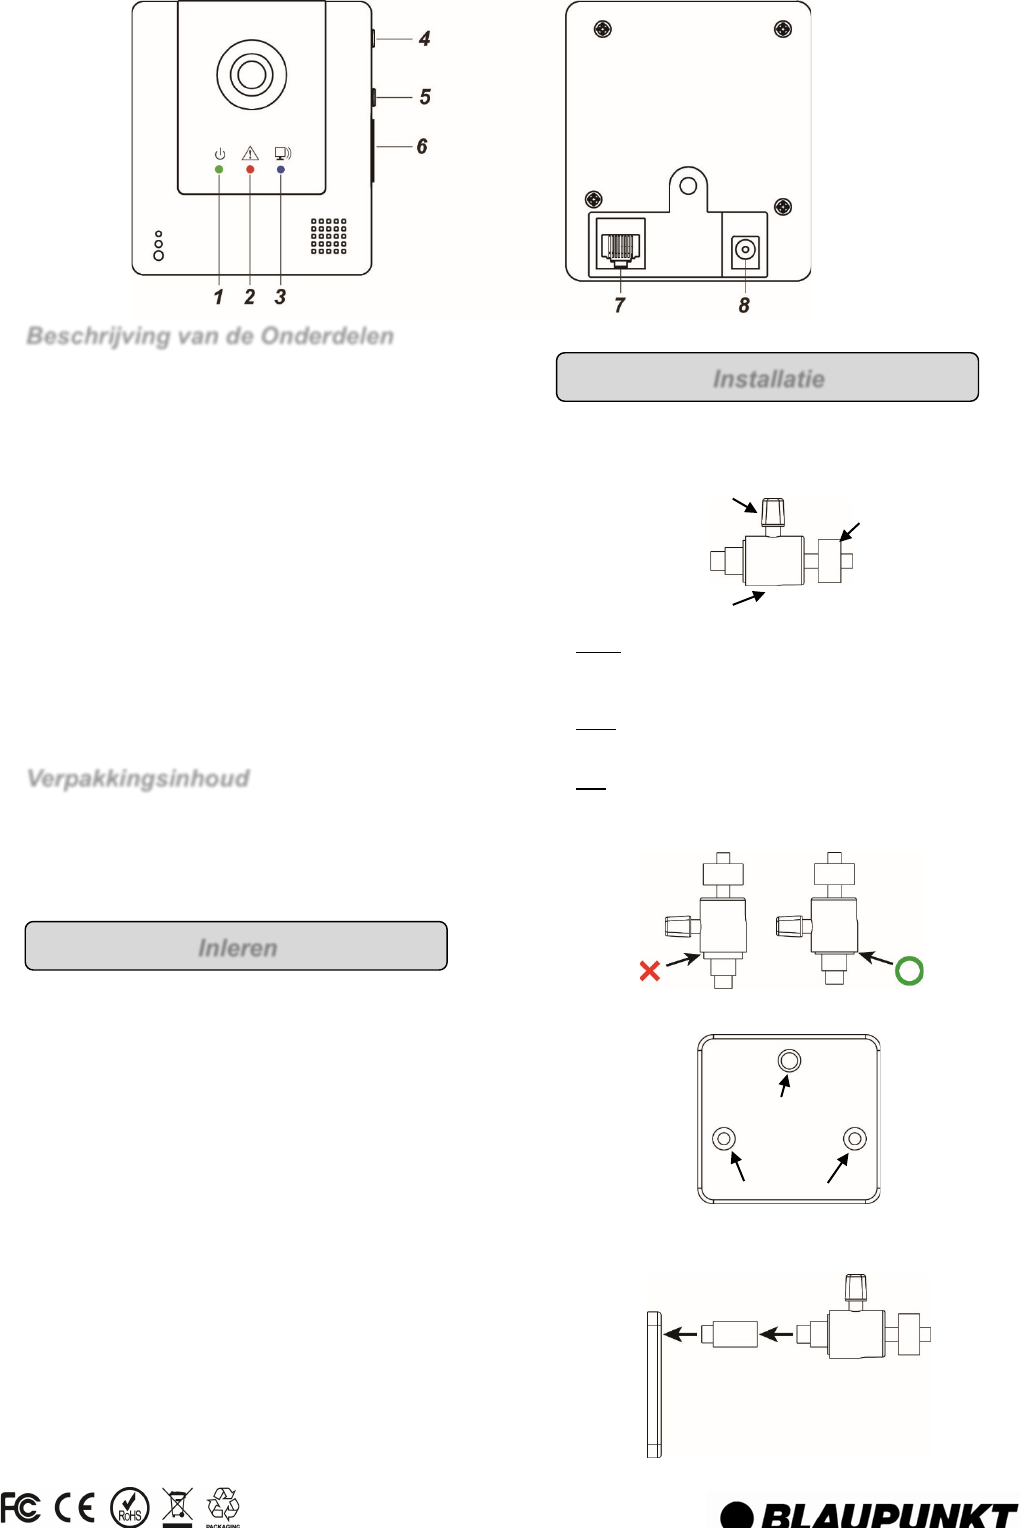
Beschrijving van de Onderdelen
1. Power LED (Groen)
2. Status LED (Rood)
3. Netwerk LED (Blauw)
4. WPS Knop
Druk en houd ingedrukt voor 2 seconden om WPS protocol te
activeren
5. Leer / Privacy-knop
Druk en houd ingedrukt voor 2 seconden om privacy mode te
activeren of af te sluiten.
Druk en houd gedrukt voor 10 seconden om de leermodus te
activeren.
Druk en houd gedrukt voor 6 seconden om de leermodus af te
sluiten.
6. Micro SD-kaartsleuf
7. Ethernet-poort
8. DC-ingang
Verpakkingsinhoud
1 x IP Camera
1 x Camera statief
2 x Stekkers, wasser en schroeven
1 x AC/DC 5V 2A Stroomadapter
1 x Ethernet Kabel
De IP Camera moet bij het regelpaneel ingeleerd worden om te
kunnen werken in het systeem.
1. Verbind de Ethernet kabel met de router waarop ook uw
regelpaneel is aangesloten.
2. Plug de AC adapter in het stopcontact en in de camera.
3. Zet nadat het Blauwe Netwerk LED licht aan gaat het
regelpaneel in de leermodus.
4. Druk en houd de Leerknop voor 10 seconden ingedrukt.
Negeer de 2 Rode Status LED flitsen bij de tweede seconde
en laat de knop los wanneer de Blauwe Netwerk LED begint
te flitsen.
5. Het regelpaneel geeft nu informatie over de IP Camera weer.
Raadpleeg de handleiding van het regelpaneel om het
leerproces af te maken.
6. Als het regelpaneel geen IP Camera info weergeeft, druk en
houd dan de Leerknop voor 6 seconden in om het flitsen van
de Blauwe Netwerk LED te stoppen. Herstart daarna vanaf
Stap 4.
Een camera statief is meegeleverd in het pakket.
l Het camera statief is opgemaakt uit een basis, schacht en hoofd.
l Het camera hoofd bevat de volgende onderdelen:
Kraag: Wanneer de IP Camera is geïnstalleerd op de
montage schroef, draait u de kraag linksom om de montage
schroef losser te maken of rechtsom om hem vaster in de IP
Camera te draaien.
Knop: Draai de Knop linksom om de montage schroef losser
te maken en de camera hoek aan te passen, en dan rechtsom
om hem vaster te schroeven.
Kap: Zorg er voor dat bij het aanpassen van de hoek van de
camera dat de onderkant van de kap om het statief heen past
en geen ruimte over laat.
1. Gebruik de montage gaten op de basis als sjabloon om
montage locaties op de ondergrond mee te markeren.
2. Boor gaten in de ondergrond en plaats de stekker indien nodig.
3. Schroef de basis in de montage locatie.
4. Verbind het camera statief hoofd, schacht en basis.