633181
1
Zoom out
Zoom in
Previous page
1/2
Next page
Handsender
Allgemeine Hinweise1
Den Handsender vor direkter Sonneneinstrahlung schützen.
Den Handsender vor Feuchtigkeit und Staubbelastung 
schützen. Bei einem Feuchtigkeitseintritt kann die Funktion
beeinträchtigt werden.
Den Handsender von Kindern fernhalten.

auf die Reichweite der Fernsteuerung haben.
Bestimmungsgemäße Verwendung1.1
Der Handsender ist ausschließlich zur Fernbedienung von
Garagentorantrieben gedacht. Der Handsender darf nicht zur
Steuerung von anderen Geräten oder Maschinen verwendet
werden.
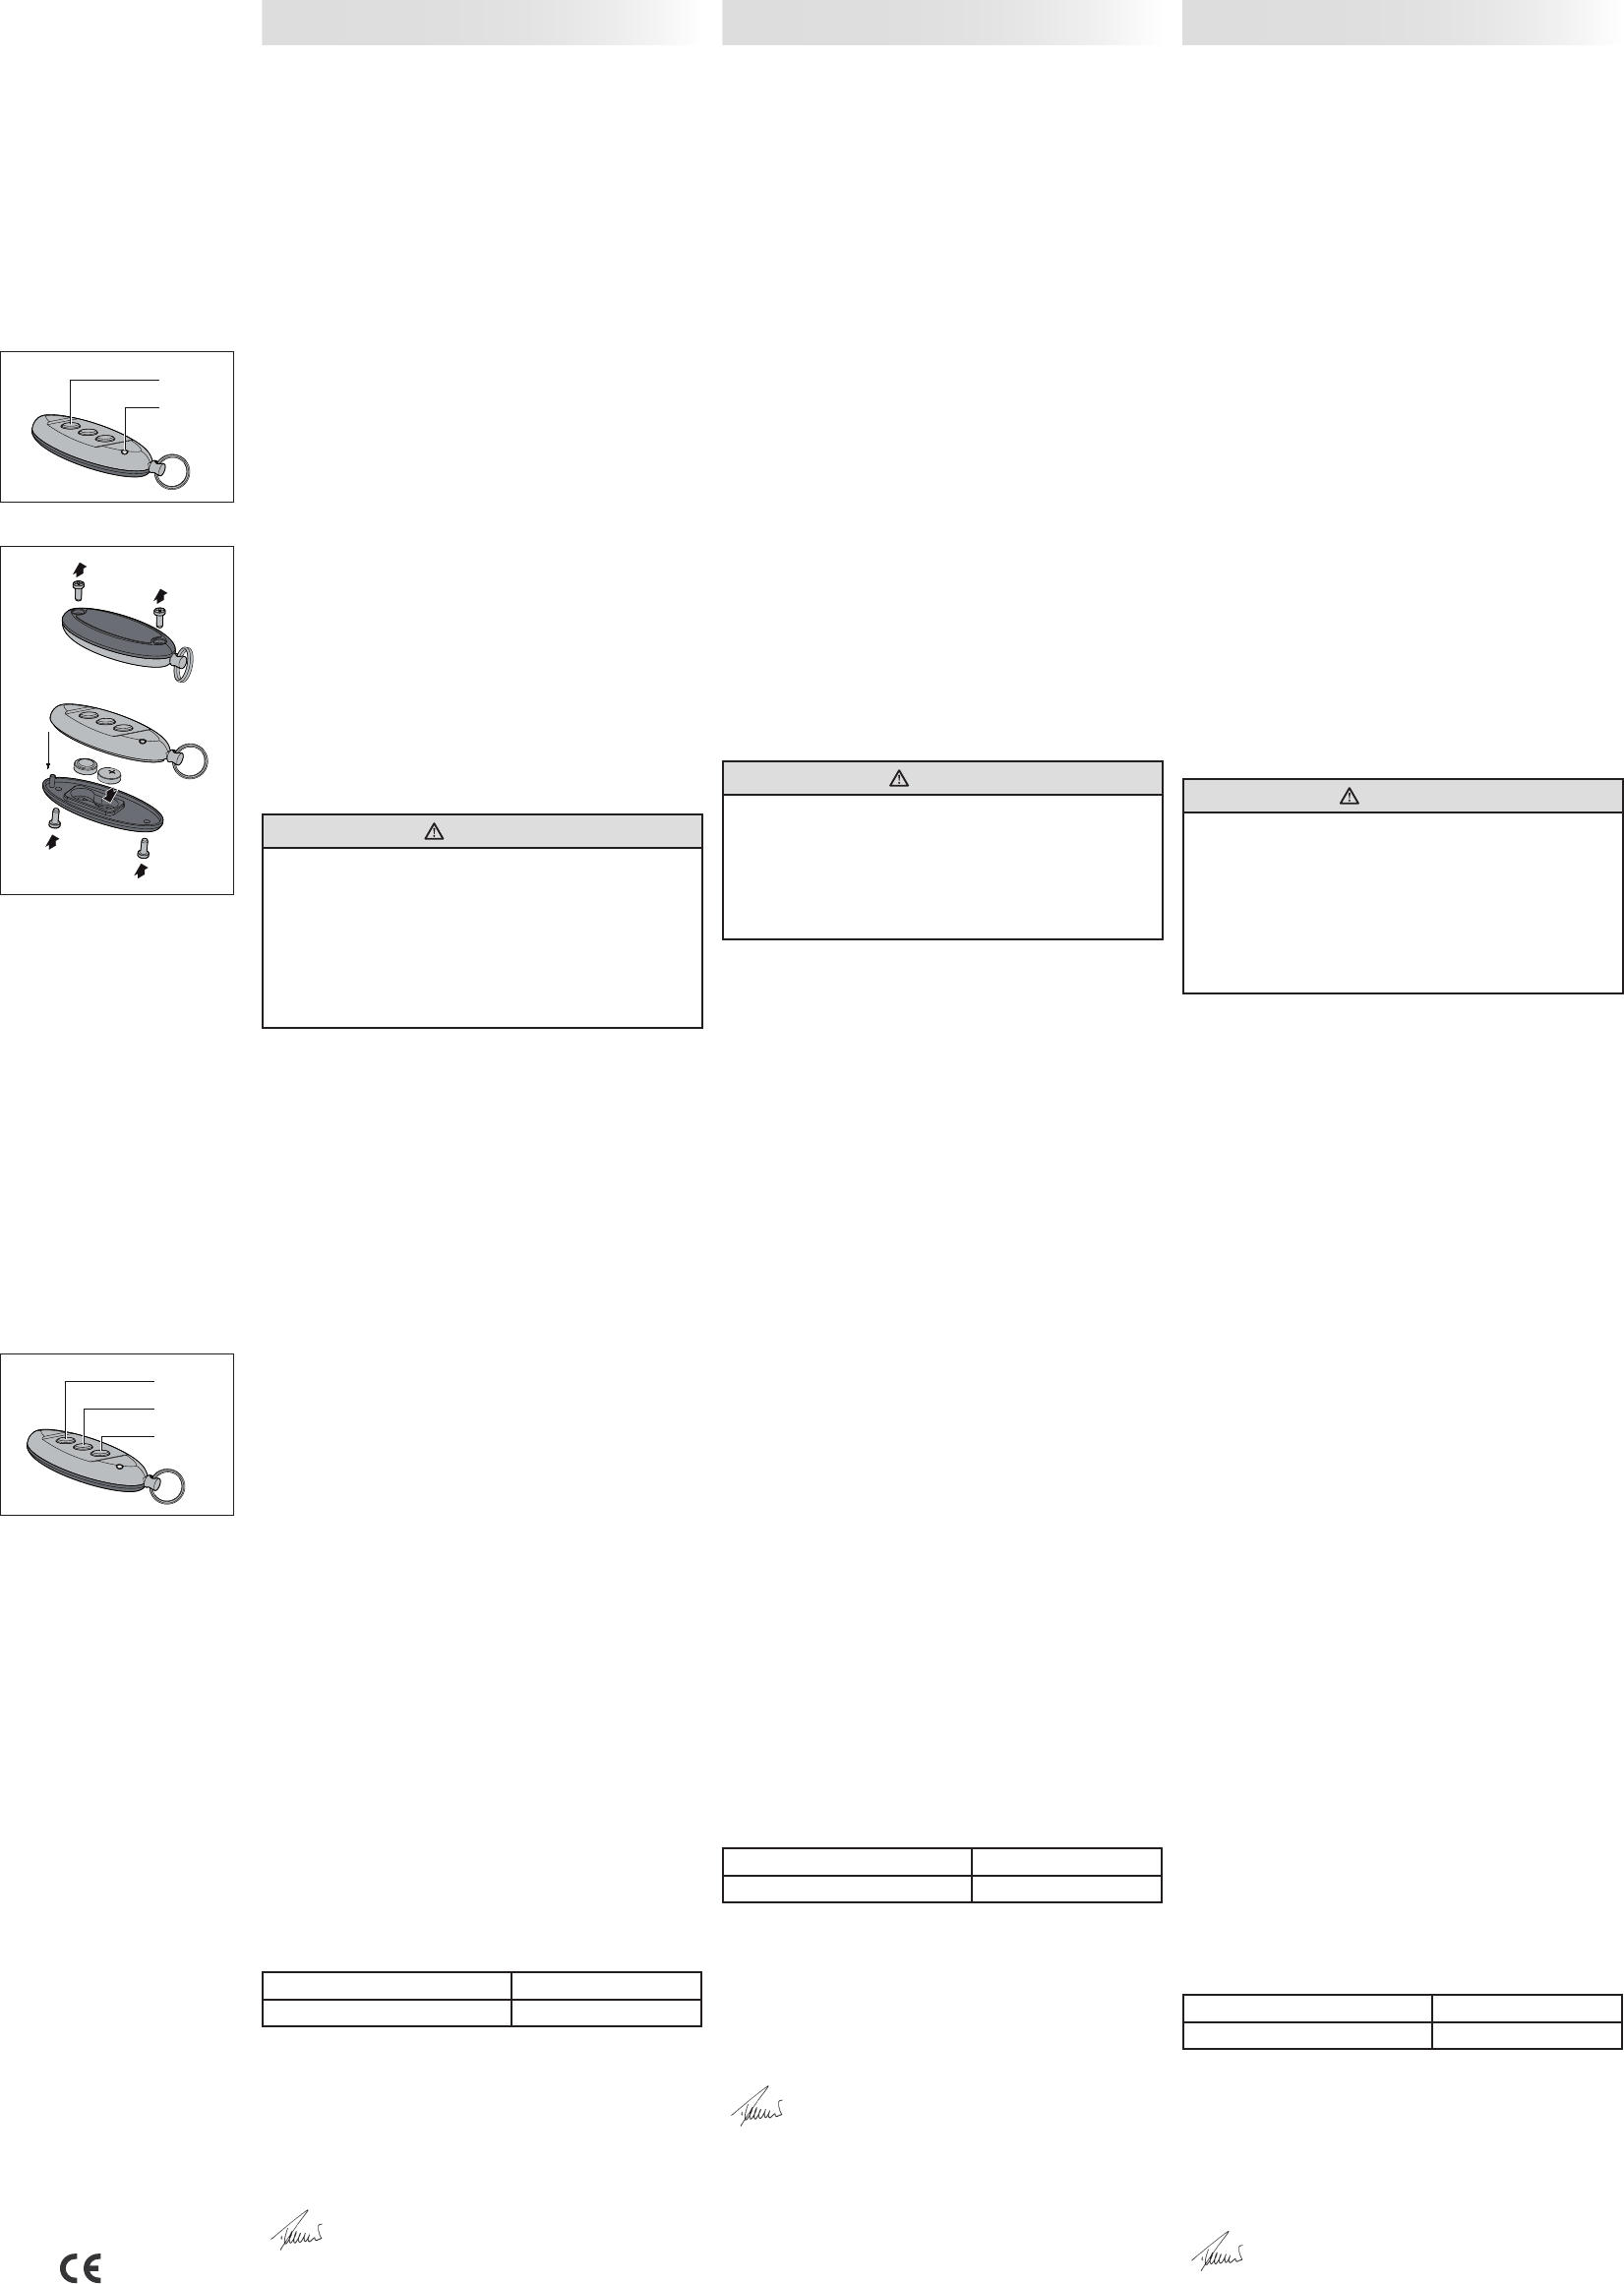
Gerätebeschreibung (Fig. 1)2
(1) Tasten: zur Steuerung von 5 Kanälen
(2) LED: leuchtet bei gedrückter Taste
Vor dem Betrieb3
Batterien wechseln/einlegen (Fig. 2)3.1
Die beiden Schrauben auf der Unterseite lösen und die 1.
Gehäuseunterschale abnehmen.
Batterien in die Unterschale einlegen. Dabei auf Polarität 2.
achten!
Die Gehäuseteile vorsichtig wieder zusammenstecken.3.
Die Schrauben wieder anziehen.4.
Hinweis:
Verbrauchte Batterien an dafür vorgesehenen Rücknahmestel-
len entsorgen.
Den Batteriezustand prüfen:
Eine der drei Tasten f (1) drücken.
LED - (2) leuchtet: Handsender funktioniert korrekt
LED - (2) aus: Batterien austauschen
Bedienung4
VORSICHT
Verletzungsgefahr durch zufällig ausgelöste Torfahrt!
Das Zuweisen und Kopieren einer Funktion kann zu einer
zufällig ausgelösten Torfahrt führen. Hierdurch können
Personen oder Gegenstände vom herabfahrenden Tor
eingeklemmt werden.
Achten Sie darauf, dass sich keine Personen oder f

Führen Sie das Zuweisen und Kopieren von Funktionen f
immer in der Garage durch.
Eine Tastenfunktion zuweisen4.1
Der Handsender hat drei Tasten zur Steuerung von bis zu fünf
Funktionen (abhängig vom verwendeten Funkempfänger).
Bevor Sie den Handsender verwenden können, müssen Sie
zuvor jeder gewünschten Funktion im Funkempfänger eine Taste

in der Bedienungsanleitung des Funkempfängers.
Den Handsender verwenden4.2
Sie haben dem Empfänger eine oder mehrere 9
Tastenfunktionen des Handsenders zugewiesen.
Eine der Tasten f (1) am Handsender drücken. Die mit der
Taste verbundene Funktion (z. B. Tor auf/zu) wird ausgeführt.
Anordnung der Tastenfunktionen (Fig. 3)4.3
Die Funktionen können wie folgt ausgelöst werden:
Funktion 1: Taste 1 (2a) drücken
Funktion 2: Taste 2 (2b) drücken
Funktion 3: Taste 3 (2c) drücken
Funktion 4: Taste 1 (2a) und Taste 2 (2b) gemeinsam drücken
Funktion 5: Taste 2 (2b) und Taste 3 (2c) gemeinsam drücken
Modellunterschiede
BHS153: Funktion 1-5 (serieller Befehl)
BHS157: Funktion 1 (Befehl Ein)
Funktion 3 (Befehl Aus)
Funktion 2, 4 und 5 (serieller Befehl)
Hinweis:
Die beiden Handsender sind nicht lernfähig, d.h. sie können
nur als Mastersender verwendet werden. Die Handsender
können jedoch auf alle Berner Festcode-Empfänger 868,3 MHz
eingelernt werden.
Tastensperre4.4
Um ein unbeabsichtigtes Auslösen einer Funktion zu
verhindern, wurde der Handsender mit einer anwählbaren
Tastensperre ausgestattet.
Die Taste 1 und Taste 3 kurz hintereinander drücken, um die f
Tastensperre zu aktivieren. Bei Betätigung einer Taste blinkt
die LED und es wird keine Funktion ausgeführt.
Die Taste 1 und Taste 3 kurz hintereinander drücken, um die f
Tastensperre zu deaktivieren. Bei Betätigung einer Taste
leuchtet die LED und die mit der Taste verbundene Funktion
wird ausgeführt.
Technische Daten und Zusatzinformationen5
Zulässige Umgebungstemperatur bis
Benötigter Batterietyp LR-932 Knopfzelle (2 x)
EG-Konformitätserklärung6


der von uns in Verkehr gebrachten Ausführung den einschlägi-
gen grundlegenden Anforderungen der R&TTE-Richtlinie 1995/5/
EG, Artikel 3.

 Hersteller:
Berner Torantriebe KG,
Graf-Bentzel-Straße 68,

Jürgen Ruppel, Geschäftsführer
General information1
Never place or store the hand transmitter in direct sunlight.
The hand transmitter is to be kept clean and dry at all times. 
The hand transmitter's function may become impaired if it
becomes damp.
Keep the hand transmitter out of the reach of children.

of the remote control.
Intended use1.1
The hand transmitter is only designed for the remote control
of garage door operators. It must not be used to control other
devices or systems.
Device description (Fig. 1)2
(1) Buttons: to control 5 channels
(2) LED: illuminated when button is pressed
Before operation3
Changing/inserting the batteries (Fig. 2)3.1
Loosen both screws on the bottom and remove the casing.1.
Insert the batteries in the casing. Pay attention to the polarity!2.
3.
Retighten the screws.4.
Note:
Dispose of used batteries at the appropriate disposal locations.
Checking the battery power:
Press one of the three buttons f (1).
LED (2) illuminated: hand transmitter is functioning
correctly
LED (2)
Operation4
CAUTION
Danger of injury due to triggered door travel!
Assigning and copying a function may trigger door travel.
Persons or objects may be trapped in the lowering door.
Make sure that no persons or objects are located within the f
door's area of travel.
Always assign and copy functions while standing in the f
garage.
Assigning a button function
4.1

functions (depending on the radio receiver used).
Before you can use the hand transmitter, you must assign each of
the desired functions in the radio receiver to a button on the hand
transmitter. A description on how to do this can be found in the
operating instructions for the radio receiver.
Using the hand transmitter4.2
The receiver has been assigned one or more functions of the 9
hand transmitter.
Press one of the buttons f (1) on the hand transmitter. The
function assigned to the button (e.g. open/close door) will be
carried out.
Arrangement of the button functions (Fig. 3)4.3
The functions can be triggered as follows:
Function 1: Press button 1 (2a)
Function 2: Press button 2 (2b)
Function 3: Press button 3 (2c)
Function 4: Press buttons 1 (2a) and 2 (2b) simultaneously
Function 5: Press buttons 2 (2b) and 3 (2c) simultaneously
Model variances
BHS153: Functions 1-5 (serial command)
BHS157: Function 1 (ON command)
Function 3 (OFF command)
Functions 2, 4 and 5 (serial command)
Note:
Both hand transmitters cannot be taught-in, i..e. they can only be
used as a master transmitter. However, the hand transmitters can

Button lock4.4
To prevent functions from being carried out accidentally, the hand
transmitter is equipped with an optional button lock.
To activate the button lock, press button 1 immediately f

and no function will be carried out.
To deactivate the button lock, press button 1 immediately f
followed by button 3. If a button is pressed, the LED will light
up and the function assigned to the button will be carried out.
Technical data and additional information5
Permissible ambient temperature to
Type of battery LR-932 coin cell (2x)
EC Declaration of Conformity6
Due to the conception and design of the versions marketed by


essential requirements of the R&TTE directive 1995/5/EG, article
3.

 Manufacturer:
Berner Torantriebe KG,
Graf-Bentzel-Str. 68,

Jürgen Ruppel, Managing
Director
Remarques générales1
Protéger l’émetteur de l’exposition directe aux rayons solaires.
Protéger l’émetteur de l’humidité et de la poussière. 

fonctionnement.
Tenir l’émetteur hors de portée des enfants.
Les réalités locales ou certains obstacles peuvent avoir une 

Utilisation appropriée1.1

distance les motorisations de porte de garage. Il est interdit de
l’utiliser pour commander d’autres appareils ou machines.
Description de l’appareil (Fig. 1)2
(1) Touches : pour la commande de 5 canaux
(2) DEL : s’allume lorsque la touche est enfoncée
Avant la mise en service3
Introduction / Changement de piles (Fig. 2)3.1
Desserrer les deux vis situées en dessous et déposer le 1.
cache inférieur du boîtier.
Mettre les piles en place dans leur logement. Respecter la 2.
polarité !
Assembler de nouveau le boîtier avec précaution.3.
Resserrer les vis.4.
Remarque :

Vérier l’état de la pile :
Appuyer sur l’une des trois touches f (1).
La DEL (2) s’allume : l’émetteur fonctionne correctement.
La DEL (2) éteinte : la pile doit être changée.
Commande4
ATTENTION
Risque de blessure en cas de trajet de porte déclenché
involontairement !
L’attribution et la copie d’une fonction peuvent entraîner un
trajet intempestif de la porte. Des personnes ou des objets
peuvent alors être coincés par la porte en mouvement.
S’assurer qu’aucune personne ni aucun objet ne se trouve f
dans la zone de déplacement de la porte.
L’attribution ou la copie de fonctions doivent toujours être f

Attribution d’une fonction4.1
L’émetteur dispose de trois touches permettant de commander

Avant de pouvoir utiliser l’émetteur, toutes les fonctions désirées

l’émetteur. La description de cette manipulation se trouve dans
les instructions d’utilisation du récepteur radio.
Utilisation de l’émetteur4.2
Une ou plusieurs fonction(s) de touche de l’émetteur a / ont 9
été attribuée(s) au récepteur.
Appuyer sur l’une des touches f (1) de l’émetteur. La fonction

Agencement des fonctions par touche (Fig. 3)4.3
Les fonctions peuvent être déclenchées comme suit :
Fonction 1 : Appuyer sur la touche 1 (2a)
Fonction 2 : Appuyer sur la touche 2 (2b)
Fonction 3 : Appuyer sur touche 3 (2c)
Fonction 4 : Appuyer simultanément sur les touches 1 (2a)
et 2 (2b)
Fonction 5 : Appuyer simultanément sur les touches 2 (2b)
et 3 (2c)
Diérences entre les modèles
BHS153 : Fonction 1-5 (ordre sériel)
BHS157 : Fonction 1 (ordre marche)
Fonction 3 (ordre arrêt)
Fonction 2, 4 et 5 (ordre sériel)
Remarque :

qu’ils peuvent uniquement être utilisés comme émetteur maître.
Les émetteurs peuvent toutefois être programmés sur tous les

Verrouillage de touche4.4

l’émetteur est équipé d’un verrouillage de touche activable.
Pour activer le verrouillage de touche, appuyer f
successivement sur les touches 1 et 3 de manière brève.
En cas d’activation d’une touche, la DEL clignote et aucune
fonction n’est exécutée.
Pour désactiver le verrouillage de touche, appuyer f
successivement sur les touches 1 et 3 de manière brève. En
cas d’activation d’une touche, la DEL s’allume et la fonction

Données techniques et informations 5
complémentaires
Température ambiante autorisée 
Type de piles nécessaires Pile ronde LR 932 (2x)
Déclaration de conformité CE6
Sur le plan de la conception, de la construction et de l’exécution
que nous commercialisons, les émetteurs BHS153, Modèle




 Fabricant :
Berner Torantriebe KG,
Graf-Bentzel-Straße 68,

Jürgen Ruppel, Directeur
Hand Transmitter
Emetteur
Fig. 2
Fig. 1
Fig. 3
(1)
(2)
1.
2.
3.
4.
(2a)
(2b)
(2c)
ENGLISH FRANÇAISDEUTSCH
(868,3 MHz)
Bedienungsanleitung

Mode d‘emploi

0682
1


Need help? Post your question in this forum.

Forumrules


Report abuse

Libble takes abuse of its services very seriously. We're committed to dealing with such abuse according to the laws in your country of residence. When you submit a report, we'll investigate it and take the appropriate action. We'll get back to you only if we require additional details or have more information to share.

Product:

For example, Anti-Semitic content, racist content, or material that could result in a violent physical act.

For example, a credit card number, a personal identification number, or an unlisted home address. Note that email addresses and full names are not considered private information.

Forumrules

To achieve meaningful questions, we apply the following rules:

Register

Register getting emails for Berner BHS153 at:


You will receive an email to register for one or both of the options.


Get your user manual by e-mail

Enter your email address to receive the manual of Berner BHS153 in the language / languages: English, German, Dutch, French, Italian, Spanish as an attachment in your email.

The manual is 0,92 mb in size.


You will receive the manual in your email within minutes. If you have not received an email, then probably have entered the wrong email address or your mailbox is too full. In addition, it may be that your ISP may have a maximum size for emails to receive.

The manual is sent by email. Check your email

If you have not received an email with the manual within fifteen minutes, it may be that you have a entered a wrong email address or that your ISP has set a maximum size to receive email that is smaller than the size of the manual.

The email address you have provided is not correct.

Please check the email address and correct it.

Your question is posted on this page

Would you like to receive an email when new answers and questions are posted? Please enter your email address.


Info