3214
22
Zoom out
Zoom in
Previous page
1/24
Next page
20
8 ONDERHOUD
Laat na het eerste jaar een inspectiebeurt aan het
toestel uitvoeren door een erkend installateur.
Deze installateur kan aan de hand van een inspectie
en omstandigheden de onderhoudstermijn vaststellen.
- Verwijder de sifon (zie figuur 1) en reinig deze. Vul de
sifon weer met water en plaats deze weer terug.
- Neem de stekker uit de wandcontactdoos.
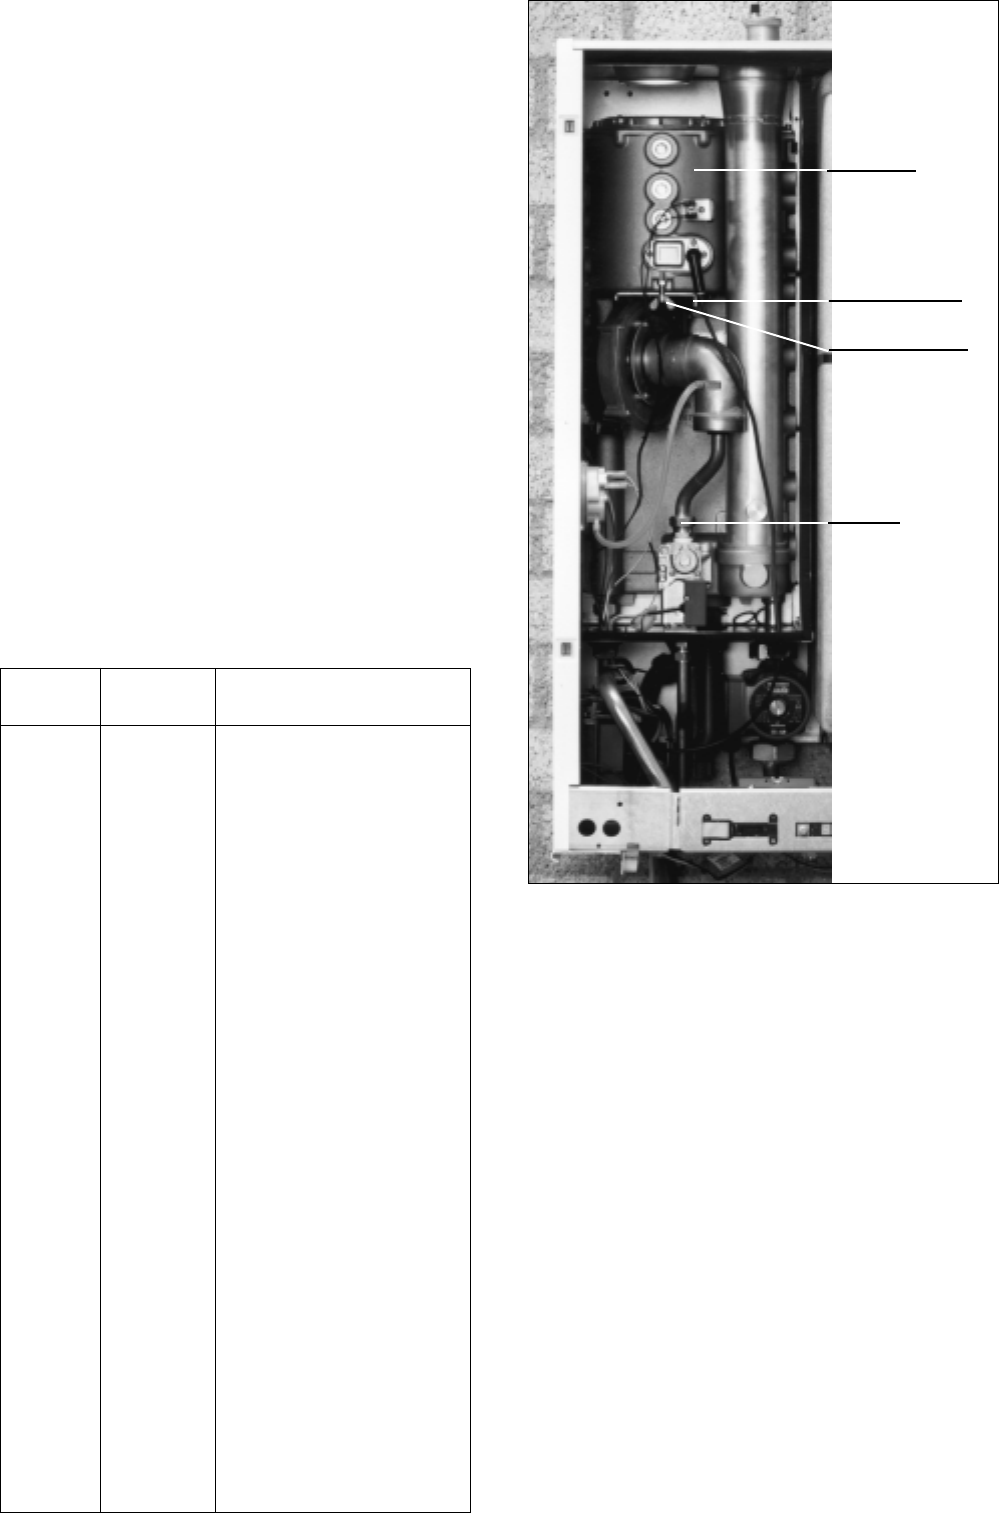
- Draai de wartel van de gasleiding boven het gasblok
los (zie figuur 15).
- Draai de vleugelschroef die aan de vuurhaard bevestigd
is (zie figuur 15) los.
- Haal de ventilatorklem er uit (door deze te kantelen en
naar voren te trekken). De brander en de ventilator
kunnen vervolgens uitgenomen en geïnspecteerd
worden. Inspecteer de verbrandingskamer en reinig
deze eventueel met een nylon borstel (nooit met
staalborstel). Let op: de brander kan nog warm zijn.
- Vervang eventueel beschadigde pakkingen.
Monteer tenslotte alles in omgekeerde volgorde.
Let hierbij op de juiste positionering van brander,
ventilator en ventilatorklem en zet alles goed vast.
Let op terugplaatsen o-ring op gasleiding!
- Controleer het CO
2
gehalte en corrigeer eventueel.
(zie hoofdstuk 5.6.2)
- Controleer de opbrengst van het sanitairwater.
Bij te weinig water (<10 l/min): zie hoofdstuk 7.2.1.
9 PARAMETERLIJST
Nummer Standaard Instelling
instelling installateur
165
22
31
40
585
690
710
820
9 -10
A0
b25
C. 10
d8
E6
F3
63
H41
157
L57
O21
980
(O
Figuur 15 Montage en demontage brander
en ventilator
Brander
Vleugelschroef
Wartel
Ventilatorklem
WIJZIGINGEN VOORBEHOUDEN
22


Need help? Post your question in this forum.

Forumrules


Report abuse

Libble takes abuse of its services very seriously. We're committed to dealing with such abuse according to the laws in your country of residence. When you submit a report, we'll investigate it and take the appropriate action. We'll get back to you only if we require additional details or have more information to share.

Product:

For example, Anti-Semitic content, racist content, or material that could result in a violent physical act.

For example, a credit card number, a personal identification number, or an unlisted home address. Note that email addresses and full names are not considered private information.

Forumrules

To achieve meaningful questions, we apply the following rules:

Register

Register getting emails for AWB Thermomaster2HR Comfort Plus at:


You will receive an email to register for one or both of the options.


Get your user manual by e-mail

Enter your email address to receive the manual of AWB Thermomaster2HR Comfort Plus in the language / languages: Dutch as an attachment in your email.

The manual is 1,08 mb in size.


You will receive the manual in your email within minutes. If you have not received an email, then probably have entered the wrong email address or your mailbox is too full. In addition, it may be that your ISP may have a maximum size for emails to receive.

Others manual(s) of AWB Thermomaster2HR Comfort Plus

AWB Thermomaster2HR Comfort Plus Manual - Dutch - 2 pages


The manual is sent by email. Check your email

If you have not received an email with the manual within fifteen minutes, it may be that you have a entered a wrong email address or that your ISP has set a maximum size to receive email that is smaller than the size of the manual.

The email address you have provided is not correct.

Please check the email address and correct it.

Your question is posted on this page

Would you like to receive an email when new answers and questions are posted? Please enter your email address.


Info