3
Sensor Pad
3 AAA rechargeable
batteries for Parents Unit
3 AAA regular batteries for
Nursery Unit battery back-up
Nursery Unit
2 AC adapters for Nursery Unit
and for Parents Unit charger
Installation in the Baby’s room...............................................................................................................................................................................................3
Nursery Unit set up ...............................................................................................................................................................................................................4
Parents Unit set up................................................................................................................................................................................................................4
Testing our Angelcare® monitor............................................................................................................................................................................................4
Parents Unit settings .............................................................................................................................................................................................................5
Troubleshooting.....................................................................................................................................................................................................................8
Warranty ..............................................................................................................................................................................................................................9
Maintenance of your Angelcare® monitor .............................................................................................................................................................................9
Factory settings and technical specifications.........................................................................................................................................................................9
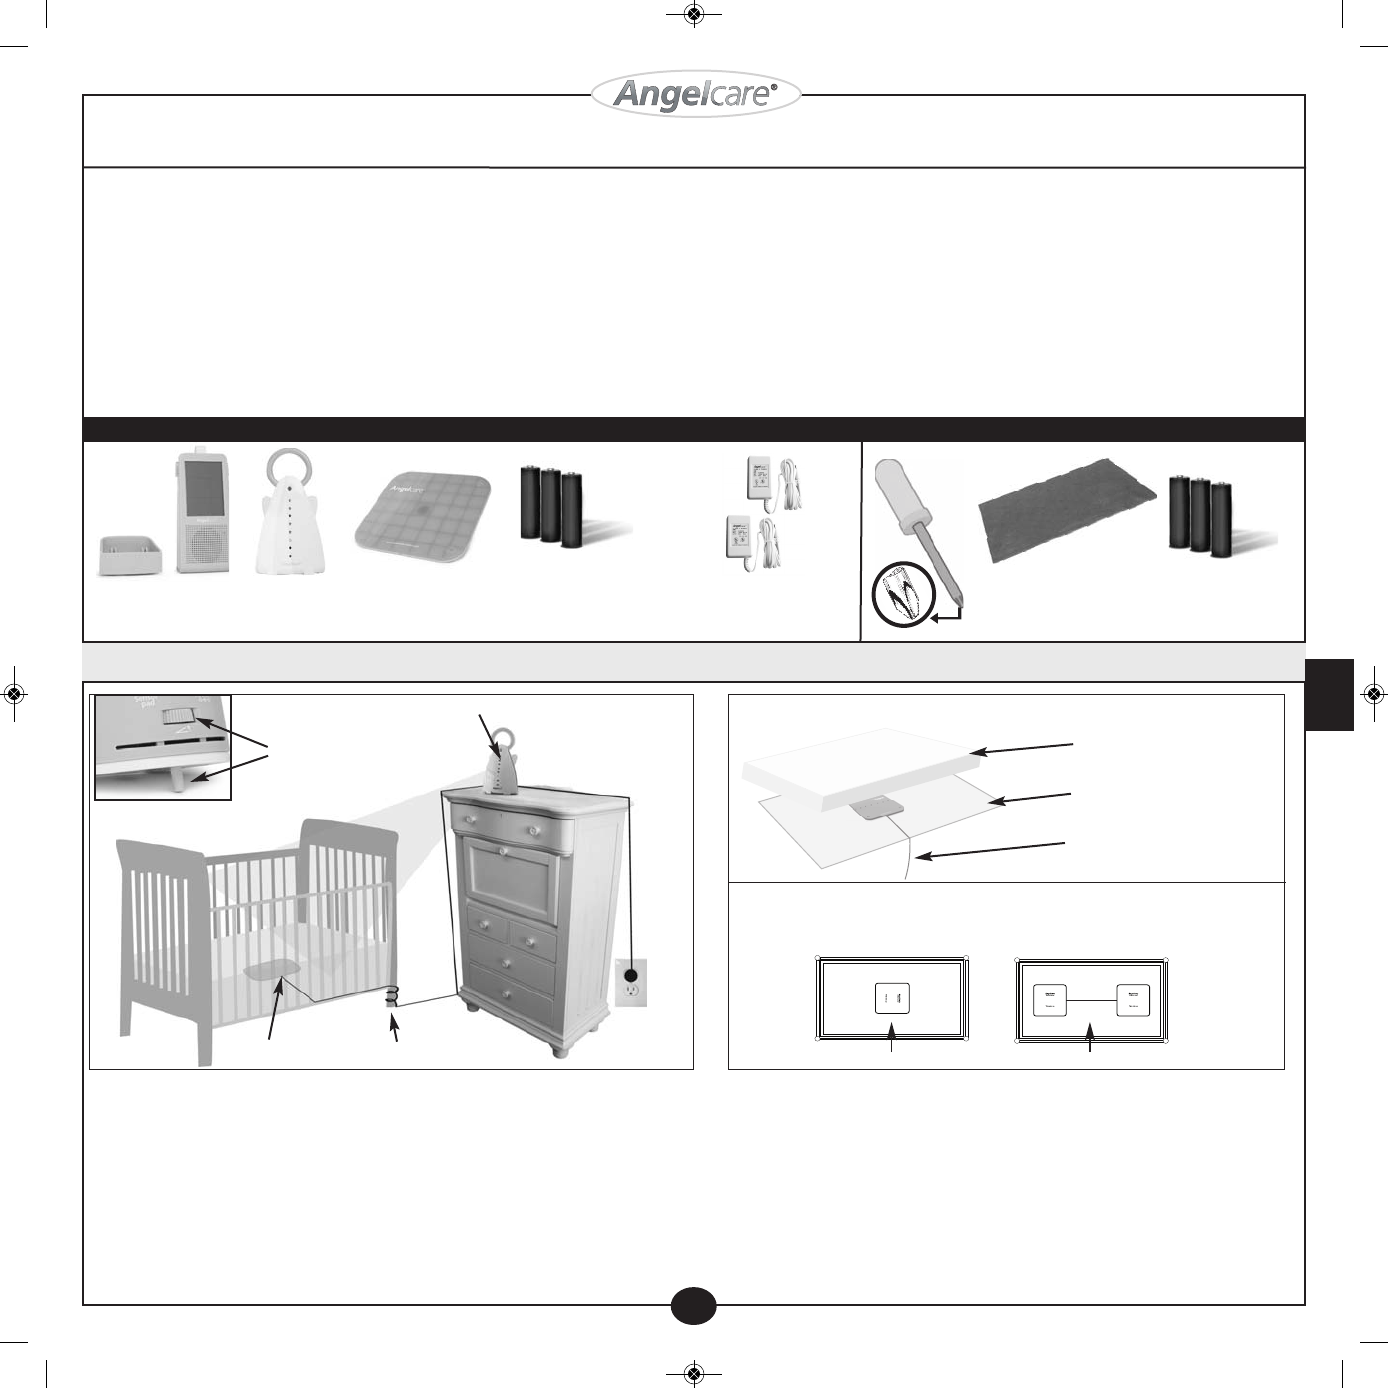
STEP 1 - Installation in the Baby’s room
Rechargeable Parents
Unit and charger
Table of content
Hard fiberboard
(Masonite)
NOT INCLUDED
• Position the Nursery Unit facing
the crib.
• Adjust camera angle with
rotating dial.
Sensor Pad
Mattress
Sensor Pad cord
Masonite fiberboard
(not included)
Secure the Sensor Pad cord
Owner’s Manual
Keep instructions for future reference
INCLUDED
•The Sensor Pad must rest on a completely flat and rigid surface. Place a 6mm (1/4'') thick Masonite board to cover the full size of the crib or with minimum dimensions of
28cm (11'') X 28cm (11'') X 6mm (1/4'') between the crib base and mattress,when using one Sensor Pad. The board will push the Sensor Pad into the mattress and keep
the contact between the Sensor Pad and the mattress, should the baby move around. Make sure the Sensor Pad’s cord passes underneath the mattress as shown.
•Position the Sensor Pad as shown, in the center of the crib. Make sure the printed side faces up. Do not place any bedding between the mattress and the Sensor Pad.
•Secure the Sensor Pad cord to the crib using a tie wrap. Run the cord on the floor to ensure it is out of the baby’s reach.
• The Sensor Pad works with all baby bed sizes and all mattresses, except memory foam mattresses or mattresses with a hollow frame. You will need to test your Sensor Pad after
the set-up is completed.
• The Nursery Unit can also be installed on a tripod (not included).
E
N
I sensor pad 2 sensor pads
POSITION OF SENSOR PAD UNDER MATTRESS
Crib center Crib center
INSTALLATION OF THE SENSOR PAD UNDER THE MATTRESS
(Available in certain countries only)